

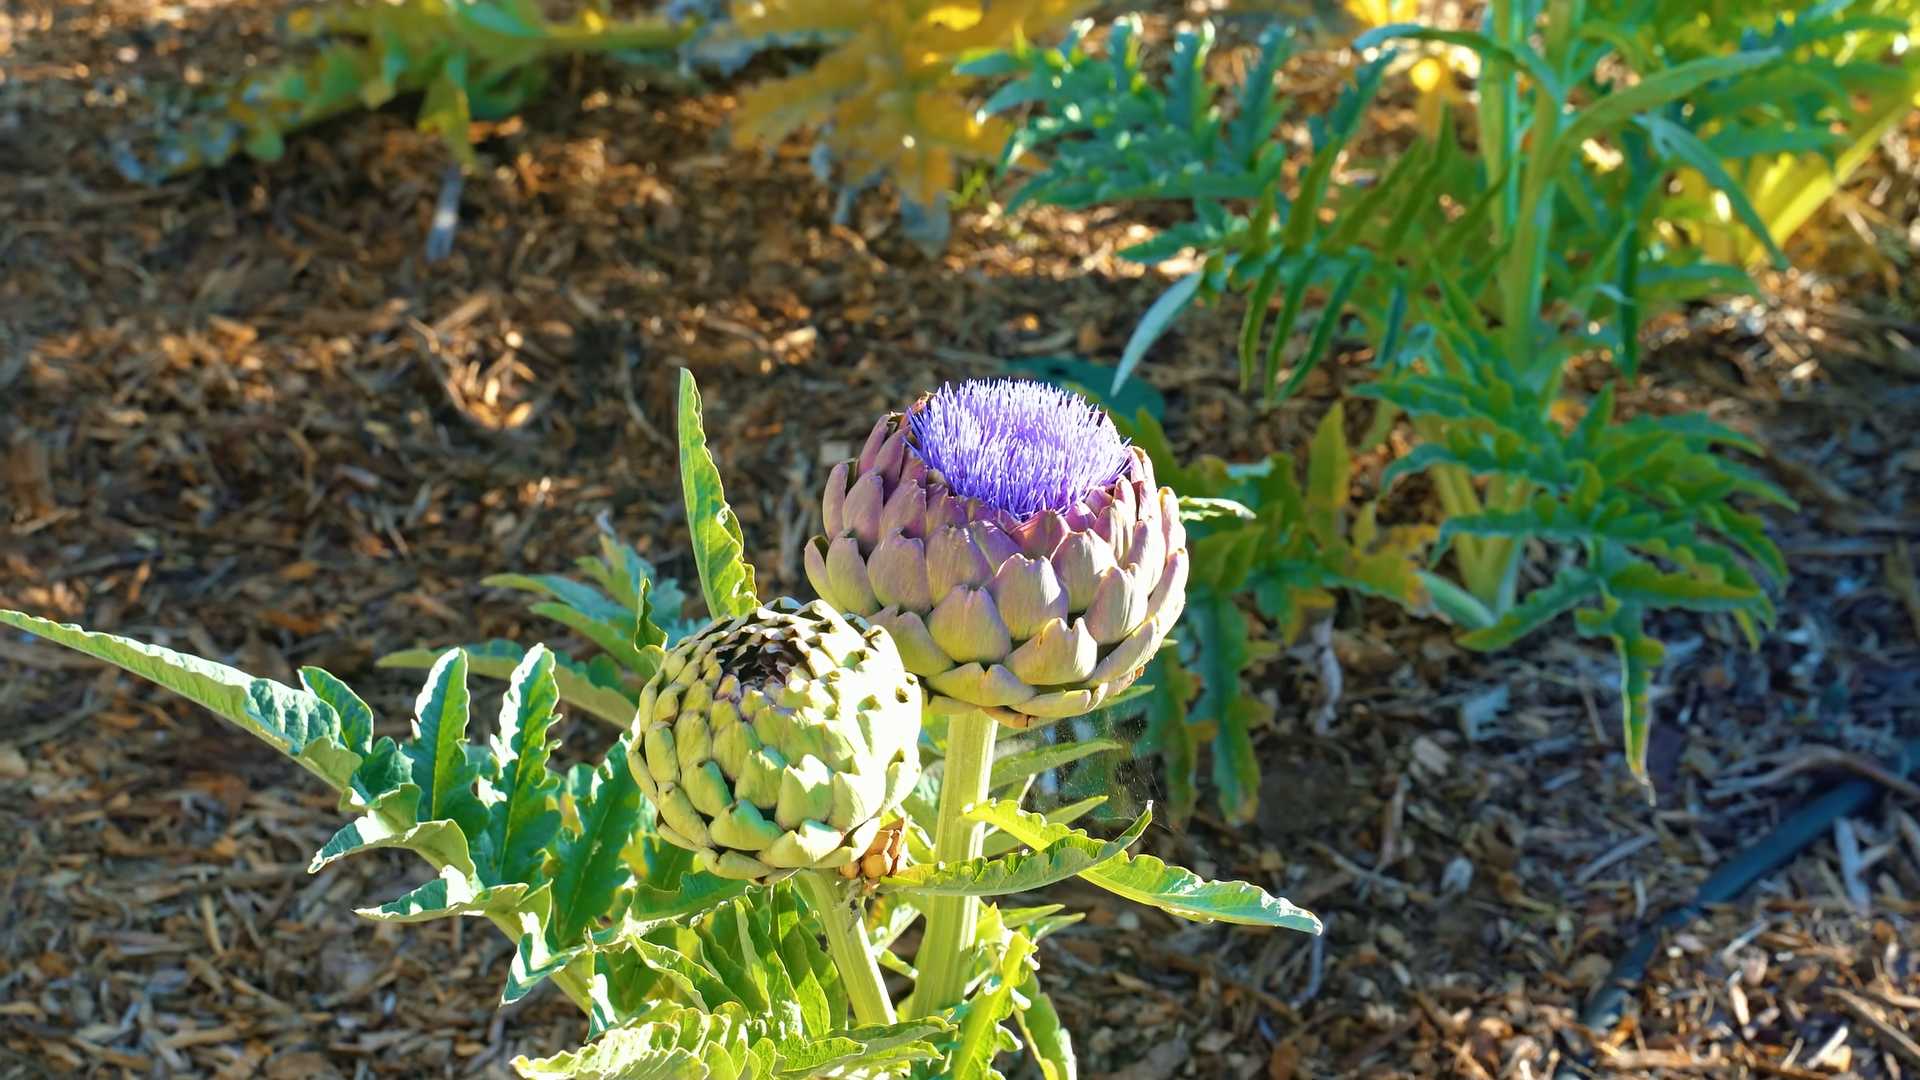
Grow Artichokes at Home? Absolutely! Imagine stepping into your backyard and harvesting your very own spiky treasures, ready to be steamed, grilled, or dipped in your favorite sauce. Sounds dreamy, right? Well, it’s more achievable than you might think, and I’m here to show you how!
Artichokes, with their architectural beauty and delectable hearts, have a rich history. Originating in the Mediterranean, they were prized by the ancient Greeks and Romans for their culinary and medicinal properties. For centuries, they were considered a delicacy, a symbol of luxury and sophistication. Now, you can bring a touch of that history to your own garden.
But why grow artichokes at home? Let’s be honest, store-bought artichokes can be expensive and sometimes lack that fresh, vibrant flavor. Plus, there’s something incredibly satisfying about nurturing a plant from seedling to harvest. This DIY guide will provide you with simple, effective tricks and hacks to successfully cultivate these unique plants, even if you’re a beginner gardener. I’ll walk you through everything from choosing the right variety to protecting your artichokes from pests, ensuring you enjoy a bountiful harvest. Get ready to impress your friends and family with your homegrown artichoke creations!
DIY All-Natural Cleaning Power: My Secret Weapon for a Sparkling Home
Okay, friends, let’s talk cleaning! I know, it’s not the most glamorous topic, but a clean home is a happy home, right? And honestly, I’ve found that ditching the harsh chemicals and embracing natural cleaning solutions has not only made my house sparkle but also made me feel so much better about the air my family breathes. So, I’m going to share my go-to DIY all-natural cleaning power recipe and how I use it all over my house. Get ready to say goodbye to store-bought cleaners and hello to a fresh, clean, and naturally beautiful home!
The Magic Formula: All-Purpose Cleaning Spray
This is the base recipe that I use for almost everything. It’s simple, effective, and smells amazing!
What you’ll need:
* Empty spray bottle (16-24 oz is a good size)
* 1 cup distilled white vinegar
* 1 cup water (distilled or filtered is best)
* 10-20 drops of your favorite essential oil(s) (I love lemon, lavender, tea tree, or a blend!)
* Optional: 1 tablespoon of rubbing alcohol (for extra disinfecting power)
Why these ingredients?
* Vinegar: A natural disinfectant and degreaser. It cuts through grime and leaves surfaces sparkling.
* Water: Dilutes the vinegar and helps it spread evenly.
* Essential Oils: Add a pleasant scent and can also have antibacterial and antifungal properties.
* Rubbing Alcohol: Boosts the disinfecting power, especially helpful in bathrooms and kitchens.
Step-by-Step Instructions: Mixing Your Cleaning Spray
1. Grab your spray bottle: Make sure it’s clean and dry. I like to reuse old spray bottles from store-bought cleaners, but I always wash them thoroughly first.
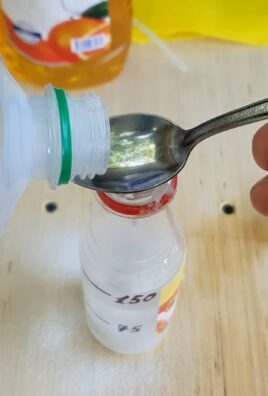
2. Pour in the vinegar: Carefully pour one cup of distilled white vinegar into the spray bottle. Don’t worry about the smell; it dissipates quickly!
3. Add the water: Next, add one cup of distilled or filtered water to the bottle.
4. Essential oil time! This is where you get to customize your cleaner. Add 10-20 drops of your favorite essential oil(s). I usually go for lemon for its fresh, clean scent and antibacterial properties. Lavender is great for a calming scent, and tea tree oil is a powerful disinfectant. You can experiment with different blends to find what you love!
5. Optional: Add rubbing alcohol: If you want extra disinfecting power, add one tablespoon of rubbing alcohol. This is especially helpful for cleaning surfaces that come into contact with food or in the bathroom.
6. Shake it up! Put the spray nozzle back on the bottle and shake well to combine all the ingredients.
7. Label your bottle: This is important! Label your bottle with the name of the cleaner and the ingredients. This will help you remember what’s in it and prevent any accidental misuse.
Putting Your All-Purpose Cleaner to Work: Room-by-Room Guide
Now that you have your amazing all-purpose cleaner, let’s get cleaning! Here’s how I use it in different areas of my home:
Kitchen Cleaning Power
The kitchen is where I use this cleaner the most. It’s perfect for tackling grease, spills, and everyday messes.
1. Countertops: Spray the cleaner directly onto your countertops and wipe clean with a microfiber cloth. For stubborn stains, let the cleaner sit for a few minutes before wiping. Be careful using vinegar on natural stone countertops like granite or marble, as it can etch the surface. Test in an inconspicuous area first.
2. Stovetop: Spray the cleaner onto your stovetop and let it sit for a few minutes to loosen any grease or food particles. Then, wipe clean with a sponge or cloth. For baked-on messes, you might need to use a scrub brush.
3. Sink: Spray the cleaner into your sink and scrub with a sponge or brush. Rinse thoroughly with water.
4. Microwave: Heat a cup of water with a few tablespoons of vinegar in the microwave for a few minutes until it steams up. Then, carefully remove the cup and wipe down the inside of the microwave with a cloth. The steam will loosen any food splatters, making them easy to remove.
5. Refrigerator: Spray the cleaner onto a cloth and wipe down the shelves and drawers of your refrigerator. This will help remove spills and odors.
6. Cutting Boards: Spray the cleaner on your cutting boards after each use to disinfect them. Let it sit for a few minutes before rinsing with water.
Bathroom Bliss
This cleaner is also great for tackling bathroom grime and keeping things fresh.
1. Toilet: Spray the cleaner inside and outside the toilet bowl. Let it sit for a few minutes, then scrub with a toilet brush and flush.
2. Sink and Countertop: Spray the cleaner onto your sink and countertop and wipe clean with a cloth.
3. Shower and Tub: Spray the cleaner onto the walls and floor of your shower or tub. Let it sit for a few minutes, then scrub with a sponge or brush and rinse with water. For stubborn soap scum, you might need to use a stronger cleaner or a scrub brush.
4. Mirrors: Spray the cleaner onto a microfiber cloth and wipe down your mirrors. This will leave them streak-free and sparkling.
Living Room Refresh
Even the living room can benefit from a little natural cleaning!
1. Dusting: Spray the cleaner onto a microfiber cloth and use it to dust furniture, shelves, and other surfaces.
2. Upholstery Spot Cleaning: Test the cleaner in an inconspicuous area first to make sure it doesn’t stain. If it’s safe, spray a small amount of cleaner onto a cloth and blot the stain. Avoid saturating the fabric.
3. Window Cleaning: Spray the cleaner onto a microfiber cloth and wipe down your windows. This will leave them clean and streak-free.
Floor Cleaning (with a slight modification!)
For floors, I tweak the recipe just a bit.
1. The Modified Recipe: In a bucket, mix 1/4 cup of vinegar with 1 gallon of warm water. Add a few drops of your favorite essential oil for scent.
2. Mop Away! Dip your mop into the bucket, wring it out well, and mop your floors as usual. Always test in an inconspicuous area first, especially on hardwood floors.
Important Considerations and Tips
* Always test in an inconspicuous area first: Before using this cleaner on any surface, test it in a small, hidden area to make sure it doesn’t cause any damage or discoloration.
* Avoid using on certain surfaces: As mentioned earlier, avoid using vinegar on natural stone countertops like granite or marble. Also, be careful using it on waxed wood surfaces, as it can strip the wax.
* Store in a cool, dark place: Store your cleaning spray in a cool, dark place to prevent the essential oils from degrading.
* Shake well before each use: The ingredients in the cleaner may separate over time, so shake well before each use to ensure they are properly mixed.
* Adjust the recipe to your liking: Feel free to experiment with different essential oils and adjust the amount of vinegar to suit your preferences.
* Safety First: While these ingredients are natural, keep the spray out of reach of children and pets. Avoid spraying directly into eyes.
Troubleshooting: Common Cleaning Challenges
* Stubborn Grease: For really stubborn grease, try adding a bit of baking soda to your cleaning spray. The baking soda will act as a mild abrasive to help scrub away the grease.
* Soap Scum: Soap scum can be a real pain. For tough soap scum, try using a paste of baking soda and water. Apply the paste to the soap scum, let it sit for a few minutes, and then scrub with a brush or sponge.
* Lingering Odors: If you’re dealing with lingering odors, try placing a bowl of vinegar in the room overnight. The vinegar will absorb the odors and leave the room smelling fresh.
Beyond the Basics: Other Natural Cleaning Ingredients
While my all-purpose spray is my go-to, there are other natural cleaning ingredients that I love to use:
* Baking Soda: A mild abrasive and deodorizer. Great for scrubbing sinks, tubs, and ovens.
* Lemon Juice: A natural disinfectant and degreaser. Perfect for cleaning cutting boards and removing stains.
* Hydrogen Peroxide: A natural disinfectant and bleaching agent. Use with caution, as it can lighten some surfaces.
* Castile Soap: A gentle, all-natural soap that can be used for a variety of cleaning tasks.
I hope this guide helps you create your own all-natural cleaning power and enjoy a sparkling
Conclusion
So, there you have it! Growing artichokes at home might seem daunting at first, but with a little patience and the right approach, you can enjoy these delicious and nutritious thistles straight from your own garden. This DIY trick isn’t just about saving money; it’s about connecting with your food, understanding the growing process, and experiencing the immense satisfaction of harvesting something you nurtured from a tiny seed or transplant.
Why is this a must-try? Because fresh, homegrown artichokes are simply unparalleled in flavor. The artichokes you find in the grocery store often lack the tenderness and sweetness of those picked at their peak ripeness. Plus, you get to control the entire process, ensuring your artichokes are grown organically and without harmful pesticides. Imagine serving a stunning artichoke dip at your next gathering, proudly announcing that the star ingredient came from your very own backyard!
Beyond the basic method outlined, there’s plenty of room for experimentation. Consider different varieties of artichokes to find your favorite flavor profile. ‘Green Globe’ is a classic choice, but ‘Violetta’ offers a beautiful purple hue and a slightly sweeter taste. You can also adjust the soil composition to suit your specific climate and growing conditions. Some gardeners swear by adding extra compost or well-rotted manure to boost nutrient levels.
Furthermore, think about companion planting. Artichokes thrive alongside certain herbs and vegetables that can help deter pests and improve soil health. Planting basil, rosemary, or thyme nearby can create a beneficial ecosystem in your garden. You can also interplant with nitrogen-fixing legumes like beans or peas to enrich the soil.
Don’t be afraid to experiment with different methods of propagation. While starting from seed can be rewarding, using root divisions or offshoots from established plants can speed up the process and ensure you’re growing a plant with desirable characteristics.
Ultimately, the key to success with this DIY trick is observation and adaptation. Pay close attention to your artichoke plants, monitor their growth, and adjust your care routine as needed. Be patient, as it may take a season or two for your plants to fully mature and produce a bountiful harvest.
We wholeheartedly encourage you to give growing artichokes at home a try. It’s a rewarding experience that will not only enhance your culinary adventures but also deepen your appreciation for the natural world. And most importantly, we want to hear about your journey! Share your experiences, tips, and photos with us in the comments below. Let’s build a community of artichoke enthusiasts and learn from each other’s successes and challenges. Let us know what DIY artichoke growing tips you have!
Frequently Asked Questions (FAQ)
What is the best time of year to plant artichokes?
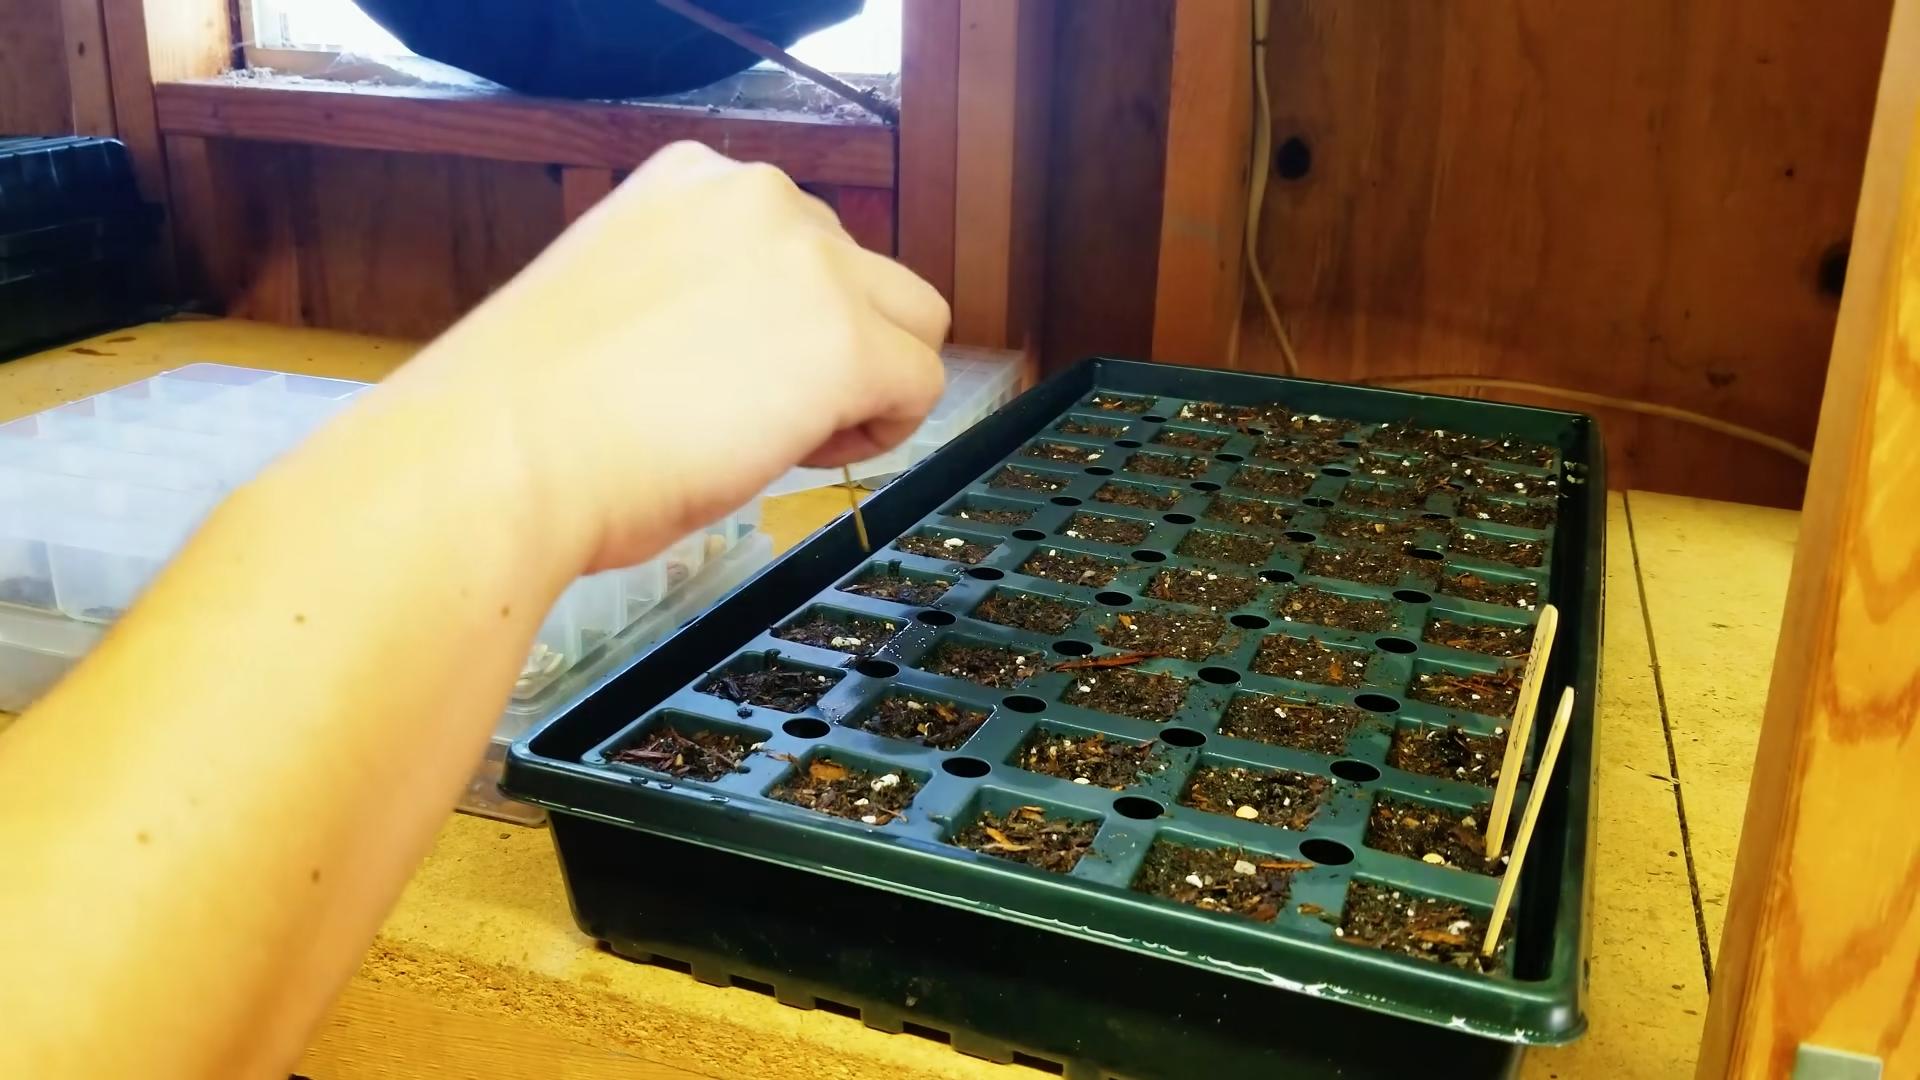
The ideal time to plant artichokes depends on your climate. In regions with mild winters (zones 7-10), you can plant artichokes in the fall for a spring harvest. In colder climates (zones 6 and below), it’s best to start seeds indoors 8-10 weeks before the last expected frost and transplant them outdoors in the spring after the danger of frost has passed. This gives the plants a head start and allows them to establish themselves before the onset of winter.
How much space do artichoke plants need?
Artichoke plants can grow quite large, reaching up to 3-4 feet in height and width. Therefore, it’s essential to provide them with ample space to thrive. A good rule of thumb is to space artichoke plants at least 4 feet apart in rows that are 4-6 feet apart. This will allow for adequate air circulation and sunlight penetration, which are crucial for healthy growth and abundant yields.
What kind of soil is best for growing artichokes?
Artichokes prefer well-drained, fertile soil that is rich in organic matter. The ideal soil pH is between 6.0 and 7.0. Before planting, amend the soil with compost, well-rotted manure, or other organic amendments to improve its structure and fertility. If your soil is heavy clay, consider adding sand or perlite to improve drainage.
How often should I water artichoke plants?
Artichokes need consistent moisture, especially during the growing season. Water deeply and regularly, especially during dry spells. Aim to keep the soil consistently moist but not waterlogged. Avoid overhead watering, as this can increase the risk of fungal diseases. Mulching around the plants can help retain moisture and suppress weeds.
How do I fertilize artichoke plants?
Artichokes are heavy feeders and benefit from regular fertilization. Apply a balanced fertilizer (e.g., 10-10-10) in the spring when new growth emerges. You can also side-dress the plants with compost or well-rotted manure throughout the growing season. Avoid over-fertilizing, as this can lead to excessive vegetative growth at the expense of flower production.
How do I protect artichoke plants from pests and diseases?
Artichokes can be susceptible to various pests and diseases, including aphids, snails, slugs, and powdery mildew. Regularly inspect your plants for signs of infestation or disease. Handpick pests whenever possible. Use organic pest control methods, such as insecticidal soap or neem oil, to control aphids and other insects. To prevent fungal diseases, ensure good air circulation and avoid overhead watering.
When are artichokes ready to harvest?
Artichokes are typically ready to harvest in the spring or early summer, depending on the variety and your climate. The buds should be firm and plump, with tightly closed scales. Harvest the buds when they are about two-thirds of their mature size. Use a sharp knife to cut the stem about 2-3 inches below the bud.
Can I grow artichokes in containers?
Yes, you can grow artichokes in containers, but you’ll need a large container (at least 20 gallons) to accommodate their extensive root system. Choose a well-draining potting mix and provide regular watering and fertilization. Container-grown artichokes may need to be overwintered indoors in colder climates.
How do I overwinter artichoke plants in cold climates?
In regions with harsh winters, artichokes need protection to survive. After the first frost, cut back the foliage to a few inches above the ground. Mulch heavily around the plants with straw, leaves, or other organic material to insulate the roots. In extremely cold areas, you may need to dig up the plants and store them in a cool, dark place until spring.
Are artichoke plants perennial or annual?
Artichokes are technically perennials, but they are often grown as annuals in colder climates because they are not reliably hardy. In mild climates, they can live for several years and produce multiple harvests.
Leave a Comment