

Kale Growing Soil Bags: Unlock the secrets to a thriving kale harvest right in your own backyard, or even on your balcony! Have you ever dreamed of plucking fresh, vibrant kale leaves for your salads and smoothies, but felt intimidated by the thought of managing a full-fledged garden? Well, dream no more! This DIY guide is your passport to effortless kale cultivation, using a simple, cost-effective, and space-saving method: soil bags.
For centuries, humans have cultivated kale, a nutritional powerhouse, for its resilience and health benefits. From its humble beginnings in the Mediterranean, kale has journeyed across continents, becoming a staple in diverse cuisines. Now, you can join this rich history by growing your own! But let’s face it, not everyone has the time, space, or expertise for traditional gardening. That’s where our kale growing soil bags come in.
I know what you’re thinking: “Can it really be that easy?” Absolutely! This DIY trick eliminates the need for extensive digging, weeding, and soil preparation. Plus, it’s perfect for urban dwellers with limited space. Imagine the satisfaction of harvesting your own organic kale, knowing exactly where it came from and how it was grown. Say goodbye to expensive grocery store kale and hello to fresh, flavorful greens at your fingertips. Let’s get started and transform those soil bags into kale-growing powerhouses!
DIY Kale Growing Soil Bags: A Gardener’s Delight!
Hey there, fellow gardening enthusiasts! I’m super excited to share my favorite way to grow kale – in DIY soil bags! It’s a fantastic method, especially if you’re short on space, have poor soil, or just want a super easy and portable garden. Trust me, once you try this, you’ll be hooked. Let’s dive in!
Why Soil Bags for Kale?
Before we get started, let’s quickly chat about why I love using soil bags for kale.
* Space Saver: Perfect for balconies, patios, or small yards.
* Improved Drainage: Bags naturally provide excellent drainage, preventing root rot.
* Custom Soil: You control the soil composition, ensuring your kale gets exactly what it needs.
* Portability: Easily move your kale around to follow the sun or protect it from harsh weather.
* Weed Control: Less weeding compared to traditional garden beds.
* Cost-Effective: Cheaper than building raised beds or buying large containers.
Materials You’ll Need
Okay, let’s gather our supplies. Here’s what you’ll need to create your own kale-growing soil bags:
* Heavy-Duty Landscape Fabric or Burlap Bags: These are your containers. I prefer landscape fabric because it’s durable and allows for good drainage, but burlap adds a rustic touch. Aim for bags that are at least 24 inches wide and 18 inches deep.
* Potting Mix: This is the base of your growing medium. Choose a high-quality potting mix that’s well-draining.
* Compost: Compost adds nutrients and improves soil structure. I use a mix of homemade and store-bought compost.
* Peat Moss or Coco Coir: These help retain moisture. Coco coir is a more sustainable option than peat moss.
* Perlite or Vermiculite: These improve drainage and aeration.
* Slow-Release Fertilizer: This provides a steady supply of nutrients to your kale plants. Look for a fertilizer specifically formulated for vegetables.
* Kale Seeds or Seedlings: Choose your favorite kale varieties! I love ‘Lacinato’ (dinosaur kale), ‘Red Russian,’ and ‘Curly Kale.’
* Watering Can or Hose: For watering your kale.
* Scissors or Utility Knife: For cutting the landscape fabric (if needed).
* Measuring Tools: A bucket or scoop for measuring soil amendments.
* Gloves: To protect your hands.
Step-by-Step Guide: Creating Your Kale Growing Soil Bags
Alright, let’s get our hands dirty! Here’s how to create your own kale-growing soil bags:
1. Prepare Your Bags
1. Inspect the Bags: Check your landscape fabric or burlap bags for any tears or holes. If using landscape fabric, you might need to cut it to your desired size and shape. I usually make mine rectangular.
2. Reinforce the Bottom (Optional): For extra durability, you can reinforce the bottom of the bags with an extra layer of landscape fabric or burlap. Simply cut a piece slightly larger than the bottom of the bag and sew or glue it on. I usually skip this step unless I’m using thinner burlap.
3. Drainage Holes: If your bags don’t have drainage holes, create some. For landscape fabric, you can simply poke a few holes in the bottom with scissors or a knife. For burlap, the natural weave usually provides sufficient drainage. I usually add 4-5 holes.
2. Mix Your Soil
This is where the magic happens! A well-balanced soil mix is crucial for healthy kale growth.
1. Gather Your Ingredients: Have your potting mix, compost, peat moss/coco coir, perlite/vermiculite, and slow-release fertilizer ready.
2. Combine the Ingredients: In a large container (like a wheelbarrow or a large bucket), mix the following:
* 50% Potting Mix
* 25% Compost
* 15% Peat Moss or Coco Coir
* 10% Perlite or Vermiculite
* Follow the instructions on your slow-release fertilizer package for the correct amount to add. I usually use about 1 tablespoon per gallon of soil mix.
3. Mix Thoroughly: Use your hands (with gloves on!) or a shovel to mix everything together until it’s evenly distributed. The mixture should be light, airy, and well-draining.
4. Moisten the Soil: Lightly moisten the soil mix with water. It should be damp but not soggy. This helps the ingredients bind together and prevents the soil from compacting.
3. Fill Your Bags
Now it’s time to fill those bags with our amazing soil mix!
1. Position Your Bags: Place your prepared bags in their final location. Remember, kale needs at least 6 hours of sunlight per day.
2. Fill the Bags: Carefully fill the bags with your soil mix, leaving about 2-3 inches of space at the top. This space will prevent water from overflowing when you water your kale.
3. Settle the Soil: Gently pat down the soil to settle it. Don’t pack it too tightly, as this can restrict drainage.
4. Water the Soil: Water the soil thoroughly until water drains out of the bottom of the bags. This helps settle the soil further and ensures that the entire root zone is moist.
4. Planting Your Kale
The moment we’ve been waiting for – planting the kale!
1. Choose Your Planting Method: You can either start with kale seeds or seedlings. Seedlings are faster, but seeds are more economical.
2. Planting Seeds:
* Make small holes in the soil, about 1/2 inch deep and spaced 6-8 inches apart.
* Place 2-3 seeds in each hole.
* Cover the seeds with soil and gently water.
* Once the seedlings emerge and have a few true leaves, thin them out to one plant per hole.
3. Planting Seedlings:
* Dig holes in the soil that are slightly larger than the root balls of your seedlings. Space the holes 6-8 inches apart.
* Gently remove the seedlings from their containers and loosen the roots.
* Place the seedlings in the holes and cover the roots with soil.
* Gently pat down the soil around the seedlings and water thoroughly.
4. Mulch (Optional): Add a layer of mulch around your kale plants to help retain moisture, suppress weeds, and regulate soil temperature. I like to use straw or shredded leaves.
5. Caring for Your Kale
Now that your kale is planted, it’s important to provide it with the care it needs to thrive.
1. Watering: Water your kale regularly, especially during dry periods. The soil should be consistently moist but not soggy. Check the soil moisture by sticking your finger into the soil. If the top inch feels dry, it’s time to water. I usually water every 2-3 days, depending on the weather.
2. Fertilizing: Kale is a heavy feeder, so it needs regular fertilization. In addition to the slow-release fertilizer you added to the soil mix, you can also supplement with liquid fertilizer every 2-3 weeks. Use a balanced fertilizer or one specifically formulated for leafy greens. I like to use fish emulsion or seaweed extract.
3. Sunlight: Ensure your kale gets at least 6 hours of sunlight per day. If you live in a hot climate, provide some afternoon shade to prevent the leaves from scorching.
4. Pest Control: Keep an eye out for pests like aphids, cabbage worms, and flea beetles. Handpick any pests you see or use organic pest control methods like insecticidal soap or neem oil. I also like to plant companion plants like marigolds and nasturtiums to deter pests.
5. Weed Control: Remove any weeds that pop up in your soil bags. Weeds compete with your kale for nutrients and water.
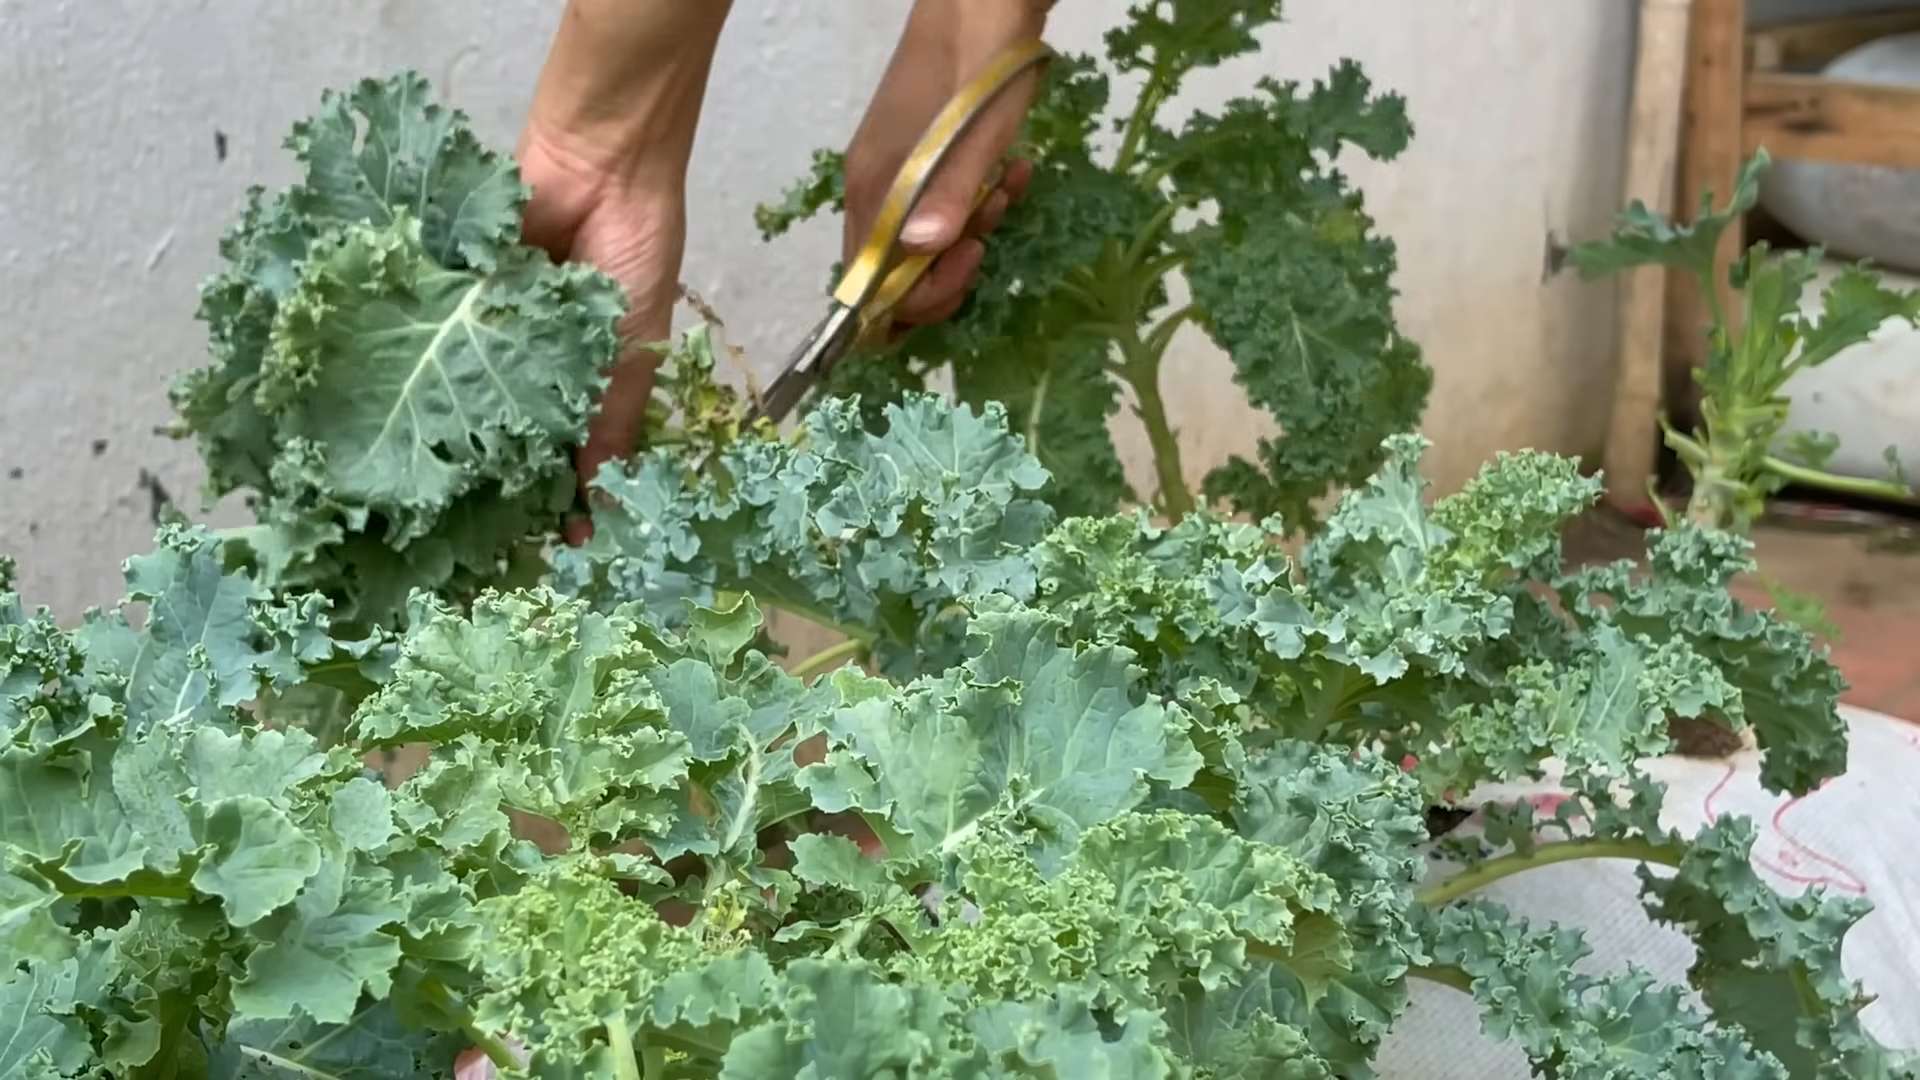
6. Harvesting: You can start harvesting kale leaves once they are large enough to eat, usually about 6-8 inches long. Harvest the outer leaves first, leaving the inner leaves to continue growing. This will encourage continuous production. I love adding fresh kale to salads, smoothies, soups, and stir-fries!
Troubleshooting
Even with the best care, you might encounter some problems. Here are a few common issues and how to address them:
* Yellowing Leaves: This could be a sign of nutrient deficiency, overwatering, or underwatering. Check the soil moisture and fertilize if necessary.
* Pests: As mentioned earlier, keep an eye out for pests and take action promptly.
*

Conclusion
So, there you have it! Creating your own kale growing soil bags is not just a cost-effective alternative to pre-made options, it’s a game-changer for your kale cultivation. We’ve walked you through the process, highlighting the benefits of tailoring your soil mix to the specific needs of kale, a leafy green that thrives on nutrient-rich, well-draining soil.
Why is this a must-try? Because store-bought potting mixes, while convenient, often lack the specific balance of nutrients and drainage that kale craves. By crafting your own soil bags, you gain complete control over the ingredients, ensuring your kale receives the optimal blend of organic matter, essential minerals, and proper aeration. This translates to healthier, more robust plants, and ultimately, a more bountiful harvest of delicious, nutritious kale.
Think about the possibilities! You can customize your kale growing soil bags based on your local climate and the specific variety of kale you’re growing. For instance, if you live in a particularly rainy area, you might want to increase the proportion of perlite or vermiculite to improve drainage and prevent waterlogging. Or, if you’re growing a kale variety known for its heavy feeding habits, you could incorporate more compost or aged manure into your mix to provide an extra boost of nutrients.
Consider these variations to further enhance your kale growing soil bags:
* Adding Worm Castings: A small addition of worm castings can significantly improve soil fertility and water retention.
* Using Biochar: Biochar helps improve soil structure, drainage, and nutrient retention, creating a more favorable environment for kale roots.
* Incorporating Mycorrhizae: These beneficial fungi form a symbiotic relationship with plant roots, enhancing nutrient uptake and overall plant health.
* Experimenting with Different Compost Sources: Try using different types of compost, such as mushroom compost or leaf mold, to see which works best for your kale.
Beyond the practical benefits, creating your own kale growing soil bags is also a deeply satisfying experience. It connects you more closely to the growing process, allowing you to nurture your plants from the very beginning. It’s a chance to get your hands dirty, learn about soil science, and witness the amazing transformation of seeds into vibrant, leafy greens.
We wholeheartedly encourage you to give this DIY trick a try. It’s easier than you might think, and the rewards are well worth the effort. Imagine harvesting your own fresh, organic kale, knowing that you played a direct role in its success.
Don’t just take our word for it! We’re eager to hear about your experiences. Share your tips, tricks, and results in the comments below. Let us know what variations you tried, what challenges you encountered, and what successes you celebrated. Together, we can build a community of kale-growing enthusiasts and unlock the full potential of this amazing vegetable. So, grab your ingredients, get your hands dirty, and start creating your own kale growing soil bags today! Happy growing!
Frequently Asked Questions (FAQ)
What are the benefits of making my own kale growing soil bags compared to buying pre-made potting mix?
Making your own kale growing soil bags offers several advantages. Firstly, you have complete control over the ingredients, allowing you to tailor the soil mix to the specific needs of kale. Store-bought mixes may not always provide the optimal balance of nutrients, drainage, and aeration that kale requires. Secondly, it can be more cost-effective, especially if you have access to compost or other organic materials. Finally, it’s a more sustainable option, as you can reduce your reliance on commercially produced products and potentially utilize recycled materials.
What are the essential ingredients for a good kale growing soil mix?
A good kale growing soil mix should include a combination of ingredients that provide nutrients, drainage, and aeration. A typical mix might consist of:
* Compost: Provides essential nutrients and improves soil structure.
* Topsoil: Adds bulk and provides a base for the mix.
* Peat Moss or Coco Coir: Helps retain moisture and improve drainage.
* Perlite or Vermiculite: Improves drainage and aeration.
* Aged Manure (optional): Provides an extra boost of nutrients.
The specific proportions of each ingredient may vary depending on your local climate and the type of kale you’re growing.
How do I know if my kale growing soil mix is well-draining enough?
Proper drainage is crucial for kale, as it is susceptible to root rot in overly wet conditions. To test the drainage of your kale growing soil mix, fill a pot with the mix and water it thoroughly. The water should drain freely from the bottom of the pot within a few minutes. If the water pools on the surface or drains very slowly, the mix is not well-draining enough and you should add more perlite or vermiculite.
Can I use garden soil in my kale growing soil bags?
While you can incorporate some garden soil into your kale growing soil bags, it’s generally not recommended to use it as the primary component. Garden soil can be heavy and compacted, which can hinder drainage and aeration. It may also contain pests or diseases that could harm your kale plants. If you do use garden soil, be sure to amend it with plenty of compost and other organic matter to improve its structure and fertility.
How often should I water my kale plants grown in DIY soil bags?
The watering frequency for your kale plants will depend on several factors, including the weather, the type of soil mix you’re using, and the size of the plants. As a general rule, water your kale plants when the top inch of soil feels dry to the touch. Avoid overwatering, as this can lead to root rot. During hot, dry weather, you may need to water your plants more frequently.
What kind of fertilizer should I use for kale grown in DIY soil bags?
Kale is a heavy feeder, so it benefits from regular fertilization. You can use a balanced organic fertilizer, such as compost tea or fish emulsion, to provide your kale plants with the nutrients they need. Follow the instructions on the fertilizer label for application rates. You can also side-dress your plants with compost or aged manure every few weeks to provide a slow-release source of nutrients.
How do I prevent pests and diseases in my kale plants grown in DIY soil bags?
Prevention is key when it comes to pests and diseases in kale. Start by using a high-quality kale growing soil mix that is free of pests and diseases. Plant your kale in a sunny location with good air circulation. Regularly inspect your plants for signs of pests or diseases, and take action promptly if you notice any problems. Common kale pests include aphids, cabbage worms, and flea beetles. Common kale diseases include black rot and downy mildew. Organic pest control methods, such as insecticidal soap or neem oil, can be effective for controlling many kale pests.
Can I reuse the soil from my kale growing soil bags for other plants?
Yes, you can reuse the soil from your kale growing soil bags, but it’s important to amend it before using it for other plants. Kale is a heavy feeder, so the soil may be depleted of nutrients after a growing season. Add plenty of compost and other organic matter to replenish the nutrients. You may also want to sterilize the soil to kill any pests or diseases that may be present. You can sterilize the soil by baking it in the oven or steaming it.
Leave a Comment