

Onion planting method – ever wondered how to transform your backyard into a thriving, fragrant, and delicious onion haven? I know I have! For centuries, onions have been a staple in cuisines worldwide, dating back to ancient Egypt where they were even revered as symbols of eternity. But you don’t need to be a pharaoh to enjoy the fruits (or bulbs!) of your labor.
Let’s face it, store-bought onions can be bland and expensive. But imagine stepping outside your door and harvesting plump, juicy onions bursting with flavor. That’s where this DIY guide comes in! I’m going to share some simple yet effective onion planting method tricks that will help you grow a bountiful crop, even if you’re a complete beginner.
This isn’t just about saving money; it’s about connecting with nature, enjoying fresh, homegrown produce, and experiencing the satisfaction of nurturing something from seed to table. So, grab your gardening gloves, and let’s dive into the wonderful world of onion cultivation! I’m excited to show you how easy and rewarding it can be.
DIY Concrete Countertops: A Weekend Project for a Stunning Kitchen Upgrade
Hey there, fellow DIY enthusiasts! Ready to transform your kitchen with a touch of modern industrial chic? I’m going to walk you through creating your very own concrete countertops. It might sound intimidating, but trust me, with a little patience and these detailed instructions, you’ll be amazed at what you can achieve. We’re going to cover everything from building the mold to pouring, curing, and sealing your new countertops. Let’s get started!
Materials You’ll Need:
* Melamine boards (for the mold – measure your existing countertops for accurate dimensions)
* Concrete mix (specifically designed for countertops – I recommend a high-strength, fiber-reinforced mix)
* Concrete color pigment (optional, for adding a unique hue)
* Concrete sealer (food-safe and stain-resistant is crucial!)
* Rebar or wire mesh (for reinforcement)
* Silicone caulk (for sealing the mold)
* Cooking spray or form release agent
* Mixing buckets
* Drill with mixing paddle
* Trowel
* Rubber gloves
* Safety glasses
* Dust mask
* Concrete vibrator (optional, but highly recommended)
* Diamond polishing pads (various grits, from coarse to fine)
* Wet/dry sander or polisher
* Shop towels
* Level
* Measuring tape
* Clamps
* Painter’s tape
* Drop cloths
Building the Mold: The Foundation of Your Countertop
This is arguably the most important step. A well-built mold ensures a smooth, accurate countertop.
1. Measure, Measure, Measure! Accurately measure the dimensions of your existing countertops. Consider any overhangs or specific shapes you want to incorporate. I always double-check my measurements before cutting anything!
2. Cut the Melamine: Cut the melamine boards according to your measurements. You’ll need pieces for the base, sides, and any backsplashes. Remember, the inside dimensions of the mold will be the final dimensions of your countertop.
3. Assemble the Mold: Use screws to assemble the melamine pieces, creating a box. The melamine surface should be facing inwards, as this will be the surface of your countertop. Make sure the corners are square and the seams are tight.
4. Caulk the Seams: Apply a generous bead of silicone caulk along all the inside seams of the mold. This prevents the concrete from leaking and creates a smooth edge. Smooth the caulk with your finger for a clean finish. Let the caulk dry completely.
5. Reinforce the Mold: Use clamps to reinforce the mold, especially if you’re creating a large countertop. This will prevent the mold from bowing or warping under the weight of the concrete.
6. Cutouts for Sinks and Faucets: If you need cutouts for sinks or faucets, create smaller melamine boxes to the correct dimensions and attach them securely to the inside of the mold. Remember to caulk around these cutouts as well.
7. Apply Form Release: Generously spray the inside of the mold with cooking spray or a commercial form release agent. This will help prevent the concrete from sticking to the melamine.
Mixing and Pouring the Concrete: The Heart of the Project
Now for the fun part! Mixing and pouring the concrete requires a bit of muscle and attention to detail.
1. Prepare Your Workspace: Cover your work area with drop cloths to protect it from spills. Have all your materials and tools within easy reach.
2. Mix the Concrete: Follow the manufacturer’s instructions for mixing your concrete. Add water gradually, mixing with a drill and mixing paddle until you achieve a thick, but pourable consistency. The mix should be similar to a thick oatmeal.
3. Add Pigment (Optional): If you’re using concrete pigment, add it to the mix according to the manufacturer’s instructions. Mix thoroughly to ensure even color distribution.
4. Pour the First Layer: Pour a layer of concrete into the mold, about halfway up.
5. Add Reinforcement: Place the rebar or wire mesh into the concrete, ensuring it’s fully embedded. This will add strength and prevent cracking.
6. Pour the Second Layer: Pour the remaining concrete into the mold, filling it to the top.
7. Vibrate the Concrete: Use a concrete vibrator to remove air bubbles from the concrete. This will create a stronger, more durable countertop. If you don’t have a vibrator, you can tap the sides of the mold with a rubber mallet.
8. Screed the Surface: Use a trowel to screed the surface of the concrete, removing any excess and creating a level surface.
9. Trowel the Surface: Use a trowel to smooth the surface of the concrete. This will help reduce the amount of grinding and polishing required later.
10. Cover and Cure: Cover the concrete with plastic sheeting to prevent it from drying out too quickly. This is crucial for proper curing.
Curing and Demolding: Patience is Key
Curing is essential for the concrete to gain strength and durability.
1. Cure for 7-10 Days: Allow the concrete to cure for at least 7-10 days. Keep the concrete covered with plastic sheeting and mist it with water periodically to keep it moist.
2. Demold the Countertop: After the curing period, carefully remove the screws and clamps from the mold. Gently tap the sides of the mold with a rubber mallet to loosen the concrete.
3. Lift the Countertop: With the help of a friend, carefully lift the countertop out of the mold. Be prepared – it will be heavy!
Grinding and Polishing: Achieving a Smooth Finish
This is where you transform the rough concrete into a beautiful, smooth countertop.
1. Prepare for Grinding: Set up your wet/dry sander or polisher with a coarse diamond polishing pad (e.g., 50 grit). Wear safety glasses and a dust mask.
2. Grind the Surface: Grind the surface of the concrete in a circular motion, using water to keep the pad cool and prevent dust. Focus on removing any imperfections or unevenness.
3. Progress Through the Grits: Gradually progress through the diamond polishing pads, using finer and finer grits (e.g., 100, 200, 400, 800, 1500, 3000). Rinse the surface thoroughly between each grit.
4. Inspect for Imperfections: After each grit, inspect the surface for any remaining imperfections. If you find any, go back to a coarser grit and grind them out.
5. Polish to Your Desired Sheen: Continue polishing until you achieve your desired sheen. A higher grit will result in a glossier finish.
6. Clean the Surface: Thoroughly clean the surface of the countertop with water and a mild detergent.
Sealing: Protecting Your Investment
Sealing is crucial to protect your concrete countertop from stains and water damage.
1. Choose a Sealer: Select a food-safe and stain-resistant concrete sealer specifically designed for countertops. I recommend a penetrating sealer that will protect the concrete from within.
2. Apply the First Coat: Apply the first coat of sealer according to the manufacturer’s instructions. Use a clean shop towel or applicator pad.
3. Allow to Dry: Allow the sealer to dry completely, as directed by the manufacturer.
4. Apply Additional Coats: Apply additional coats of sealer, following the manufacturer’s instructions. I usually apply at least three coats for maximum protection.
5. Buff the Surface: After the final coat has dried, buff the surface with a clean shop towel to remove any excess sealer.
Installation: The Final Touch
Almost there! Now it’s time to install your beautiful new concrete countertop.
1. Prepare the Cabinets: Ensure your cabinets are level and sturdy.
2. Apply Adhesive: Apply a bead of construction adhesive to the top of the cabinets.
3. Position the Countertop: Carefully position the countertop onto the cabinets.
4. Level the Countertop: Use shims to level the countertop if necessary.
5. Secure the Countertop: Secure the countertop to the cabinets using screws or construction adhesive.
6. Caulk the Seams: Caulk any seams between the countertop and the backsplash or walls.
7. Enjoy Your New Countertop! Step back and admire your handiwork! You’ve just created a stunning and unique concrete countertop that will be the envy of all your friends.
Tips and Tricks I’ve Learned Along the Way:
* Practice Makes Perfect: Consider making a small test piece before tackling the full countertop. This will give you a chance to practice your mixing, pouring, and finishing techniques.
*
Conclusion
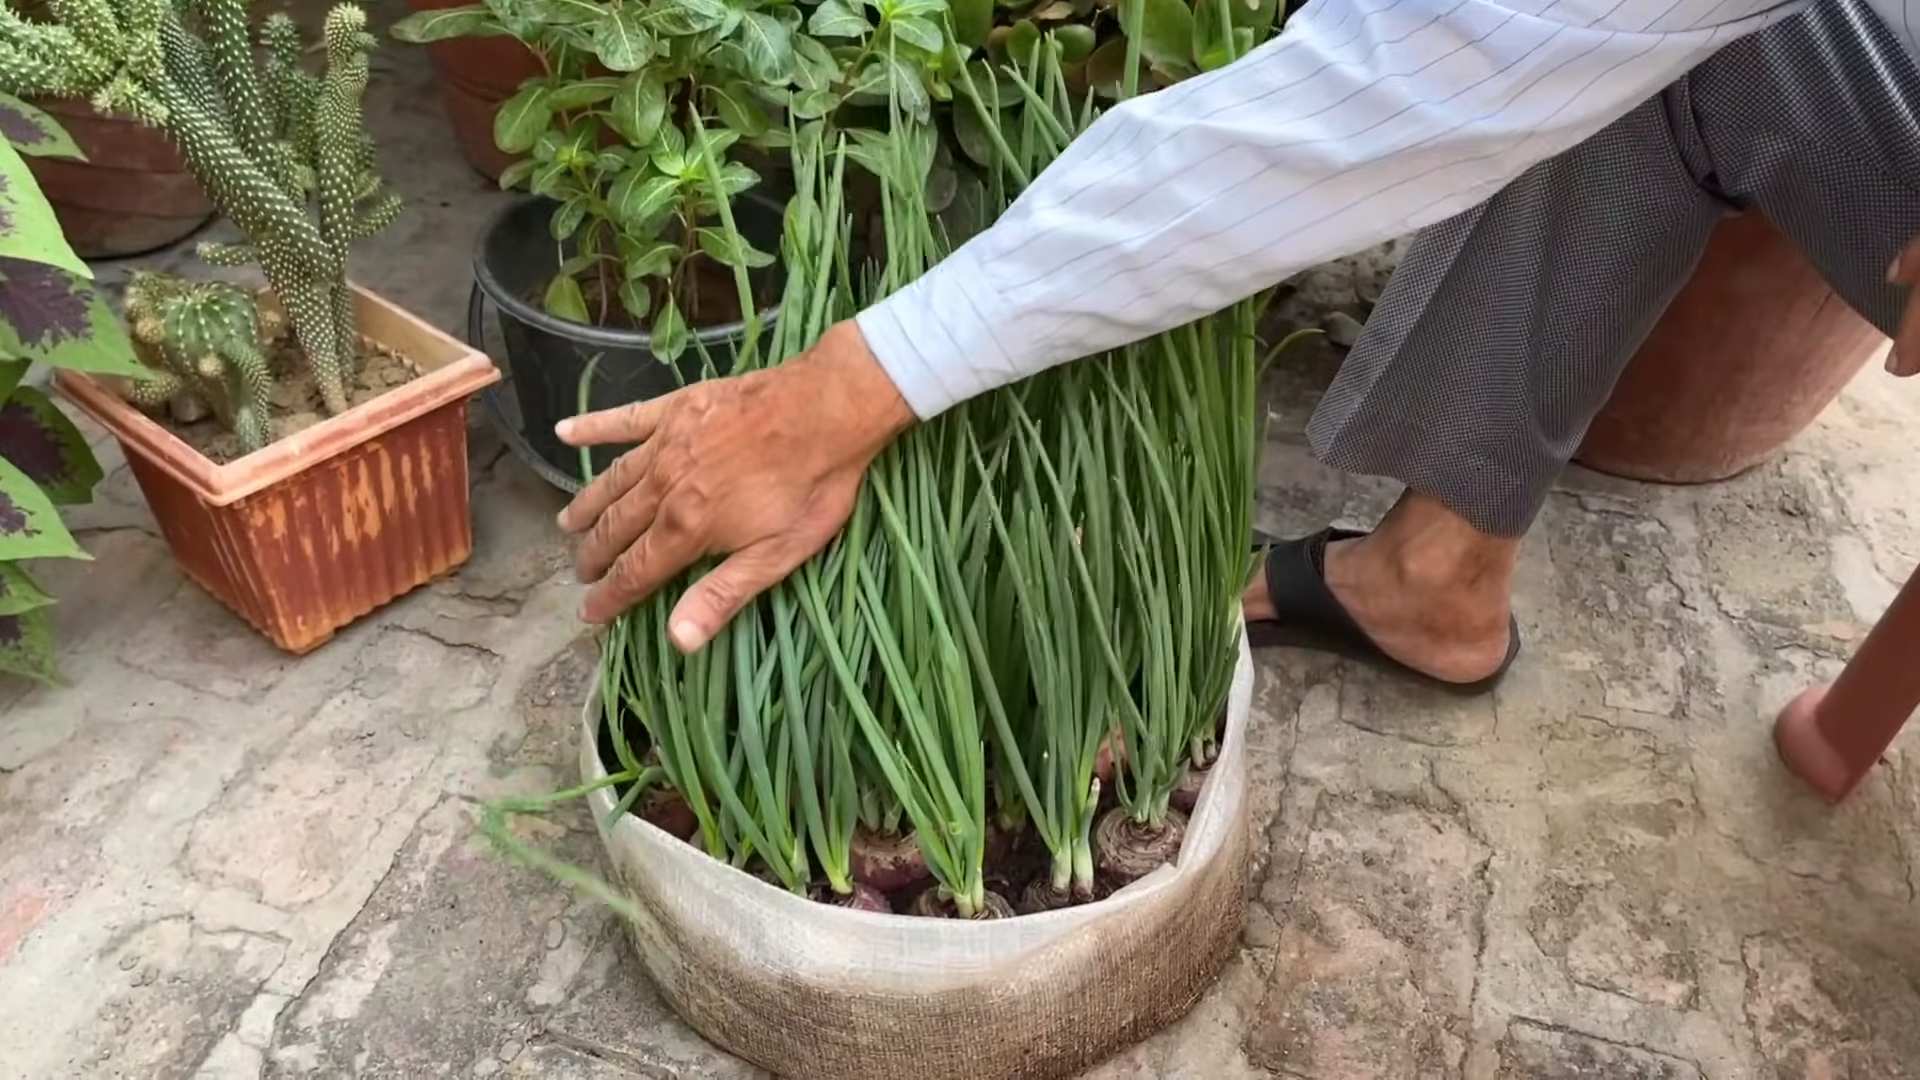
So, there you have it! This simple yet effective DIY onion planting method is more than just a gardening hack; it’s a pathway to fresher, tastier, and more sustainable meals. By taking control of your onion supply, you’re not only saving money but also reducing your reliance on commercially grown produce, often laden with pesticides and transported long distances. The satisfaction of harvesting your own plump, flavorful onions, knowing exactly where they came from and how they were grown, is truly unparalleled.
This method, focusing on maximizing space and minimizing waste, is particularly beneficial for urban gardeners or those with limited garden space. Imagine transforming a small balcony or patio into a thriving onion patch! And the beauty of this technique lies in its adaptability. Feel free to experiment with different onion varieties – from the pungent yellow onions perfect for cooking to the sweet Vidalia onions ideal for salads. You can also adjust the spacing based on the specific variety and your desired onion size. For smaller onions, plant them closer together; for larger, more robust bulbs, give them a bit more room to breathe.
Consider companion planting to further enhance your onion crop. Carrots, for example, are excellent companions, as their scent deters onion flies. Marigolds are another great choice, known for their pest-repelling properties. Experiment with different combinations to find what works best in your garden.
Don’t be afraid to get creative with your planting containers. While traditional garden beds are ideal, you can also use raised beds, pots, or even repurposed containers like old buckets or tires. Just ensure that your chosen container has adequate drainage to prevent waterlogging, which can lead to root rot.
And remember, the key to successful onion growing is patience and consistent care. Water regularly, especially during dry spells, and fertilize as needed to provide your onions with the nutrients they need to thrive. Keep an eye out for pests and diseases, and take action promptly to prevent them from spreading.
We wholeheartedly encourage you to try this DIY onion planting method. It’s a rewarding experience that will connect you with nature and provide you with a delicious and sustainable source of onions. Once you’ve given it a try, we’d love to hear about your experience! Share your photos, tips, and tricks in the comments below. Let’s build a community of onion-growing enthusiasts and learn from each other’s successes and challenges. Happy planting!
Frequently Asked Questions (FAQ)
What kind of onions can I plant using this method?
You can plant almost any type of onion using this method! From yellow and white onions to red onions and shallots, the principles remain the same. However, keep in mind that different varieties have different growth requirements and maturation times. Research the specific needs of the onion variety you choose to ensure optimal growth. For example, long-day onions are best suited for northern climates, while short-day onions thrive in southern regions. Consider your local climate and growing season when selecting your onion varieties.
How much sunlight do onions need?
Onions are sun-loving plants and require at least 6-8 hours of direct sunlight per day to thrive. Choose a planting location that receives ample sunlight throughout the day. If you’re growing onions in containers, you may need to move them around to ensure they get enough sun. Insufficient sunlight can result in smaller bulbs and reduced yields.
What kind of soil is best for growing onions?
Onions prefer well-drained, fertile soil that is rich in organic matter. Amend your soil with compost or well-rotted manure before planting to improve its fertility and drainage. The ideal soil pH for onions is between 6.0 and 7.0. You can test your soil pH using a soil testing kit and adjust it accordingly. Avoid planting onions in heavy clay soil, as this can lead to waterlogging and root rot. If you have clay soil, consider amending it with sand and organic matter to improve its drainage.
How often should I water my onions?
Water your onions regularly, especially during dry spells. The soil should be consistently moist but not waterlogged. Water deeply and less frequently, rather than shallowly and more often, to encourage deep root growth. Avoid overhead watering, as this can promote fungal diseases. Use a soaker hose or drip irrigation system to water your onions at the base of the plants.
When should I fertilize my onions?
Fertilize your onions every 2-3 weeks with a balanced fertilizer that is high in nitrogen, phosphorus, and potassium. Nitrogen is essential for leaf growth, phosphorus promotes root development, and potassium enhances bulb formation. You can also use organic fertilizers such as compost tea or fish emulsion. Avoid over-fertilizing, as this can lead to excessive leaf growth and reduced bulb size.
How do I know when my onions are ready to harvest?
Onions are typically ready to harvest when the tops begin to fall over and turn yellow or brown. This usually occurs about 100-120 days after planting, depending on the variety. Once the tops have fallen over, stop watering the onions to allow the bulbs to dry out. After a week or two, carefully dig up the onions and cure them in a warm, dry place for several days before storing them.
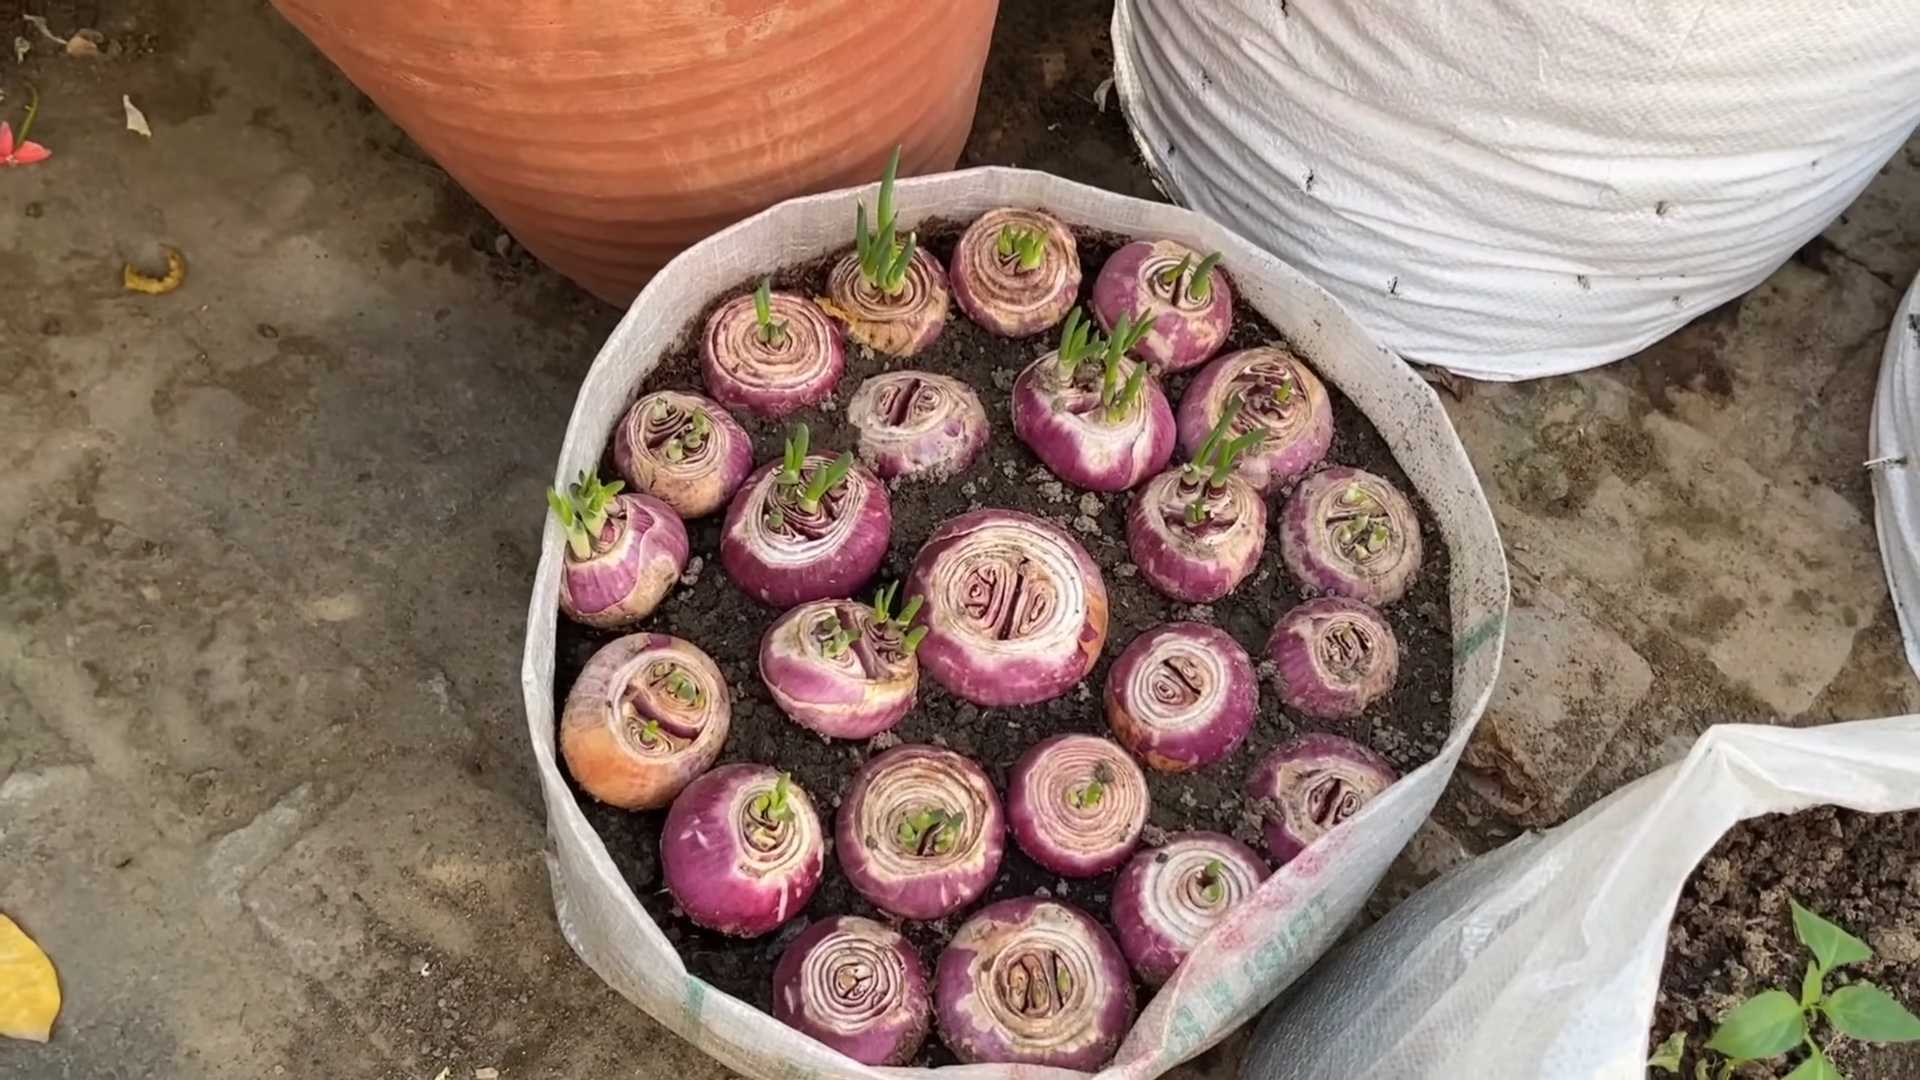
Can I grow onions from scraps?
Yes, you can grow onions from scraps! Save the root end of your onion (about an inch or two) and plant it in soil. Keep the soil moist and the root end will start to sprout. This is a great way to reduce food waste and grow your own onions from kitchen scraps. However, onions grown from scraps may not produce as large of bulbs as those grown from sets or seeds.
What are some common onion pests and diseases?
Some common onion pests include onion flies, thrips, and onion maggots. Common onion diseases include downy mildew, purple blotch, and white rot. To prevent pests and diseases, practice good garden hygiene, such as removing weeds and debris, and rotate your crops regularly. You can also use organic pest control methods such as insecticidal soap or neem oil. If you suspect your onions have a disease, consult with your local agricultural extension office for advice on treatment options.
Can I grow onions indoors?
While it’s possible to grow onions indoors, it can be challenging to provide them with the amount of sunlight they need to thrive. If you want to try growing onions indoors, choose a sunny location and use grow lights to supplement natural sunlight. Use a well-draining potting mix and water regularly. You may not get as large of bulbs as you would if you grew them outdoors, but you can still harvest the green tops for use in salads and other dishes.


Leave a Comment