

Organic Taro Growing No Fertilizer – sounds like a dream, right? I know, I know, you’re probably thinking, “Impossible! How can I possibly grow delicious, healthy taro without relying on synthetic fertilizers?” Well, get ready to have your gardening world turned upside down because I’m about to share some incredible DIY tricks that will have you harvesting a bountiful taro crop, completely naturally!
Taro, a staple in many cultures across the Pacific and Asia for centuries, holds a special place in culinary traditions. From poi in Hawaii to various curries and stews, this versatile root vegetable has nourished generations. But what if I told you that you could reconnect with this ancient food source in your own backyard, using methods that are both sustainable and incredibly rewarding?
In today’s world, where we’re increasingly conscious of what we put into our bodies and the impact we have on the environment, the need for organic gardening practices has never been greater. Many gardeners struggle with the cost and potential harm associated with chemical fertilizers. That’s where these DIY tricks come in! I’m going to show you how to harness the power of nature to create a thriving environment for your taro plants, ensuring a healthy harvest without ever reaching for a bag of synthetic fertilizer. Get ready to unlock the secrets to successful organic taro growing no fertilizer needed!
Growing Taro Organically: A No-Fertilizer Guide
Hey there, fellow gardening enthusiasts! I’m super excited to share my experience with growing taro organically, completely skipping the synthetic fertilizers. Taro, also known as kalo, is a delicious and nutritious root vegetable, and growing it without relying on chemical fertilizers is not only possible but also incredibly rewarding. It’s all about understanding the plant’s needs and working with nature to create a thriving environment. So, let’s dive in!
Understanding Taro’s Needs
Before we get our hands dirty, let’s talk about what taro needs to flourish. Taro is a tropical plant, so it loves warmth and moisture. Here’s a quick rundown:
* Water: Taro thrives in consistently moist soil, even tolerating standing water. This is crucial!
* Sunlight: It prefers partial shade, especially in hotter climates. Too much direct sun can scorch the leaves.
* Soil: While taro isn’t overly picky, it prefers rich, well-draining soil. We’ll focus on amending the soil naturally to achieve this.
* Nutrients: Taro needs nitrogen, phosphorus, and potassium, just like any other plant. We’ll provide these through organic matter and companion planting.
* Warmth: Taro loves warm temperatures. It’s best grown in USDA zones 8-11, but you can grow it in cooler climates with some extra care.
Preparing Your Growing Area
Okay, now for the fun part! Preparing your growing area is key to success, especially when you’re going fertilizer-free. We’re aiming to create a mini-ecosystem that supports the taro plants naturally.
* Choosing the Right Location: Select a spot that gets partial shade, especially during the hottest part of the day. If you live in a cooler climate, a sunnier spot might be better.
* Soil Testing (Optional but Recommended): A soil test can tell you the pH and nutrient levels of your soil. This will help you tailor your soil amendments. You can get a soil test kit at most garden centers or online.
* Clearing the Area: Remove any weeds, rocks, or debris from the area.
* Improving Soil Drainage: Even though taro loves moisture, it still needs well-draining soil to prevent root rot. If your soil is heavy clay, you’ll need to amend it.
Building a Rich, Organic Soil Base
This is where the magic happens! We’re going to create a soil that’s teeming with life and nutrients, all without using synthetic fertilizers.
* Composting is King: Compost is your best friend when growing organically. It adds nutrients, improves soil structure, and helps retain moisture. I like to use a mix of kitchen scraps, yard waste, and aged manure.
* Adding Organic Matter: Incorporate plenty of organic matter into the soil. This could include compost, aged manure, leaf mold, or even shredded newspaper. Aim for a ratio of about 1 part organic matter to 2 parts soil.
* Cover Cropping (Optional): Planting a cover crop like buckwheat or clover before planting your taro can improve soil health and add nutrients. Till the cover crop into the soil a few weeks before planting.
* Sheet Mulching (Lasagna Gardening): This is a great way to build healthy soil and suppress weeds. Layer cardboard, compost, and other organic materials on top of the soil. Let it decompose for a few months before planting.
Planting Your Taro
Now that our soil is ready, it’s time to plant our taro!
What You’ll Need:
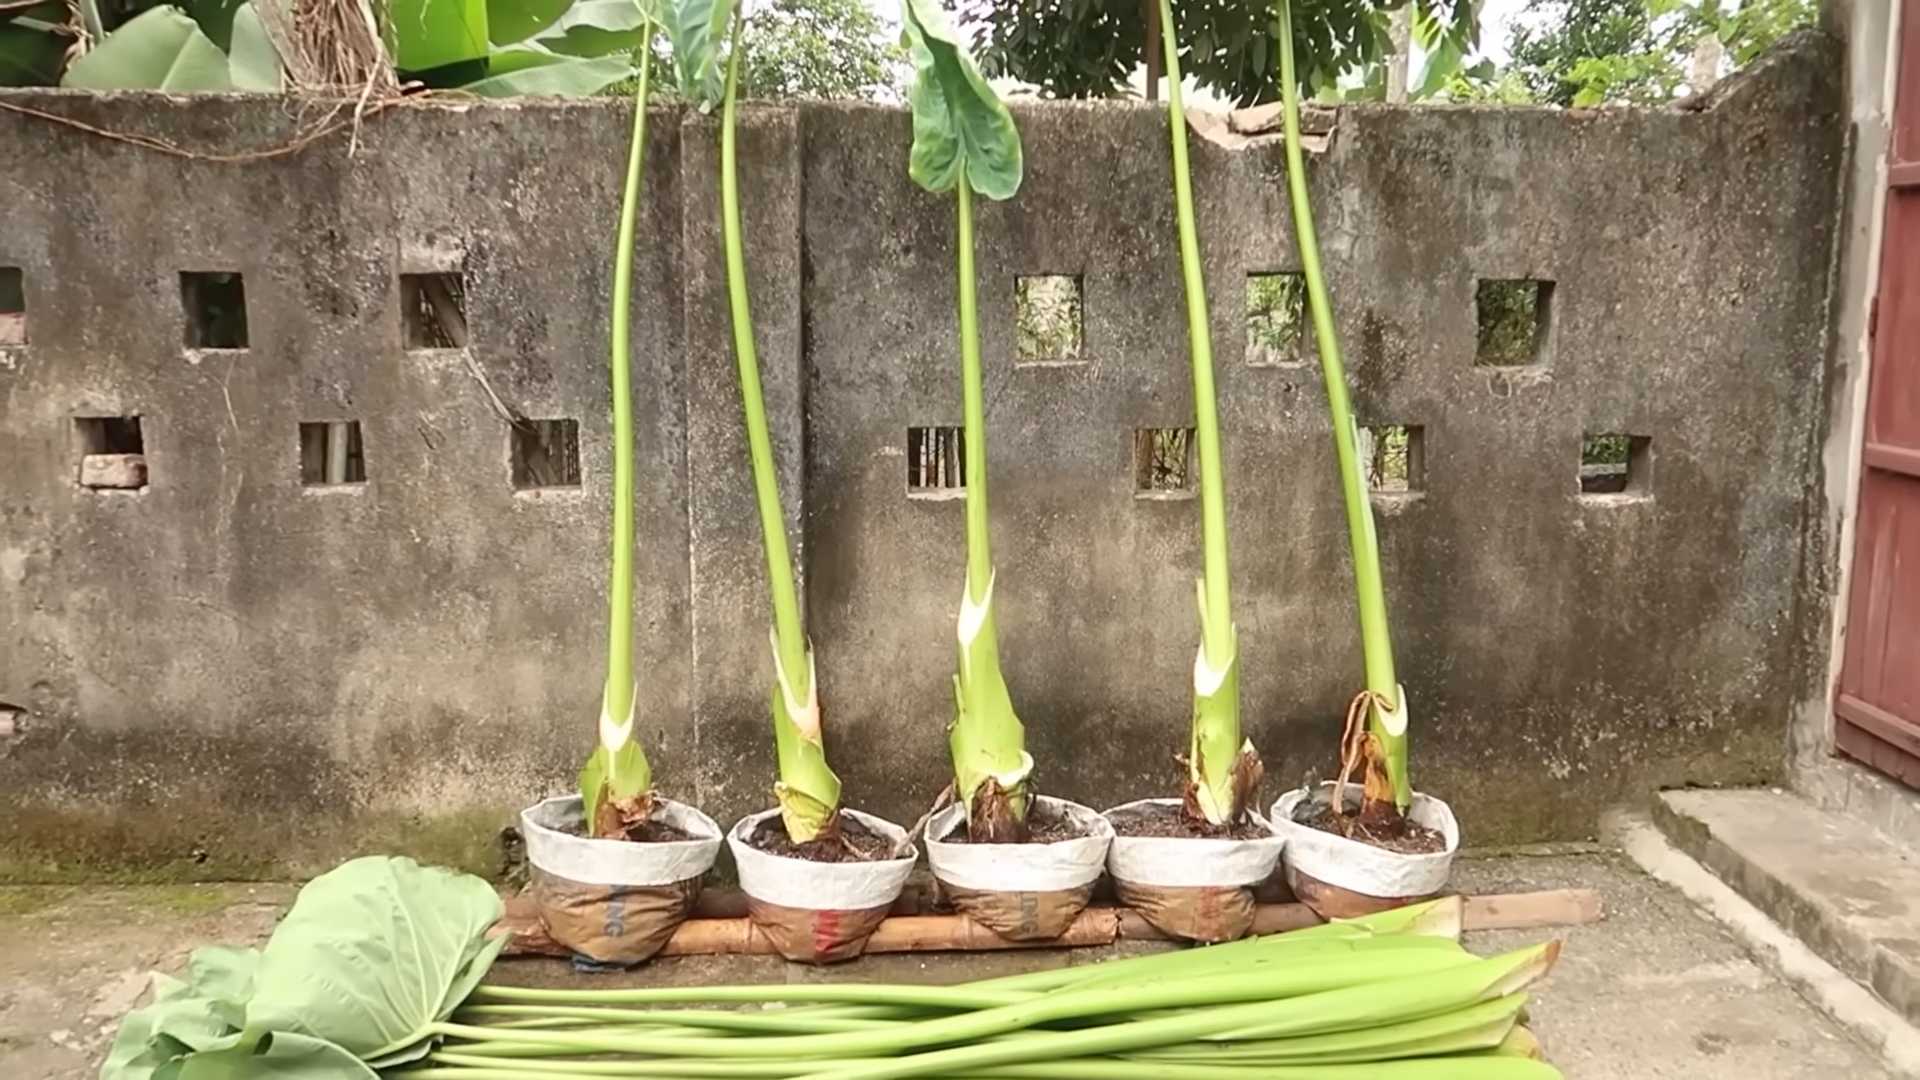
* Taro corms (the underground stem) or huli (the top portion of the taro plant with leaves)
* A shovel or trowel
* Water
Step-by-Step Instructions:
1. Prepare the Planting Hole: Dig a hole that’s about twice as wide and as deep as the taro corm or huli.
2. Add Compost to the Hole: Place a generous amount of compost at the bottom of the hole. This will provide nutrients and help retain moisture.
3. Plant the Corm or Huli: Place the taro corm or huli in the hole, making sure the top of the corm or the base of the huli is just below the soil surface.
4. Backfill with Soil: Gently backfill the hole with soil, making sure to pack it lightly around the corm or huli.
5. Water Thoroughly: Water the newly planted taro thoroughly.
6. Mulch Around the Plant: Apply a layer of mulch around the plant to help retain moisture and suppress weeds. I like to use straw, wood chips, or shredded leaves.
Caring for Your Taro Plants
Once your taro is planted, it’s important to provide it with the care it needs to thrive.
* Watering: Taro needs consistently moist soil. Water regularly, especially during dry periods. You can even grow taro in a container filled with water!
* Weeding: Keep the area around your taro plants free of weeds. Weeds compete with taro for nutrients and water.
* Mulching: Maintain a layer of mulch around your taro plants to help retain moisture and suppress weeds.
* Pest Control: Taro is relatively pest-resistant, but it can be susceptible to aphids, spider mites, and snails. Inspect your plants regularly and take action if you see any pests. I prefer to use organic pest control methods, such as insecticidal soap or neem oil.
* Companion Planting: Companion planting is a great way to improve the health of your taro plants and attract beneficial insects. Some good companion plants for taro include beans, peas, and basil.
Natural Fertilizing Techniques
Since we’re avoiding synthetic fertilizers, we need to find natural ways to provide our taro plants with the nutrients they need.
* Compost Tea: Compost tea is a liquid fertilizer made by steeping compost in water. It’s a great way to provide your taro plants with a boost of nutrients. To make compost tea, simply soak a bag of compost in a bucket of water for a few days. Then, dilute the tea with water and use it to water your plants.
* Worm Castings: Worm castings are the excrement of earthworms. They’re a rich source of nutrients and beneficial microbes. You can add worm castings to the soil around your taro plants or use them to make worm casting tea.
* Manure Tea: Similar to compost tea, manure tea is made by steeping aged manure in water. It’s a great source of nitrogen, which is essential for leafy growth. Be sure to use aged manure, as fresh manure can burn your plants.
* Green Manure: Green manure is a cover crop that’s grown specifically to be tilled into the soil. It’s a great way to add organic matter and nutrients to the soil. Some good green manure crops for taro include buckwheat, clover, and rye.
* Seaweed Extract: Seaweed extract is a liquid fertilizer made from seaweed. It’s a rich source of trace minerals and growth hormones. You can spray seaweed extract on the leaves of your taro plants or add it to the soil.
* Bone Meal: Bone meal is a slow-release fertilizer made from ground animal bones. It’s a good source of phosphorus, which is essential for root development. Add bone meal to the soil when planting your taro.
* Rock Phosphate: Rock phosphate is a slow-release fertilizer made from ground rock phosphate. It’s another good source of phosphorus. Add rock phosphate to the soil when planting your taro.
* Epsom Salts: Epsom salts are magnesium sulfate. Magnesium is essential for chlorophyll production, which is necessary for photosynthesis. You can dissolve Epsom salts in water and spray it on the leaves of your taro plants.
Harvesting Your Taro
After several months of care, your taro will be ready to harvest!
* When to Harvest: Taro is typically ready to harvest 6-12 months after planting. The leaves will start to turn yellow and die back when the corm is mature.
* How to Harvest: Carefully dig around the base of the plant and lift the corm out of the soil. Be careful not to damage the corm.
* Storing Your Taro: Taro can be stored in a cool, dry place for several weeks.
Troubleshooting
Even with the best care, you might encounter some problems while growing taro. Here are a few common issues and how to address them:
* Yellowing Leaves: This could be a sign of nutrient deficiency, overwatering, or underwatering. Check the soil moisture and nutrient levels and adjust accordingly.
* Root Rot: This is caused by overly wet soil. Make sure your soil is well-draining and avoid overwatering.
* Pests: Inspect your plants regularly and

Conclusion
Growing organic taro without fertilizer might seem daunting, but as we’ve explored, it’s a rewarding and entirely achievable endeavor. The benefits extend far beyond simply saving money on commercial fertilizers. You’re contributing to a healthier ecosystem, ensuring the purity of your food, and connecting with the land in a more meaningful way. This method allows you to cultivate taro that is truly organic, bursting with natural flavor, and free from potentially harmful chemicals.
The key takeaway is that patience and observation are your greatest allies. Understanding your soil, providing adequate drainage, and utilizing natural amendments like compost and mulch are the cornerstones of successful organic taro cultivation. Remember, taro thrives in consistently moist conditions, so regular watering, especially during dry spells, is crucial.
Why is this DIY trick a must-try? Because it empowers you to take control of your food source, ensuring that your taro is grown with the utmost care and free from synthetic inputs. It’s a sustainable practice that benefits both you and the environment. Plus, the satisfaction of harvesting your own organically grown taro is unparalleled.
Consider these variations to further personalize your organic taro growing experience:
* **Companion Planting:** Experiment with companion plants like legumes (beans, peas) to naturally fix nitrogen in the soil, further enriching it for your taro. Marigolds can also help deter pests.
* **Different Taro Varieties:** Explore different varieties of taro to find the ones that thrive best in your specific climate and soil conditions. Some varieties are more tolerant of drier conditions, while others are better suited for wetter environments.
* **Aquaponics Integration:** For a more advanced approach, consider integrating your taro cultivation into an aquaponics system. The nutrient-rich water from fish tanks can provide a natural source of fertilizer for your taro, creating a closed-loop system.
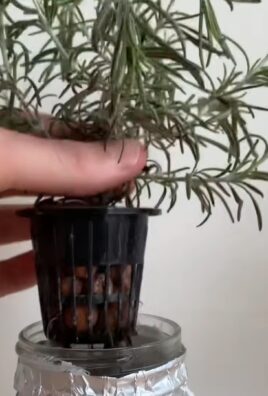
* **Container Gardening:** If you have limited space, you can successfully grow taro in large containers. Ensure the containers have adequate drainage and use a well-draining potting mix amended with compost.
We wholeheartedly encourage you to try this DIY trick for growing organic taro without fertilizer. It’s a journey of learning, experimentation, and ultimately, delicious and healthy rewards. Don’t be afraid to get your hands dirty, observe your plants closely, and adapt your approach as needed.
Once you’ve harvested your first batch of organically grown taro, we’d love to hear about your experience! Share your tips, challenges, and successes in the comments below. Your insights can help other aspiring organic taro growers on their own journeys. Let’s build a community of sustainable gardeners, one taro plant at a time. Embrace the process, enjoy the journey, and savor the taste of truly organic, homegrown taro.
Frequently Asked Questions (FAQ)
What kind of soil is best for growing organic taro without fertilizer?
Taro thrives in rich, well-draining soil that retains moisture. A loamy soil is ideal. Before planting, amend your soil with plenty of organic matter, such as compost, well-rotted manure, or leaf mold. This will improve drainage, water retention, and nutrient availability. Avoid heavy clay soils, as they can become waterlogged and lead to root rot. If you have clay soil, amend it heavily with organic matter and consider planting in raised beds or containers to improve drainage. Soil pH should ideally be between 5.5 and 6.5.
How often should I water my organic taro plants?
Taro requires consistent moisture, especially during the growing season. Water deeply and regularly, ensuring the soil remains consistently moist but not waterlogged. The frequency of watering will depend on your climate, soil type, and the size of your plants. Check the soil moisture regularly by sticking your finger about an inch into the soil. If it feels dry, it’s time to water. During hot, dry weather, you may need to water daily. Mulching around the plants can help retain moisture and reduce the need for frequent watering.
What are some natural ways to control pests and diseases in organic taro?
Prevention is key when it comes to pest and disease control in organic taro. Start with healthy plants and well-drained soil. Regularly inspect your plants for signs of pests or diseases. Some common pests that affect taro include aphids, spider mites, and snails. You can control aphids and spider mites with a strong spray of water or by introducing beneficial insects like ladybugs. Snails can be handpicked or trapped with beer traps. For fungal diseases, ensure good air circulation around the plants and avoid overhead watering. Neem oil can be used as a natural fungicide and insecticide. Companion planting with marigolds can also help deter pests.
How long does it take to harvest organic taro?
The time it takes to harvest taro depends on the variety and growing conditions. Generally, taro takes about 7 to 12 months to mature. You’ll know it’s ready to harvest when the leaves start to turn yellow and die back. The corm (the underground stem that is the edible part) should be firm and well-developed. To harvest, carefully dig around the plant and lift the corm from the soil. Be careful not to damage the corm during harvesting.
Can I grow organic taro in containers?
Yes, you can successfully grow taro in containers, especially if you have limited space. Choose a large container with good drainage holes. Use a well-draining potting mix amended with compost. Ensure the container is large enough to accommodate the growing corm. Water regularly, keeping the soil consistently moist. Place the container in a location that receives plenty of sunlight. Container-grown taro may require more frequent watering and fertilization than taro grown in the ground.
What are some signs that my organic taro plant is not thriving?
Several signs can indicate that your taro plant is not thriving. Yellowing leaves can indicate nutrient deficiencies, overwatering, or underwatering. Wilting leaves can indicate underwatering or root rot. Stunted growth can indicate nutrient deficiencies or pest infestations. If you notice any of these signs, carefully inspect your plant and adjust your care accordingly. Check the soil moisture, look for pests, and consider amending the soil with compost or other organic fertilizers.
How can I improve the drainage of my soil for growing organic taro?
Improving soil drainage is crucial for growing healthy taro. Amend heavy clay soils with plenty of organic matter, such as compost, well-rotted manure, or leaf mold. This will help break up the clay particles and improve drainage. You can also add sand to the soil, but be careful not to add too much, as it can create a concrete-like mixture. Consider planting in raised beds or containers to improve drainage. Ensure that the planting area has adequate drainage channels to prevent water from pooling around the plants.
What are some good organic fertilizers to use for taro if compost isn’t enough?
While compost is an excellent source of nutrients for organic taro, you may need to supplement it with other organic fertilizers. Fish emulsion is a good source of nitrogen, phosphorus, and potassium. Bone meal is a good source of phosphorus, which is essential for root development. Kelp meal is a good source of potassium and trace minerals. You can also use well-rotted manure, such as cow manure or chicken manure, as a fertilizer. Apply these fertilizers according to the package directions. Remember to always test your soil before applying any fertilizer to determine its nutrient needs.
Is it possible to grow taro without any added fertilizer at all?
Yes, it is possible to grow taro without any added fertilizer at all, but it requires careful attention to soil health and nutrient cycling. Focus on building a rich, healthy soil with plenty of organic matter. Use cover crops to improve soil fertility and prevent erosion. Practice crop rotation to prevent nutrient depletion. Consider using companion planting to attract beneficial insects and improve nutrient availability. Regularly monitor your plants for signs of nutrient deficiencies and adjust your practices accordingly. While it may require more effort, growing taro without any added fertilizer is a sustainable and rewarding way to produce healthy, organic food.
Leave a Comment