

Pink Radish Container Gardening: Ever dreamt of plucking vibrant, peppery radishes straight from your balcony or patio? I know I have! There’s something incredibly satisfying about growing your own food, and radishes are the perfect gateway vegetable for even the most novice gardener. Forget sprawling acres; we’re talking about bringing the farm-to-table experience to your doorstep, one container at a time.
Radishes, believe it or not, have a rich history, dating back to ancient Egypt and Greece. They were even used as currency at one point! But beyond their historical significance, radishes are incredibly easy to grow, especially in containers. This DIY guide will unlock the secrets to successful pink radish container gardening, even if you think you have a black thumb.
In today’s fast-paced world, finding moments of peace and connection with nature can be a challenge. Growing your own radishes offers a therapeutic escape, a chance to nurture something from seed to harvest. Plus, store-bought radishes simply can’t compare to the crisp, fresh flavor of homegrown ones. So, ditch the grocery store produce aisle and let’s embark on this exciting journey of creating your own mini radish farm!

Growing Pink Radishes in Containers: A Beginner’s Guide
Hey there, fellow gardening enthusiasts! Ever thought about growing your own radishes? They’re super easy, quick, and add a delightful peppery crunch to salads and snacks. And the best part? You don’t need a huge garden! We can totally grow these vibrant pink beauties in containers, even if you only have a balcony or a sunny windowsill. Let’s dive into how to make it happen!
Choosing the Right Container and Soil
First things first, we need a good home for our radishes. The right container and soil are crucial for healthy growth.
* Container Size: Radishes don’t need a super deep container because they grow relatively quickly and their roots aren’t extensive. Aim for a container that’s at least 6 inches deep and wide. A 6-inch pot is perfect for a small batch, but if you want a bigger harvest, go for something larger, like a window box or a large planter. Remember, the more space, the more radishes!
* Drainage: This is super important! Radishes hate soggy feet. Make sure your container has drainage holes at the bottom. If it doesn’t, you can drill some yourself. Trust me, it’s worth the effort to prevent root rot.
* Soil: Radishes thrive in loose, well-draining soil. Heavy clay soil is a no-go. I recommend using a good quality potting mix. You can also amend your potting mix with compost or perlite to improve drainage and add nutrients. A mix of equal parts potting mix, compost, and perlite works wonders.
Planting Your Radish Seeds
Now for the fun part – planting! This is where we get our hands dirty.
1. Prepare the Soil: Fill your container with the potting mix, leaving about an inch of space at the top. Gently pat down the soil to level it.
2. Sow the Seeds: Radish seeds are tiny, so handle them with care. Sprinkle the seeds evenly over the surface of the soil. Aim for about 1 inch spacing between seeds. You can use your fingers or a small spoon to distribute them.
3. Cover the Seeds: Lightly cover the seeds with about ½ inch of soil. You don’t want to bury them too deep, or they might have trouble sprouting.
4. Water Gently: Use a watering can with a gentle rose attachment or a spray bottle to water the soil thoroughly. You want the soil to be moist but not waterlogged.
5. Label Your Container: Don’t forget to label your container with the date you planted the seeds and the type of radish you’re growing. It’s easy to forget these details later!
Caring for Your Radishes
Radishes are pretty low-maintenance, but they do need a little TLC to thrive.
* Sunlight: Radishes need at least 6 hours of sunlight per day. Place your container in a sunny spot, like a south-facing balcony or windowsill. If you don’t have enough natural light, you can supplement with a grow light.
* Watering: Keep the soil consistently moist, but not soggy. Water when the top inch of soil feels dry to the touch. Overwatering can lead to root rot, while underwatering can cause the radishes to become tough and bitter.
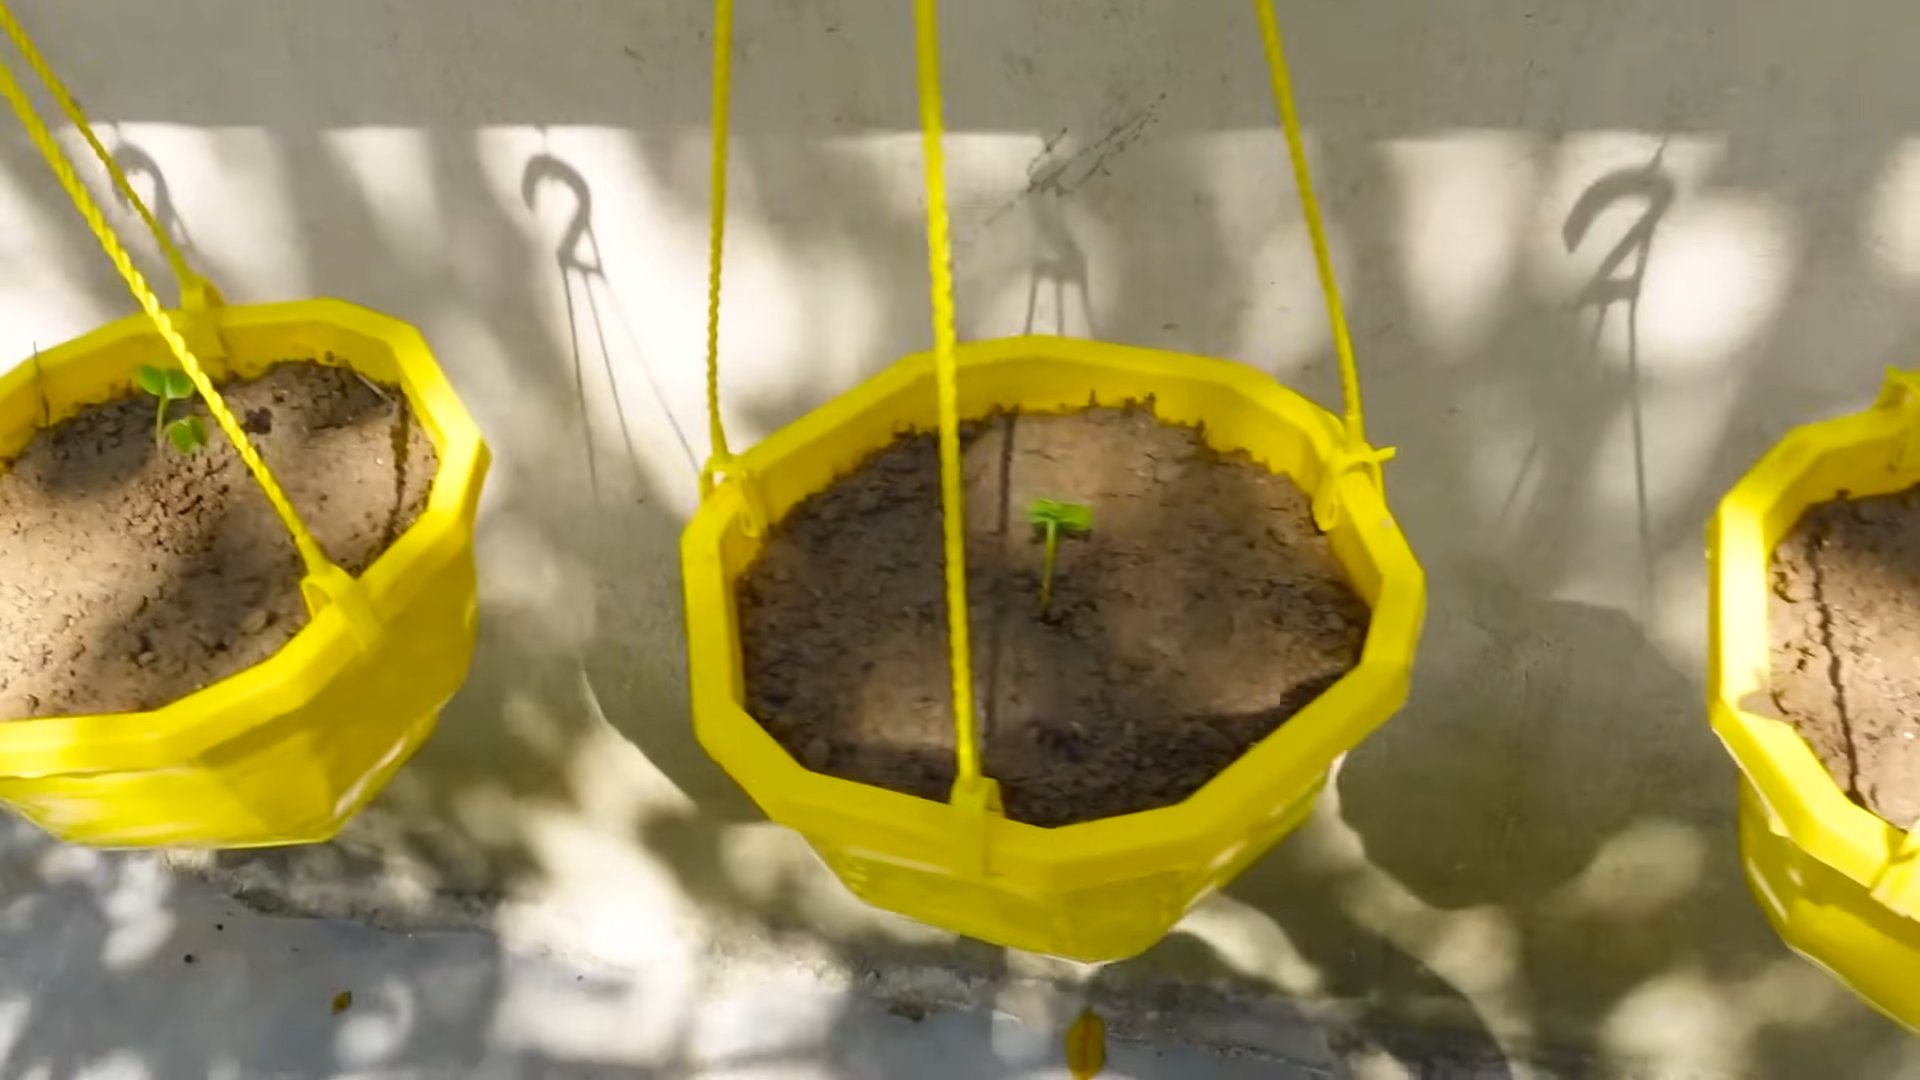
* Thinning: Once the seedlings emerge (usually within a few days), you’ll need to thin them out. This means removing some of the seedlings to give the remaining ones enough space to grow. Thin the seedlings to about 1-2 inches apart. Don’t just pull them out! Gently snip them off at the soil line with scissors to avoid disturbing the roots of the other seedlings.
* Fertilizing: Radishes don’t need a lot of fertilizer, but a light feeding can help them grow faster. You can use a balanced liquid fertilizer diluted to half strength. Apply the fertilizer every 2-3 weeks.
* Weeding: Keep an eye out for weeds and remove them promptly. Weeds can compete with your radishes for nutrients and water.
Dealing with Pests and Diseases
Radishes are generally pest-resistant, but sometimes they can be bothered by flea beetles or aphids.
* Flea Beetles: These tiny beetles can chew small holes in the leaves of your radishes. You can control them by covering your plants with row covers or by spraying them with insecticidal soap.
* Aphids: These small, sap-sucking insects can cluster on the stems and leaves of your radishes. You can wash them off with a strong stream of water or spray them with insecticidal soap.
* Root Rot: This is a fungal disease that can cause the roots of your radishes to rot. To prevent root rot, make sure your container has good drainage and avoid overwatering.
Harvesting Your Radishes
The best part! Radishes are one of the fastest-growing vegetables, so you won’t have to wait long to harvest them.
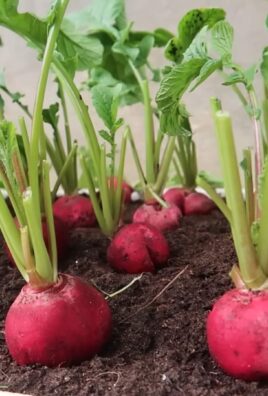
1. Check for Maturity: Radishes are typically ready to harvest in about 3-4 weeks, depending on the variety. Check the seed packet for specific maturity dates. The radishes should be about 1 inch in diameter.
2. Harvest Carefully: Gently pull the radishes out of the soil. If the soil is dry, you may need to loosen it first with a trowel.
3. Wash and Store: Wash the radishes thoroughly and remove the tops. You can store the radishes in the refrigerator for up to a week.
Choosing the Right Radish Variety
There are tons of radish varieties to choose from, each with its own unique flavor and appearance. Here are a few of my favorites:
* Cherry Belle: This is a classic, round, bright red radish with a mild flavor. It’s a great choice for beginners.
* French Breakfast: This radish is oblong in shape and has a mild, slightly sweet flavor. It’s delicious sliced and served with butter and salt.
* Easter Egg: This variety produces a mix of radishes in different colors, including red, pink, purple, and white. It’s a fun and colorful addition to any garden.
* Black Spanish: This radish has a black skin and a pungent, spicy flavor. It’s a good choice for adding a kick to salads and other dishes.
Troubleshooting Common Problems
Even with the best care, sometimes things can go wrong. Here are a few common problems and how to fix them:
* Radishes are too small: This could be due to overcrowding, lack of sunlight, or poor soil. Thin the seedlings, move the container to a sunnier location, and amend the soil with compost.
* Radishes are tough and bitter: This is usually caused by underwatering or harvesting them too late. Keep the soil consistently moist and harvest the radishes when they are the right size.
* Radishes are splitting: This can be caused by inconsistent watering. Try to water regularly and avoid letting the soil dry out completely.
* Radishes are all tops and no bottoms: This is often due to too much nitrogen in the soil. Avoid using fertilizers that are high in nitrogen.
Extending Your Radish Harvest
Want to enjoy fresh radishes all season long? Here’s how:
* Succession Planting: Plant a new batch of radish seeds every 2-3 weeks. This will ensure a continuous harvest throughout the growing season.
* Choose Different Varieties: Some radish varieties are better suited for different times of the year. For example, some varieties are more heat-tolerant and can be grown in the summer.
* Use Row Covers: Row covers can protect your radishes from pests and diseases and extend the growing season.
Radish Greens: Don’t Throw Them Away!
Did you know that radish greens are edible? They have a peppery flavor similar to arugula and can be used in salads, soups, and stir-fries. Just make sure to wash them thoroughly before using them.
Enjoying Your Homegrown Radishes
Now that you’ve harvested your radishes, it’s time to enjoy them! Here are a few ideas:
* Eat them raw: Radishes are delicious sliced and served with butter and salt.
* Add them to salads: Radishes add a peppery crunch to any salad.
* Make radish salsa: Combine chopped radishes with tomatoes, onions, cilantro, and lime juice for a refreshing salsa.
* Roast them: Roasting radishes mellows out their flavor and makes them tender and sweet.
* Pickle them: Pickled radishes are a tangy and delicious condiment.
Final Thoughts
Growing radishes in containers is a simple and rewarding experience. With a little bit of care, you can enjoy fresh, homegrown radishes all season long. So, grab a container, some seeds, and get planting! Happy gardening!
Conclusion
So, there you have it! Growing your own pink radishes in containers is not only surprisingly simple but also incredibly rewarding. Forget those bland, store-bought radishes that lack that peppery punch and vibrant color. With this DIY container gardening trick, you can cultivate a bounty of crisp, flavorful pink radishes right on your patio, balcony, or even windowsill.
Why is this a must-try? Because it puts you in control. You control the soil, the watering, and the overall environment, resulting in radishes that are fresher, tastier, and free from unwanted chemicals. Plus, it’s a fantastic way to connect with nature, even in a small space. There’s something truly satisfying about nurturing a tiny seed into a vibrant, edible plant.
But the fun doesn’t stop there! Feel free to experiment with different radish varieties. While we focused on pink radishes, you can easily adapt this method for other types like French Breakfast, Cherry Belle, or even the larger Daikon radishes (though you’ll need a larger container for those). Consider adding companion plants like carrots or lettuce to your container for a more diverse and productive mini-garden. You can also try different soil mixes to see what works best for your specific climate and growing conditions.
Another variation to consider is succession planting. Plant a small batch of radish seeds every week or two to ensure a continuous harvest throughout the growing season. This way, you’ll always have fresh radishes on hand for salads, snacks, or garnishes.
Don’t be intimidated if you’re a beginner gardener. This DIY container gardening trick is incredibly forgiving. Radishes are fast-growing and relatively low-maintenance, making them the perfect crop for novice gardeners. The key is to provide them with plenty of sunlight, well-draining soil, and consistent moisture.
We’re confident that you’ll be amazed at how easy and enjoyable it is to grow your own pink radishes in containers. So, grab your seeds, your container, and your potting mix, and get ready to experience the joy of homegrown goodness.
We encourage you to try this DIY container gardening trick and share your experiences with us! Let us know what varieties you tried, what challenges you faced, and what successes you celebrated. Share your photos and tips in the comments below. We can’t wait to see your beautiful radish gardens! Happy gardening!
Frequently Asked Questions (FAQ)
What size container do I need for growing pink radishes?
A container that is at least 6 inches deep and 6 inches wide is generally sufficient for growing pink radishes. However, a larger container, such as a 12-inch pot, will provide more room for the roots to develop and can accommodate more plants. The key is to ensure that the container has adequate drainage holes to prevent waterlogging, which can lead to root rot. If you’re planning on growing multiple radish plants in the same container, choose a wider container to allow for sufficient spacing between the plants. Remember, the larger the container, the more stable the growing environment will be, especially in hot or windy conditions.
How much sunlight do pink radishes need?
Pink radishes thrive in full sun, which means they need at least 6 hours of direct sunlight per day. However, they can also tolerate partial shade, especially in hotter climates. If you live in an area with intense summer heat, providing some afternoon shade can help prevent the radishes from bolting (going to seed prematurely), which can make them bitter. Observe your plants closely and adjust their location as needed to ensure they are receiving adequate sunlight without being scorched. If you’re growing radishes indoors, you may need to supplement with grow lights to provide sufficient light.
What type of soil is best for growing radishes in containers?
The best type of soil for growing radishes in containers is a well-draining, loamy potting mix. Avoid using garden soil, as it can be too heavy and compact, which can hinder root development. A good potting mix will retain moisture while still allowing for adequate drainage. You can also amend your potting mix with compost or other organic matter to improve its fertility and drainage. A slightly acidic to neutral pH (around 6.0 to 7.0) is ideal for radishes.
How often should I water my container radishes?
Radishes need consistent moisture to grow properly. Water your container radishes regularly, especially during hot or dry weather. The soil should be kept consistently moist but not waterlogged. Check the soil moisture by sticking your finger about an inch into the soil. If it feels dry, it’s time to water. Avoid letting the soil dry out completely, as this can cause the radishes to become tough and bitter. Overwatering, on the other hand, can lead to root rot. Adjust your watering schedule based on the weather conditions and the size of your container.
How long does it take for pink radishes to mature?
Pink radishes are known for their quick growth. Most varieties mature in just 3 to 4 weeks. This makes them a great option for impatient gardeners or those who want to harvest quickly. Check the seed packet for the specific maturity time of your chosen variety. You can start harvesting radishes as soon as they reach a usable size. Don’t wait too long to harvest, as radishes can become woody and bitter if left in the ground for too long.
How do I prevent radishes from becoming too spicy?
The spiciness of radishes is influenced by several factors, including temperature, moisture, and soil fertility. Hot weather and dry soil can contribute to a more pungent flavor. To prevent radishes from becoming too spicy, ensure they receive consistent moisture and are grown in fertile soil. Providing some afternoon shade in hot climates can also help. Harvesting radishes promptly when they reach maturity can also prevent them from becoming overly spicy.
Can I grow radishes in containers during the winter?
Yes, you can grow radishes in containers during the winter, especially in milder climates. Radishes are cool-season crops that can tolerate light frost. If you live in an area with harsh winters, you can grow radishes indoors under grow lights or in a greenhouse. Choose a sunny location for your container radishes and protect them from extreme cold.
What are some common pests and diseases that affect radishes?
Radishes are generally pest-resistant, but they can be susceptible to certain pests and diseases, such as flea beetles, root maggots, and fungal diseases. Flea beetles can damage the leaves of radishes, while root maggots can burrow into the roots. Fungal diseases can cause leaf spots or root rot. To prevent pest and disease problems, practice good sanitation, such as removing plant debris and weeds. You can also use organic pest control methods, such as insecticidal soap or neem oil, to control pests. Ensure good air circulation to prevent fungal diseases.
Can I eat the radish greens?
Yes, radish greens are edible and nutritious! They have a peppery flavor similar to the radishes themselves. You can use radish greens in salads, soups, or stir-fries. They are a good source of vitamins and minerals. Make sure to wash the greens thoroughly before eating them.
How do I know when my radishes are ready to harvest?
You’ll know your radishes are ready to harvest when the root is about 1 inch in diameter. Gently brush away some soil from the top of the radish to check its size. If it’s the size you want, gently pull the radish from the soil. If the soil is dry, water it before harvesting to make it easier to pull the radishes. Don’t wait too long to harvest, as radishes can become woody and bitter if left in the ground for too long.
Leave a Comment