

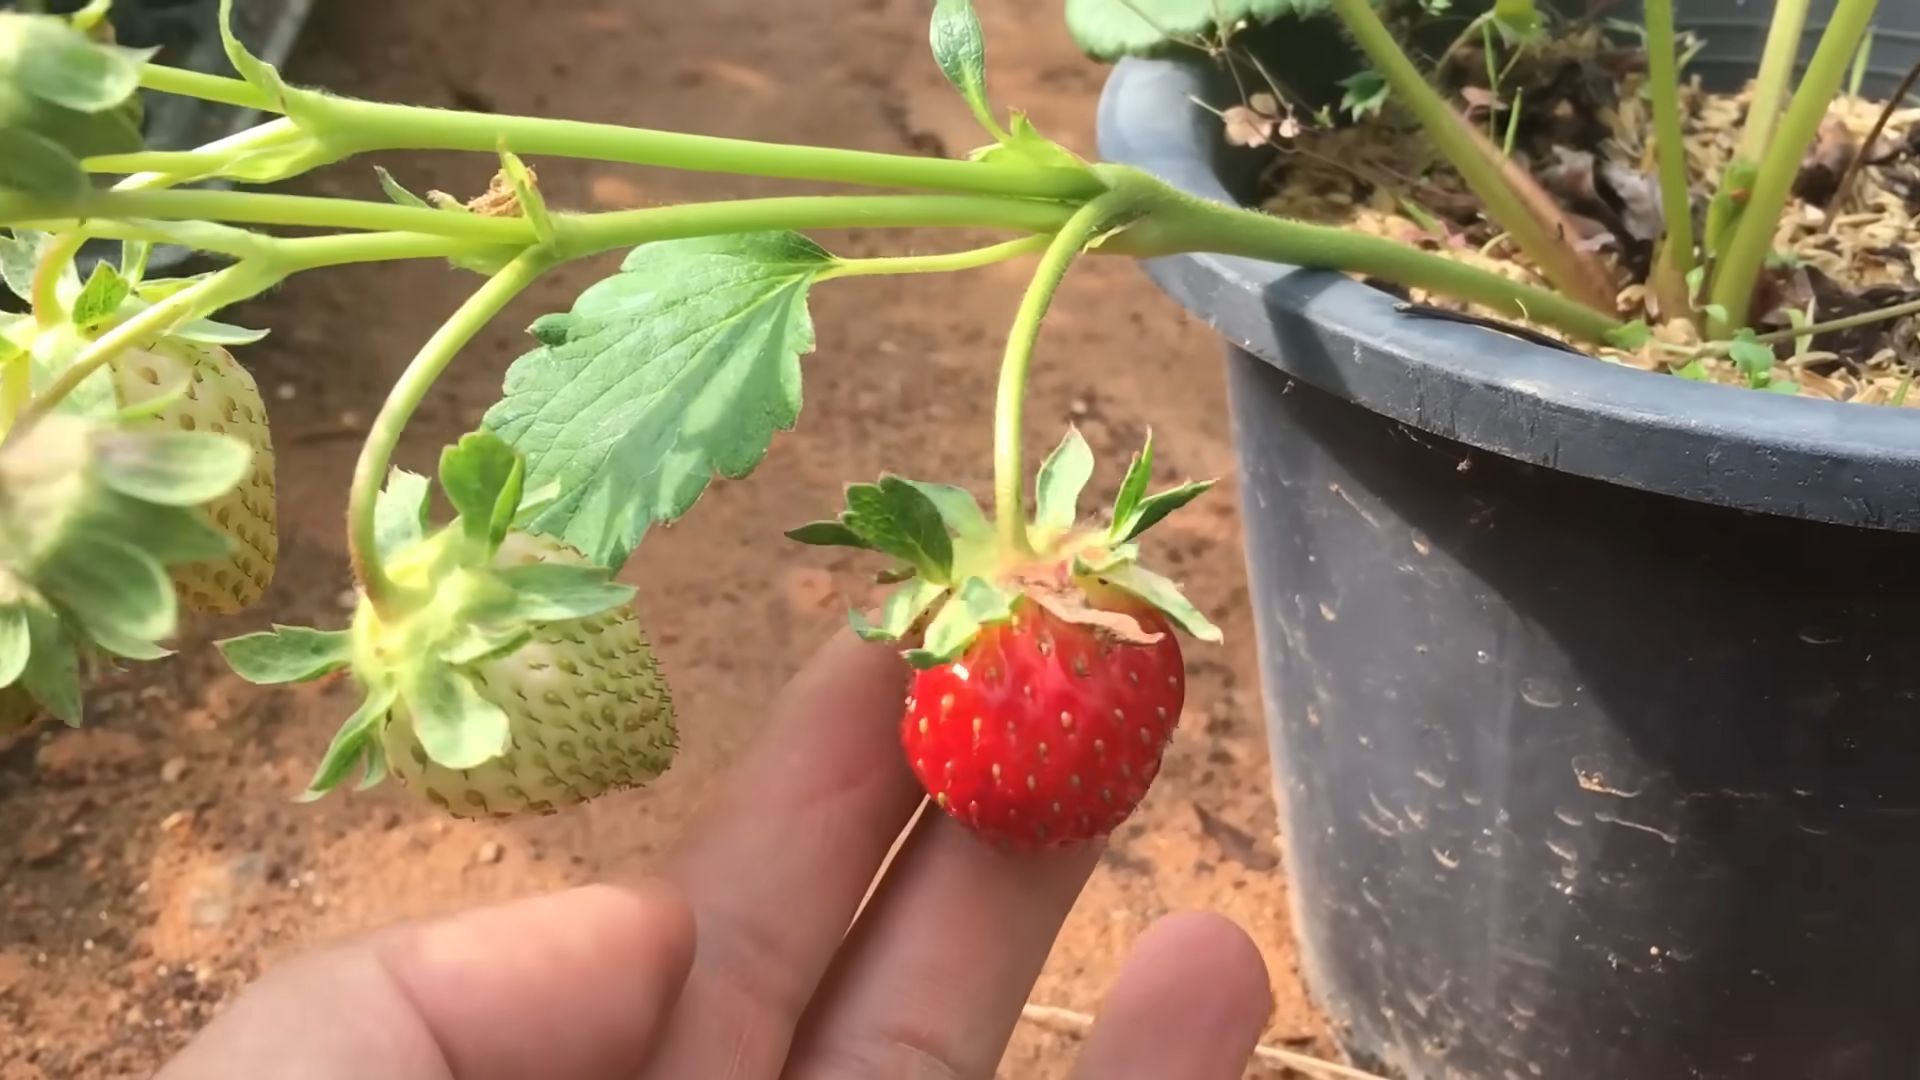
Planting strawberries from seed might seem like a daunting task, but trust me, the reward of plucking your own juicy, sun-ripened berries straight from your garden is absolutely worth the effort! For centuries, strawberries have been cherished not just for their delicious flavor, but also for their vibrant color and the joy they bring to gardens around the world. From ancient Roman gardens to modern-day backyard plots, these little red gems have always held a special place in our hearts.
But let’s be honest, buying strawberry plants can get expensive, and sometimes the selection at your local nursery is limited. That’s where the magic of DIY comes in! I’m going to show you some simple, yet effective tricks and hacks to successfully start planting strawberries from seed. Imagine the satisfaction of nurturing your own strawberry plants from tiny seeds into thriving, fruit-bearing bushes. Not only will you save money, but you’ll also have complete control over the varieties you grow, ensuring a bountiful harvest of your favorite strawberries.
Ready to ditch the store-bought plants and embark on a rewarding gardening adventure? Let’s get our hands dirty and unlock the secrets to successfully growing strawberries from seed!
DIY Floating Shelves: A Simple Guide to Adding Style and Storage
Okay, let’s dive into building some awesome floating shelves! I’ve always loved the clean, minimalist look of floating shelves, and they’re surprisingly easy to make yourself. This guide will walk you through every step, from gathering your materials to proudly displaying your favorite items.
Materials You’ll Need
Before we get started, let’s make sure you have everything you need. This is crucial for a smooth and enjoyable building experience.
* Wood for the Shelves: Choose your wood wisely! I recommend using solid wood like pine, oak, or maple. The thickness will depend on how much weight you plan to put on the shelves. For most purposes, a 1-inch thick board is perfect. You’ll also need to decide on the length and depth of your shelves. I usually go for something between 6-12 inches deep and 24-48 inches long, but it’s totally up to you and your space.
* Wood for the Mounting Brackets: This wood needs to be strong and sturdy. I often use 2×4 lumber for this, as it provides excellent support. You’ll need enough to create the internal brackets that will attach to the wall.
* Screws: You’ll need a variety of screws.
* Wood screws (1 1/4 inch and 2 1/2 inch) for assembling the shelf and attaching the brackets to the shelf.
* Drywall screws (3 inch) for attaching the mounting brackets to the wall studs.
* Wood Glue: This is essential for creating strong, lasting bonds between the wood pieces.
* Wood Filler: For filling any nail holes or imperfections in the wood.
* Sandpaper: Various grits (80, 120, 220) for smoothing the wood.
* Paint or Stain: Choose your favorite color or stain to match your decor.
* Polyurethane or Varnish (Optional): For sealing and protecting the wood.
Tools You’ll Need
Having the right tools makes all the difference. Here’s what I recommend:
* Stud Finder: Absolutely essential for finding the wall studs to securely mount your shelves.
* Drill: For pre-drilling holes and driving screws.
* Screwdriver: For manually tightening screws (optional, but sometimes helpful).
* Saw: For cutting the wood to the desired lengths. A miter saw is ideal, but a hand saw will work too.
* Measuring Tape: For accurate measurements.
* Level: To ensure your shelves are perfectly level.
* Clamps: For holding the wood pieces together while the glue dries.
* Safety Glasses: Always protect your eyes!
* Dust Mask: To avoid inhaling sawdust.
* Sanding Block: Makes sanding easier and more even.
* Paintbrushes or Rags: For applying paint or stain.
Building the Mounting Brackets
This is the backbone of your floating shelf, so let’s get it right!
1. Measure and Cut the Brackets: Determine the length of your shelf and subtract a few inches (usually 2-3 inches) to allow the shelf to slide over the brackets. This will be the length of your main support piece. Then, cut the 2×4 lumber to this length. You’ll need at least two brackets per shelf, and possibly more for longer shelves (every 16-24 inches is a good rule of thumb). Also, cut smaller pieces of 2×4 to act as supports that will attach to the main support piece and extend into the shelf. These should be about 4-6 inches long.
2. Assemble the Brackets: Apply wood glue to the ends of the smaller support pieces and attach them to the main support piece, creating a “T” shape. Use screws to reinforce the glue joint. Make sure the supports are evenly spaced along the main support piece. I usually place one at each end and then space the others evenly in between.
3. Pre-Drill Holes: Pre-drill holes through the main support piece of the bracket. These holes will be used to attach the bracket to the wall studs. Make sure the holes are large enough for your drywall screws.
Constructing the Shelf Box
Now, let’s build the outer shell of the shelf.
1. Cut the Wood: Cut the top, bottom, and side pieces of the shelf to the desired dimensions. Remember to account for the thickness of the wood when calculating the dimensions. For example, if you want a shelf that is 10 inches deep and you are using 1-inch thick wood, you’ll need to cut the top and bottom pieces to 10 inches deep, and the side pieces to 8 inches deep (10 inches – 1 inch – 1 inch).
2. Assemble the Box: Apply wood glue to the edges of the side pieces and attach them to the top and bottom pieces, forming a box. Use clamps to hold the pieces together while the glue dries.
3. Reinforce the Joints: Once the glue is dry, use screws to reinforce the joints. Pre-drill holes to prevent the wood from splitting.
4. Sand the Shelf: Sand the entire shelf with 80-grit sandpaper to remove any rough edges or imperfections. Then, sand with 120-grit sandpaper to smooth the surface. Finally, sand with 220-grit sandpaper for an ultra-smooth finish.
5. Fill Holes: Use wood filler to fill any nail holes or imperfections in the wood. Let the wood filler dry completely, and then sand it smooth.
Finishing the Shelf
Time to make your shelf look beautiful!
1. Apply Primer (Optional): If you’re painting the shelf, apply a coat of primer to help the paint adhere better. Let the primer dry completely.
2. Paint or Stain: Apply your chosen paint or stain to the shelf. Follow the manufacturer’s instructions for application and drying times. I usually apply two coats for a richer color and better coverage.
3. Apply Polyurethane or Varnish (Optional): If you want to protect the wood and give it a glossy finish, apply a coat of polyurethane or varnish. Let it dry completely. Lightly sand between coats for an even smoother finish.
Installing the Mounting Brackets
This is where the magic happens!
1. Locate the Wall Studs: Use a stud finder to locate the wall studs where you want to mount your shelf. Mark the location of the studs with a pencil.
2. Position the Brackets: Hold the mounting brackets against the wall, aligning them with the marked stud locations. Use a level to ensure the brackets are perfectly level.
3. Attach the Brackets: Pre-drill holes through the wall and into the studs. Then, use drywall screws to attach the brackets to the wall. Make sure the screws are long enough to penetrate deep into the studs for a secure hold.
4. Test the Brackets: Before sliding the shelf onto the brackets, test the brackets to make sure they are securely attached to the wall. Apply some weight to the brackets to see if they can support it.
Attaching the Shelf to the Brackets
Almost there!
1. Slide the Shelf onto the Brackets: Carefully slide the shelf onto the mounting brackets. Make sure the shelf is snug against the wall.
2. Secure the Shelf (Optional): For added security, you can use small screws to attach the shelf to the brackets from underneath. Pre-drill holes through the bottom of the shelf and into the brackets. Then, drive the screws in.
Final Touches
Now, stand back and admire your handiwork!
1. Check for Level: Use a level to make sure the shelf is perfectly level. If it’s not, you can shim the brackets slightly to adjust the level.
2. Add Your Decorations: Now comes the fun part! Decorate your shelf with your favorite books, plants, photos, and other decorative items.
3. Enjoy Your New Floating Shelf! You did it! You’ve successfully built and installed your own floating shelf. Now you can enjoy the added storage and style it brings to your space.
Tips and Tricks
Here are a few extra tips to help you along the way:
* Use a Countersink Bit: When pre-drilling holes for screws, use a countersink bit to create a small recess for the screw head. This will help the screw sit flush with the surface of the wood.
* Don’t Over-Tighten Screws: Over-tightening screws can strip the threads or split the wood. Tighten the screws until they are snug, but not too tight.
* Use a Wood Conditioner: If you’re staining the shelf, apply a wood conditioner before staining. This will help the stain absorb
Conclusion
So, there you have it! Planting strawberries from seed might seem daunting at first, but with a little patience and the right approach, you can cultivate your own delicious, homegrown berries. This DIY method offers a level of satisfaction that you simply can’t get from buying starts at the nursery. Imagine the pride you’ll feel serving up a bowl of vibrant, juicy strawberries that you nurtured from the tiniest of seeds.
This isn’t just about saving money (though that’s certainly a perk!). It’s about connecting with the natural world, understanding the life cycle of a plant, and enjoying the unparalleled flavor of truly fresh produce. Plus, starting from seed gives you access to a wider variety of strawberry cultivars than you might find locally.
Consider experimenting with different strawberry varieties to find your perfect flavor profile. Alpine strawberries, with their intense aroma and small size, are a delightful option for containers. Everbearing varieties will provide you with a continuous harvest throughout the growing season, while June-bearing types offer a larger, concentrated yield. You can also try different soil mixes to see what works best in your specific climate and growing conditions. Some gardeners swear by adding a bit of bone meal to the soil to promote strong root development.
Don’t be afraid to get creative with your planting setup! Strawberries thrive in hanging baskets, raised beds, and even vertical gardens. Just make sure they have plenty of sunlight and well-draining soil. You can even use companion planting to deter pests and attract beneficial insects. Marigolds, for example, are known to repel nematodes, while basil can help to keep aphids away.
The key to success with planting strawberries from seed is patience and consistency. Don’t get discouraged if your first attempt isn’t perfect. Every gardener learns through trial and error. The important thing is to keep learning, keep experimenting, and keep enjoying the process.
We wholeheartedly encourage you to give this DIY trick a try. It’s a rewarding experience that will connect you with nature and provide you with delicious, homegrown strawberries for years to come. Once you’ve harvested your first batch, be sure to share your experience with us! We’d love to hear about your successes, your challenges, and any tips or tricks you’ve discovered along the way. Share your photos and stories in the comments below – let’s build a community of strawberry-growing enthusiasts! Let us know what variety you chose and what challenges you faced. Your experience can help other gardeners succeed in their own strawberry-growing adventures.
Ready to embark on your strawberry-growing journey?
Don’t hesitate – grab some seeds, prepare your soil, and get planting! You’ll be amazed at what you can achieve with a little effort and a lot of love. Happy gardening!
FAQ
Q: How long does it take for strawberry seeds to germinate?
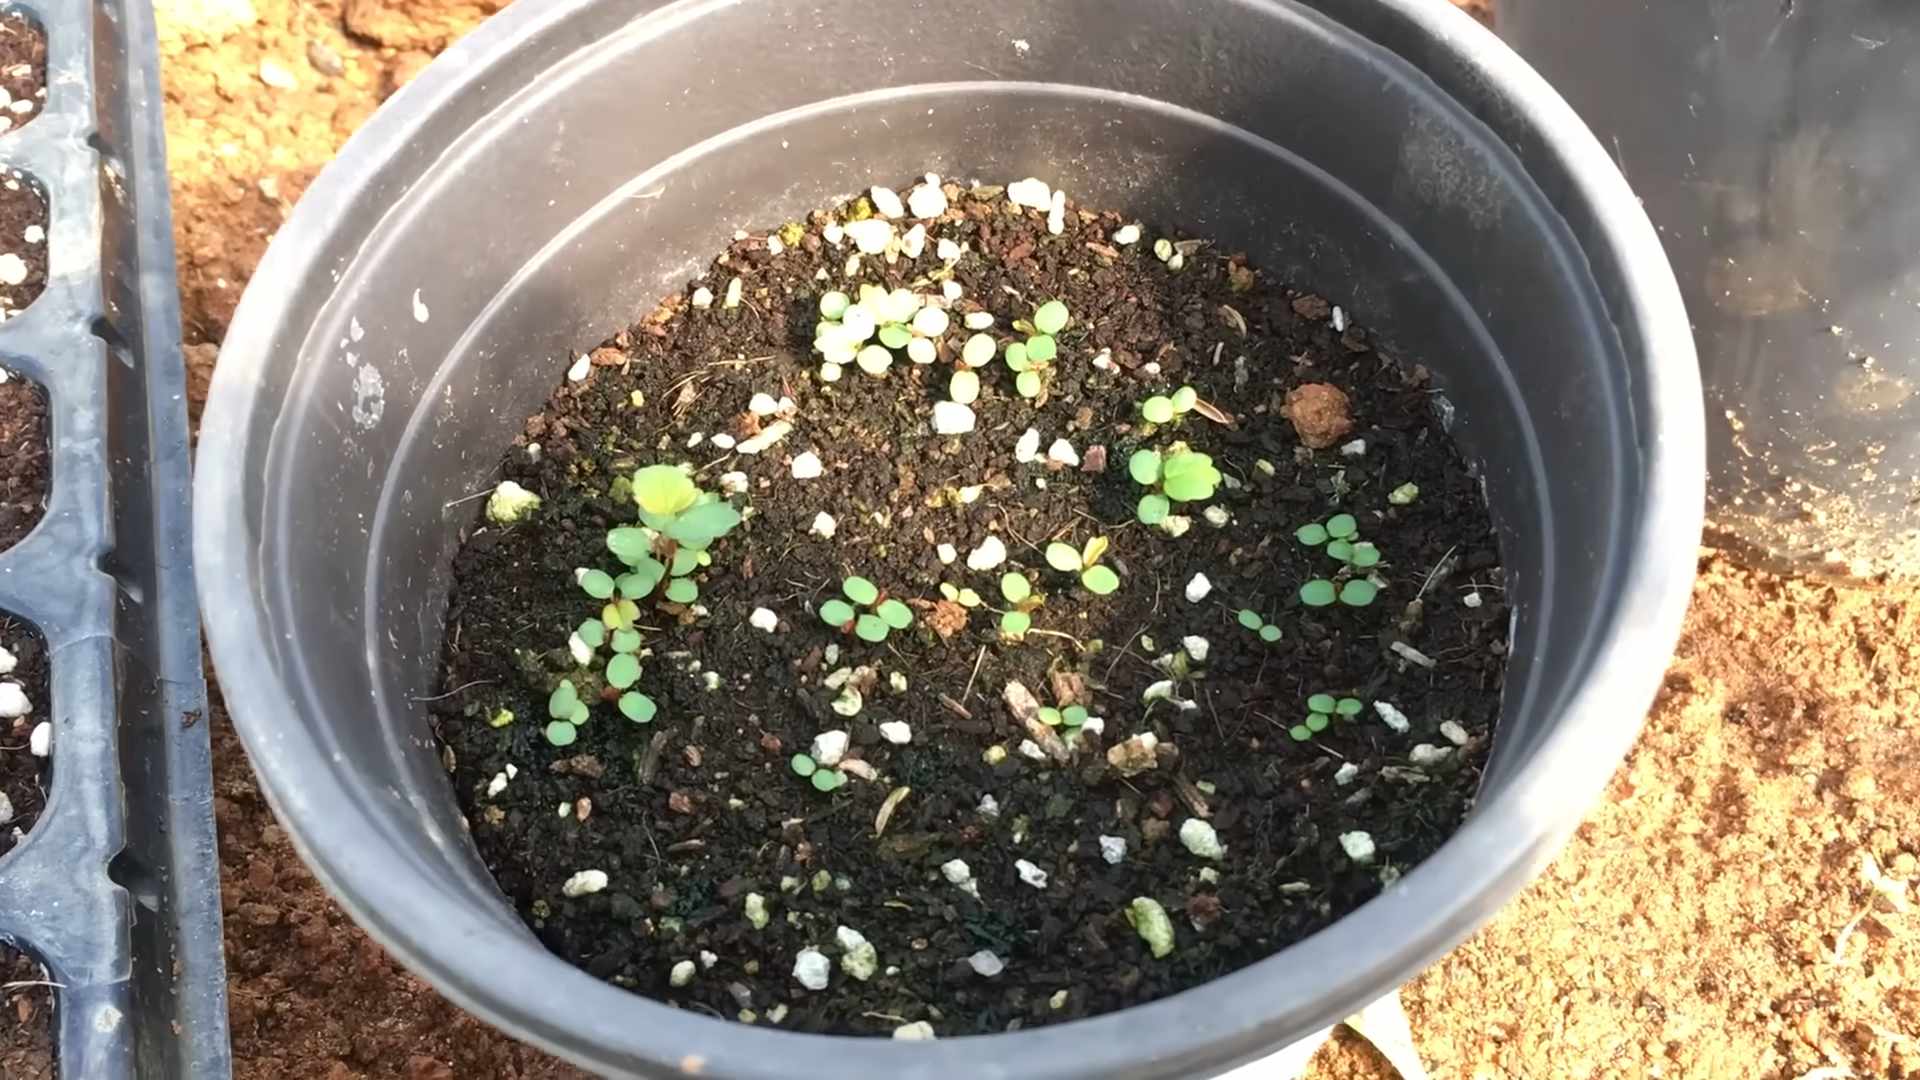
A: Germination time for strawberry seeds can vary quite a bit, typically ranging from 1 to 6 weeks. Several factors influence this, including the freshness of the seeds, the temperature, and the moisture level of the soil. It’s crucial to keep the soil consistently moist but not waterlogged during this period. Using a humidity dome or covering the seed tray with plastic wrap can help maintain the necessary moisture levels. Remember that patience is key! Some seeds may sprout quickly, while others may take longer. Don’t give up if you don’t see any action right away.
Q: What is the best soil to use for planting strawberry seeds?
A: Strawberries thrive in well-draining, slightly acidic soil with a pH between 5.5 and 6.5. A good starting mix is a combination of peat moss, perlite, and vermiculite. This mixture provides excellent drainage and aeration, which are essential for healthy root development. You can also add some compost to the mix to provide additional nutrients. Avoid using heavy clay soils, as they can retain too much moisture and lead to root rot. If you’re planting in containers, choose a potting mix specifically formulated for fruits and vegetables.
Q: How much sunlight do strawberry seedlings need?
A: Strawberry seedlings require plenty of sunlight to thrive. Aim for at least 6-8 hours of direct sunlight per day. If you’re starting your seeds indoors, you’ll likely need to supplement with grow lights. Position the lights a few inches above the seedlings and keep them on for 14-16 hours per day. As the seedlings grow, you can gradually move them closer to a sunny window or transplant them outdoors once the weather is warm enough. When transplanting outdoors, be sure to harden off the seedlings gradually by exposing them to increasing amounts of sunlight each day.
Q: When is the best time to plant strawberry seeds?
A: The best time to plant strawberry seeds depends on your climate. In general, you should start your seeds indoors 8-10 weeks before the last expected frost. This will give the seedlings enough time to develop before they’re transplanted outdoors. If you live in a warmer climate, you can start your seeds directly outdoors in the early spring or fall. Just be sure to protect the seedlings from extreme temperatures and harsh weather conditions.
Q: How often should I water strawberry seedlings?
A: Strawberry seedlings need consistent moisture to thrive, but it’s important to avoid overwatering. Water the seedlings whenever the top inch of soil feels dry to the touch. Use a gentle watering can or spray bottle to avoid disturbing the delicate roots. Be sure to provide adequate drainage to prevent waterlogging. Overwatering can lead to root rot and other fungal diseases.
Q: Do I need to fertilize strawberry seedlings?
A: Yes, strawberry seedlings benefit from regular fertilization. Start fertilizing about 2-3 weeks after the seedlings have emerged. Use a balanced liquid fertilizer diluted to half strength. Apply the fertilizer every 2-3 weeks during the growing season. Avoid over-fertilizing, as this can burn the roots. You can also amend the soil with compost or other organic matter to provide a slow-release source of nutrients.
Q: How do I transplant strawberry seedlings?
A: Once your strawberry seedlings have developed several sets of true leaves and the weather is warm enough, you can transplant them outdoors. Choose a sunny location with well-draining soil. Dig a hole that is slightly larger than the root ball of the seedling. Gently remove the seedling from its container and loosen the roots. Place the seedling in the hole and backfill with soil. Water thoroughly and mulch around the base of the plant to help retain moisture and suppress weeds. Space the plants about 12-18 inches apart.
Q: What are some common pests and diseases that affect strawberry plants?
A: Strawberry plants are susceptible to a variety of pests and diseases, including aphids, spider mites, slugs, snails, gray mold, and leaf spot. Regularly inspect your plants for signs of infestation or disease. If you spot any problems, take action immediately. You can use organic pest control methods, such as insecticidal soap or neem oil, to control pests. For diseases, remove infected leaves and improve air circulation around the plants.
Q: Can I grow strawberries in containers?
A: Yes, strawberries thrive in containers! Choose a container that is at least 12 inches in diameter and has good drainage. Use a potting mix specifically formulated for fruits and vegetables. Be sure to provide the plants with plenty of sunlight and water regularly. Container-grown strawberries may need to be fertilized more frequently than those grown in the ground.
Q: What are some tips for getting a good strawberry harvest?
A: To get a good strawberry harvest, be sure to provide your plants with plenty of sunlight, water, and nutrients. Remove any runners that develop to encourage the plants to focus their energy on producing fruit. Protect the plants from pests and diseases. Harvest the berries when they are fully ripe and red. Pick the berries in the morning when they are cool and dry. Store the berries in the refrigerator and use them within a few days.

Leave a Comment