

Regrow green onions at home? Absolutely! Imagine never having to buy green onions again. Sounds like a dream, right? Well, it’s a dream that can easily become your reality with this simple and incredibly rewarding DIY trick. For centuries, resourceful gardeners have been finding ways to extend the life of their produce, and regrowing green onions is one of the easiest and most satisfying ways to participate in this tradition.
I remember my grandmother always having a little jar of green onions happily sprouting on her windowsill. It was her secret weapon for adding a fresh, zesty kick to every dish. Now, I’m sharing that secret with you! This isn’t just about saving a few bucks at the grocery store (although that’s a definite perk!). It’s about connecting with nature, reducing food waste, and experiencing the joy of nurturing something from scraps into a thriving little plant.
In today’s world, where sustainability and self-sufficiency are becoming increasingly important, learning how to regrow green onions at home is more relevant than ever. Plus, who doesn’t love a quick and easy win? This DIY project requires minimal effort, space, and resources, making it perfect for even the busiest beginner gardener. So, grab those leftover green onion ends, and let’s get started on this fun and rewarding journey!
Regrowing Green Onions: A Simple DIY Guide
Hey there, fellow green thumb enthusiasts! Are you tired of constantly buying green onions only to use a tiny bit and then watch the rest wilt away in your fridge? Well, I have a super easy and rewarding DIY hack for you: regrowing green onions from scraps! It’s not only a great way to save money, but it’s also incredibly satisfying to watch your little green onion garden flourish. Trust me, once you start, you’ll never look at a bunch of green onions the same way again.
What You’ll Need
Before we dive in, let’s gather our supplies. The beauty of this project is that you probably already have most of what you need!
* Green Onions: Obviously! Choose a bunch that looks healthy and firm. The roots are key, so make sure they’re still attached.
* A Glass or Jar: Any glass or jar that can hold the green onion roots upright will work. I like to use mason jars or even old drinking glasses.
* Water: Tap water is perfectly fine.
* Scissors or a Sharp Knife: For trimming the green onions.
* Potting Soil (Optional): If you want to eventually transplant your green onions to a pot or garden.
* A Small Pot (Optional): For transplanting.
Step-by-Step Instructions: Regrowing in Water
This is the easiest method, perfect for beginners. We’ll start by regrowing our green onions in water.
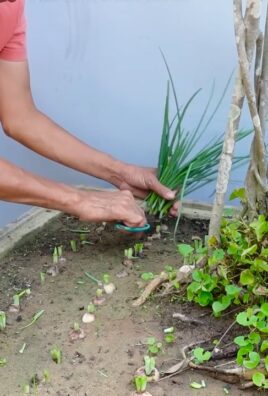
1. Prepare the Green Onions: Using your scissors or knife, cut the green onions about 1-2 inches above the roots. You want to leave enough of the white part attached to the roots so they can regrow. Don’t throw away the green tops you cut off! You can use them in your cooking right away.
2. Place in Water: Fill your glass or jar with enough water to cover the roots, but not so much that it covers the entire white part of the green onion. You want the roots submerged, but the cut end exposed to air.
3. Find a Sunny Spot: Place the glass or jar in a sunny windowsill or any area that receives plenty of light. Sunlight is essential for the green onions to regrow.
4. Change the Water Regularly: This is important to prevent bacteria growth and keep your green onions healthy. Change the water every 1-2 days. I usually do it every morning when I’m making my coffee.
5. Watch Them Grow! Within a few days, you should start to see new green shoots emerging from the cut ends. It’s so exciting to watch!
6. Harvest and Repeat: Once the green onions have grown to a decent size (a few inches), you can harvest them by cutting off the green tops as needed. Leave about an inch or two of the green part so they can continue to regrow. And the best part? You can repeat this process indefinitely!
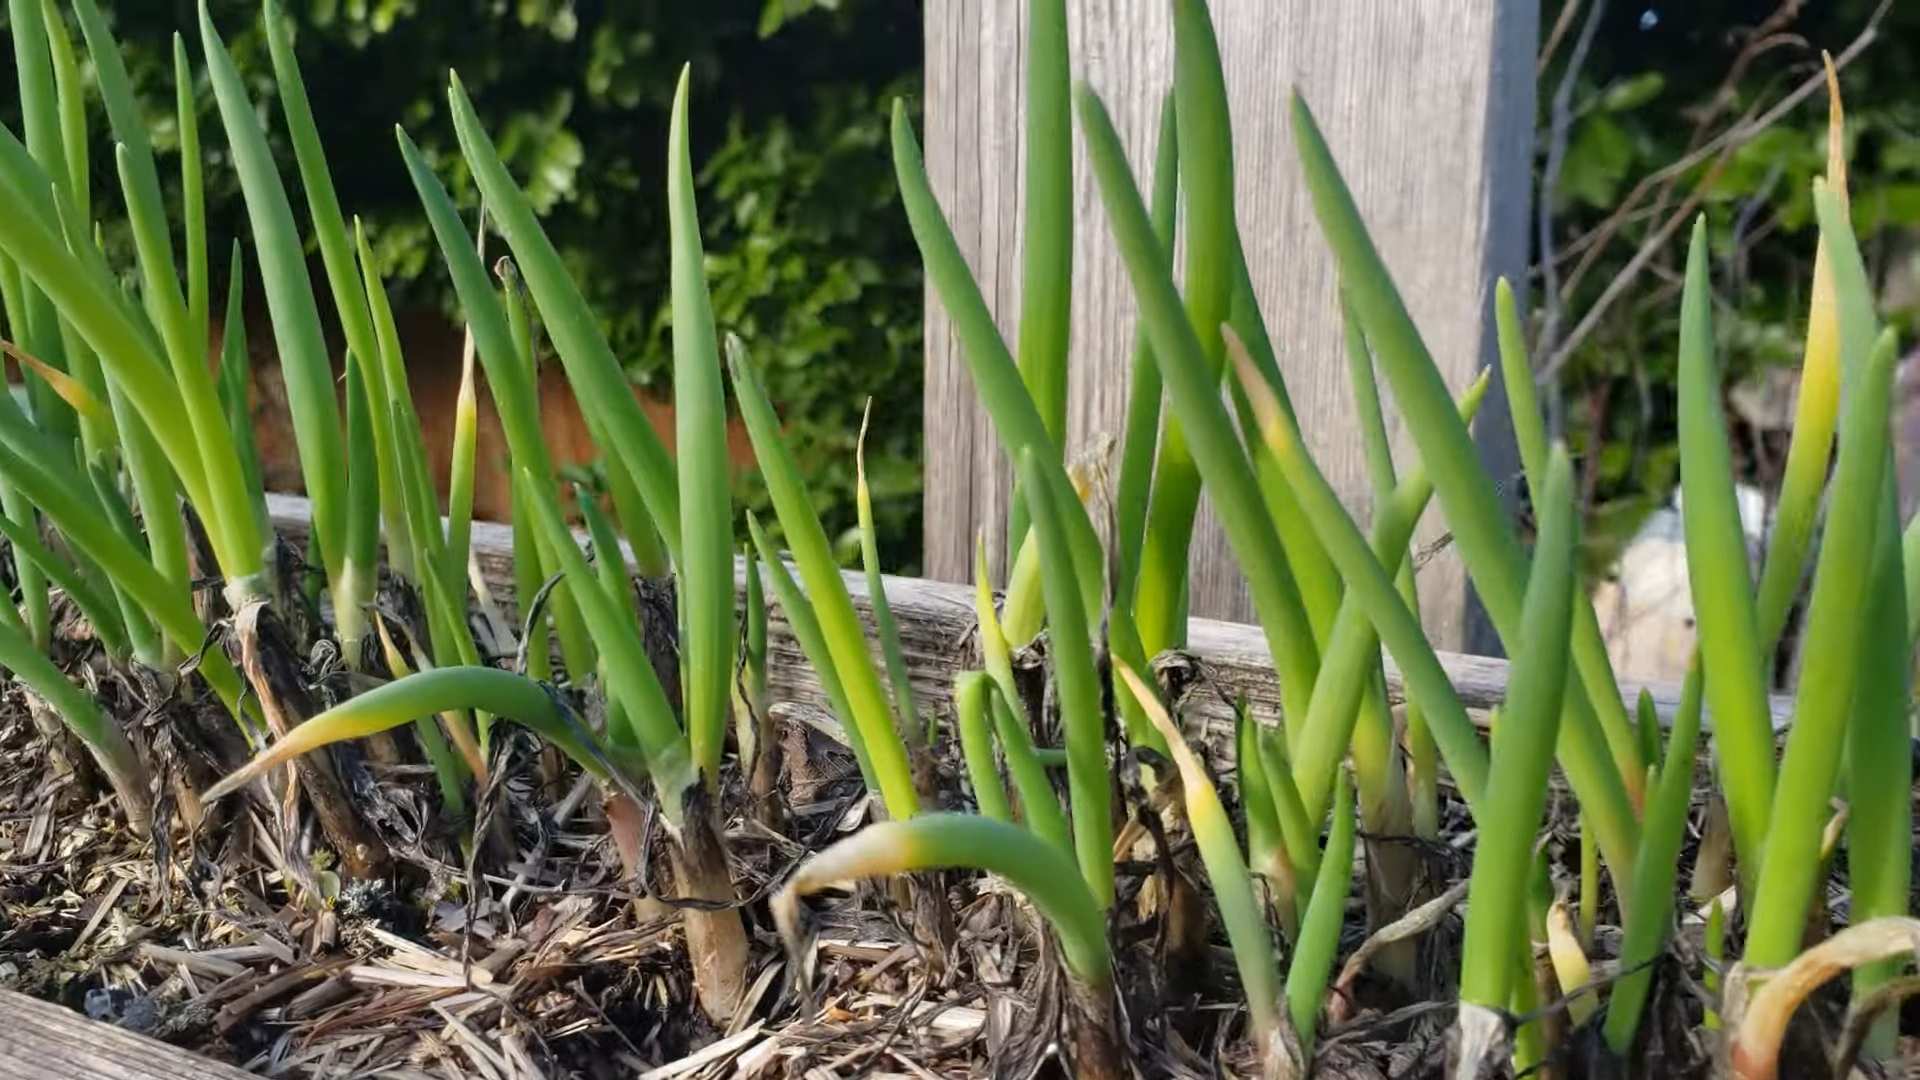
Transplanting to Soil (Optional)
While regrowing green onions in water is super convenient, transplanting them to soil can result in even stronger and more flavorful green onions. Plus, it’s a great way to have a continuous supply of fresh green onions right in your garden or on your patio.
1. Wait for Root Development: Before transplanting, make sure the roots have developed nicely in the water. You should see a good network of roots growing from the original roots.
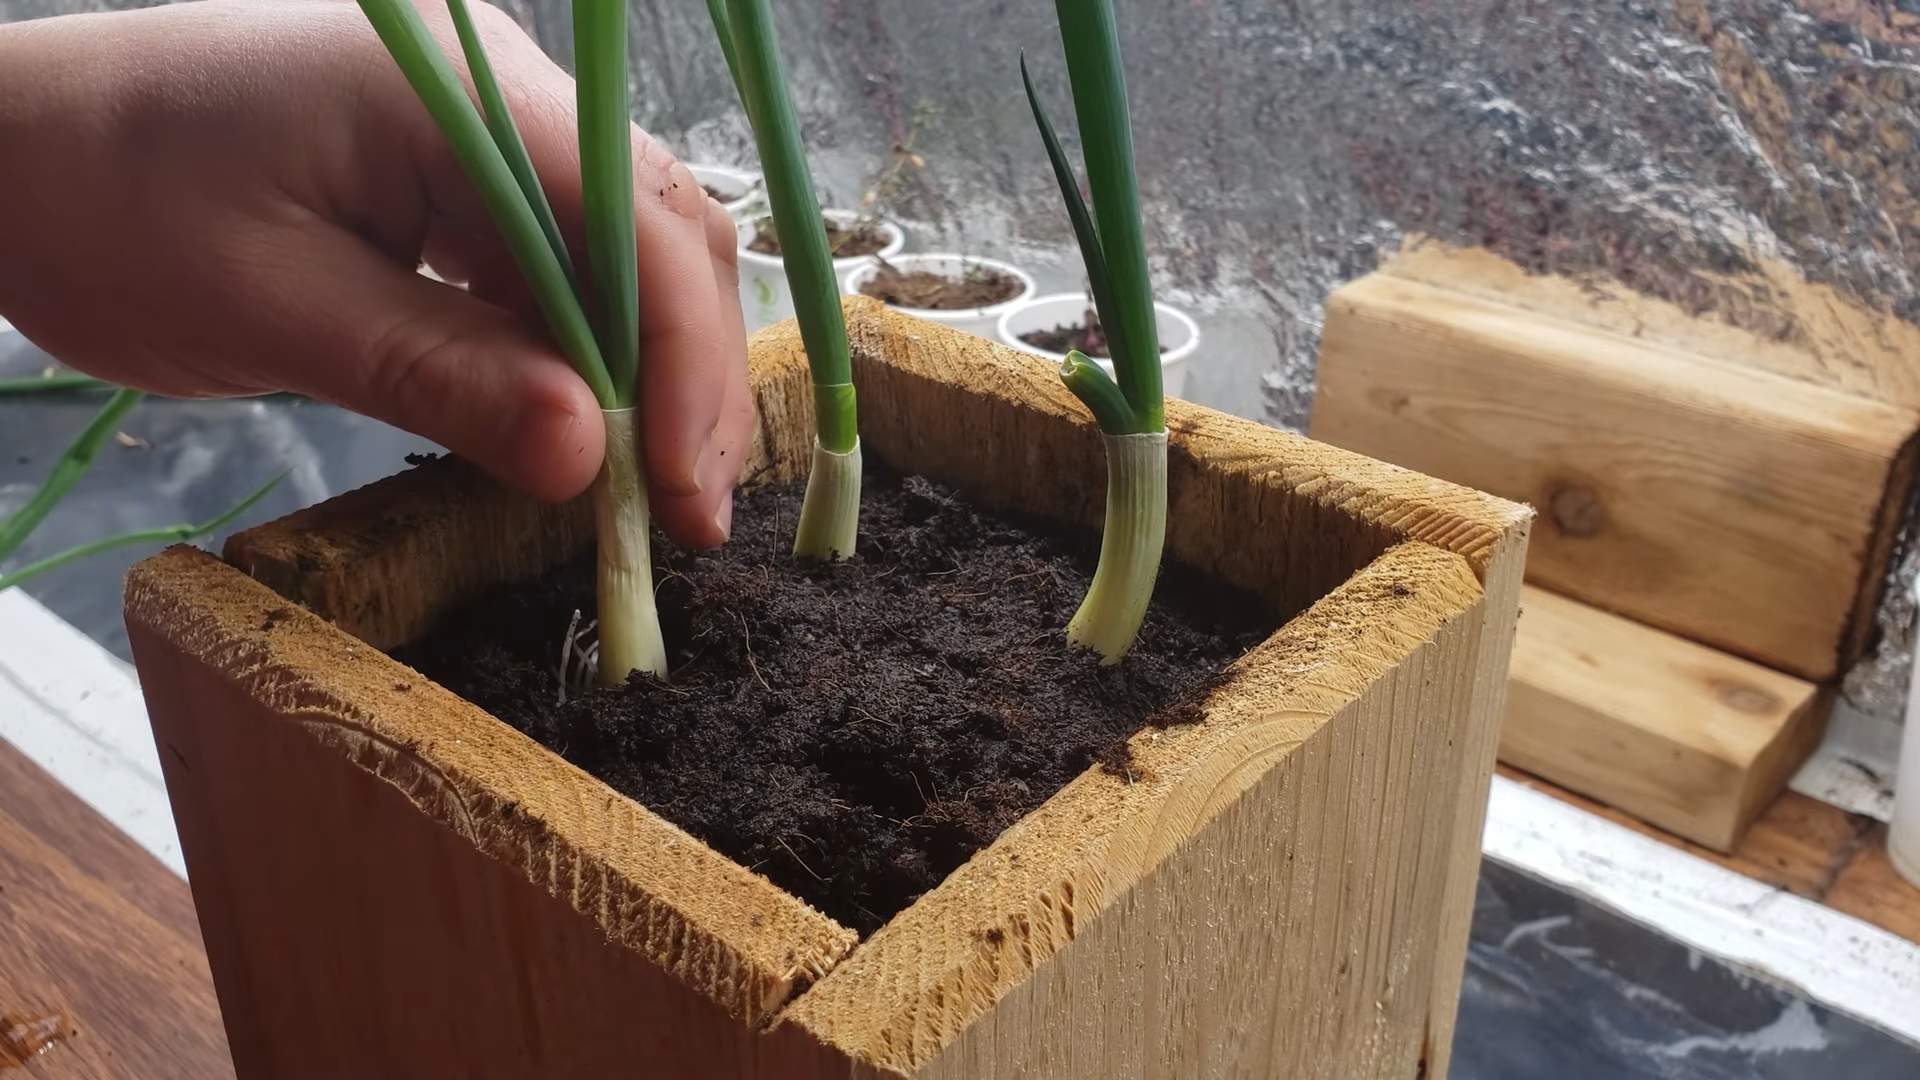
2. Prepare the Pot: Fill your small pot with potting soil. Make a small hole in the center of the soil, large enough to accommodate the green onion roots.
3. Carefully Transplant: Gently remove the green onion from the water and carefully place the roots into the hole in the soil. Cover the roots with soil, leaving the white part of the green onion exposed.
4. Water Thoroughly: Water the pot thoroughly after transplanting.
5. Find a Sunny Spot: Place the pot in a sunny location, either indoors or outdoors.
6. Water Regularly: Keep the soil consistently moist, but not soggy. Water when the top inch of soil feels dry to the touch.
7. Fertilize (Optional): To encourage even more growth, you can fertilize your green onions every few weeks with a diluted liquid fertilizer.
8. Harvest and Enjoy! Just like with the water method, you can harvest the green tops as needed. The green onions will continue to regrow, providing you with a constant supply of fresh flavor.
Troubleshooting and Tips
Even with the simplest DIY projects, sometimes things don’t go exactly as planned. Here are a few common issues you might encounter and how to fix them:
* Yellowing Leaves: Yellowing leaves can be a sign of overwatering or underwatering. Make sure the soil is consistently moist, but not soggy. If you’re regrowing in water, make sure you’re changing the water regularly. Also, ensure they are getting enough sunlight.
* Slow Growth: Slow growth can be caused by a lack of sunlight or nutrients. Make sure your green onions are in a sunny location and consider fertilizing them if you’re growing them in soil.
* Rotting Roots: Rotting roots are usually a sign of overwatering or stagnant water. Make sure you’re changing the water regularly if you’re regrowing in water, and don’t overwater if you’re growing them in soil.
* Pests: While green onions are relatively pest-resistant, they can sometimes be affected by aphids or other small insects. If you notice any pests, you can try spraying them with a diluted solution of soapy water.
Extra Tips for Success
* Choose Healthy Green Onions: Start with the best possible materials. Healthy green onions with intact roots will have a much better chance of regrowing successfully.
* Use Filtered Water: While tap water is generally fine, using filtered water can sometimes help prevent mineral buildup and keep your green onions healthier.
* Rotate Your Crops: If you’re growing green onions in soil, consider rotating your crops every few months to prevent nutrient depletion in the soil.
* Experiment with Different Varieties: There are many different varieties of green onions, so feel free to experiment and see which ones you like best.
* Don’t Be Afraid to Prune: Pruning the green tops regularly will encourage more growth and keep your green onions looking their best.
* Enjoy the Process! Regrowing green onions is a fun and rewarding project. Don’t be afraid to experiment and learn as you go.
Why This Works: The Science Behind the Magic
Okay, so you’ve got your green onions happily regrowing, but you might be wondering *why* this works. It all comes down to the plant’s ability to regenerate. Green onions, like many other plants, have cells that are capable of differentiating and forming new tissues.
The key is the root system. As long as the roots are healthy and intact, they can continue to absorb water and nutrients, which are then transported to the rest of the plant. The cut end of the green onion then sends out signals that stimulate the growth of new cells, leading to the formation of new green shoots.
Think of it like this: you’re essentially giving the green onion a second chance at life. You’re providing it with the resources it needs to continue growing, even after you’ve harvested the green tops. It’s a pretty amazing process, when you think about it!
Beyond Green Onions: Other Veggies to Regrow
Once you’ve mastered the art of regrowing green onions, you might be inspired to try regrowing other vegetables from scraps. Here are a few other easy options:
* Lettuce: Place the lettuce stump in a shallow dish of water and watch it regrow.
* Celery: Similar to lettuce, place the celery base in water.
* Garlic Sprouts: Plant garlic cloves that have started to sprout.
* Ginger: Plant a piece of ginger root with visible buds.
* Basil: Place basil cuttings in water until they develop roots.
Regrowing vegetables from scraps is a fantastic way to reduce food waste, save money, and connect with nature. It’s a simple and rewarding activity that anyone can enjoy. So, go ahead and give it a try! You might be surprised at how much you can grow.
I hope you found this guide helpful! Happy gardening!
Conclusion
So, there you have it! Regrowing green onions at home isn’t just a fun little experiment; it’s a practical, sustainable, and incredibly rewarding way to ensure you always have fresh green onions on hand. Forget those last-minute grocery store runs when all you need is a sprinkle of vibrant green goodness to elevate your dish. This simple DIY trick transforms kitchen scraps into a continuous supply of flavor, saving you money and reducing food waste – a win-win for your wallet and the planet.
But the benefits extend beyond mere convenience. Think about the satisfaction of nurturing something from seemingly nothing. Watching those little green shoots emerge from the water, reaching for the sunlight, is a miniature miracle that brightens any day. It’s a fantastic project to involve kids in, teaching them about plant life cycles and the importance of sustainability.
And don’t think you’re limited to just water propagation! Once your green onions have established a good root system in water, consider transplanting them into a pot of soil for even more robust growth and a longer lifespan. You can even experiment with different types of containers – from repurposed jars to dedicated herb planters – to find what works best for your space and aesthetic.
Want to add a little extra oomph to your regrown green onions? Try fertilizing them lightly with a diluted liquid fertilizer every few weeks once they’re in soil. This will provide them with the nutrients they need to thrive and produce even more flavorful greens. You can also experiment with different varieties of green onions. While the standard bunch from the grocery store works perfectly well, exploring heirloom varieties or those with slightly different flavor profiles can add an exciting dimension to your home gardening.
This method of regrowing green onions is truly a must-try for any home cook or gardening enthusiast. It’s easy, effective, and adds a touch of green to your kitchen windowsill.
We’re confident that once you experience the joy of harvesting your own freshly regrown green onions, you’ll be hooked! So, grab those leftover green onion ends, give them a little water and sunshine, and watch the magic happen.
We’d love to hear about your experiences! Share your photos, tips, and tricks in the comments below. Let’s build a community of green onion growers and inspire others to embrace this simple yet powerful DIY trick. What are you waiting for? Get growing!
Frequently Asked Questions (FAQ)
How long does it take to regrow green onions?
Generally, you’ll start to see noticeable regrowth within a few days. Within a week, you should have a significant amount of new green shoots. The speed of regrowth depends on factors like the amount of sunlight, water quality, and the initial health of the green onion scraps. Warmer temperatures tend to encourage faster growth. Don’t be discouraged if it takes a little longer; patience is key!
What part of the green onion do I need to regrow it?
You only need the white bulb end with the roots attached. Cut off the green tops, leaving about 2 inches of the white part intact, including the root end. This is the part that will sprout new growth. Make sure the roots are still attached; without them, the green onion won’t be able to absorb water and nutrients.
Can I regrow green onions in soil instead of water?
Yes, absolutely! While water propagation is a great way to start, transplanting your green onions to soil will allow them to grow larger and stronger. Once the roots have developed well in water (about an inch or two long), you can carefully plant them in a pot filled with well-draining potting mix. Make sure to bury the white bulb completely, leaving the green shoots exposed.
How often should I change the water when regrowing green onions in water?
It’s important to change the water every one to two days to prevent bacterial growth and keep the water fresh. Stagnant water can lead to rot and hinder growth. When you change the water, gently rinse the roots to remove any debris.
What kind of sunlight do regrowing green onions need?
Green onions thrive in bright, indirect sunlight. A windowsill that receives morning sun is ideal. Avoid placing them in direct, intense sunlight, as this can scorch the leaves. If you don’t have a sunny windowsill, you can use a grow light to provide supplemental light.
How long can I keep regrowing green onions from the same bulb?
With proper care, you can regrow green onions from the same bulb several times. However, the regrowth will eventually slow down, and the quality of the greens may diminish. After a few cycles, it’s best to start with fresh green onion scraps for optimal results.
My regrowing green onions are turning yellow. What am I doing wrong?
Yellowing leaves can indicate a few potential problems. It could be due to overwatering, underwatering, lack of nutrients, or insufficient sunlight. Make sure the water is changed regularly, the soil is well-draining (if planted in soil), and the green onions are receiving enough light. If the yellowing persists, try adding a diluted liquid fertilizer to the water or soil.
Can I use tap water to regrow green onions?
While tap water is generally fine, it’s best to use filtered or dechlorinated water if possible. Tap water can contain chlorine and other chemicals that may inhibit growth. If you’re using tap water, let it sit out for 24 hours before using it to allow the chlorine to evaporate.
Are there any other vegetables I can regrow using this method?
Yes! Many vegetables can be regrown from scraps using similar methods. Some popular options include lettuce, celery, bok choy, and garlic. Each vegetable has its own specific requirements, so be sure to research the best method for each one.
How do I harvest the regrown green onions?
Simply snip off the green tops with scissors as needed. Leave about an inch or two of the green shoots intact to allow for continued growth. Harvesting regularly will encourage the plant to produce more greens.
Can I eat the regrown green onions?
Absolutely! The regrown green onions are perfectly safe and delicious to eat. They will have the same flavor and texture as store-bought green onions. Use them in all your favorite recipes, from salads and soups to stir-fries and garnishes.
What if my green onions start to smell bad?
A foul odor usually indicates that the water is contaminated with bacteria or that the bulb is starting to rot. Immediately discard the affected green onion and start with a fresh one. Make sure to change the water regularly and avoid overcrowding the container.
Is regrowing green onions organic?
If you start with organic green onions and use organic potting mix (if transplanting to soil), then yes, your regrown green onions will be organic. This is a great way to ensure you’re eating pesticide-free produce.
Can I grow green onions indoors year-round?
Yes, you can! As long as you provide them with adequate light and water, green onions can be grown indoors year-round. This makes it a convenient and sustainable way to have fresh green onions on hand no matter the season.
Leave a Comment