

Vertical Sweet Potato Growing: Imagine harvesting a bounty of delicious, homegrown sweet potatoes from a compact space, right in your backyard or even on your balcony! Sounds too good to be true? It’s not! For centuries, gardeners have sought innovative ways to maximize yields, and the concept of vertical gardening, while recently popularized, has roots stretching back to ancient civilizations like the Hanging Gardens of Babylon.
But why should you consider vertical sweet potato growing? Well, let’s face it, traditional sweet potato patches can be sprawling and demanding. Many of us dream of fresh, organic produce but are limited by space or time. That’s where this DIY guide comes in! I’m going to show you simple, effective tricks and hacks to cultivate a thriving vertical sweet potato garden, regardless of your experience level.
This isn’t just about saving space; it’s about creating a beautiful, productive, and sustainable garden that nourishes both your body and your soul. Plus, who wouldn’t want to impress their friends and neighbors with a unique and visually stunning display of homegrown goodness? So, grab your gardening gloves, and let’s dive into the wonderful world of vertical sweet potato growing!
DIY Vertical Sweet Potato Tower: Grow More with Less Space!
Hey there, fellow gardening enthusiasts! Are you dreaming of a bountiful sweet potato harvest but short on garden space? Well, I’ve got just the project for you: a DIY vertical sweet potato tower! This ingenious method lets you grow a surprising amount of sweet potatoes in a small footprint. It’s fun, it’s relatively easy, and the results are delicious. Let’s get started!
What You’ll Need:
Before we dive in, let’s gather our supplies. This project is all about repurposing and using what you have, so feel free to adapt the materials to your liking.
* Chicken Wire or Hardware Cloth: This will form the structure of our tower. I recommend a roll that’s at least 3 feet wide. The length will depend on how tall you want your tower to be. I usually aim for around 6-8 feet of length for a good-sized tower.
* Landscape Fabric or Burlap: This will line the inside of the chicken wire to hold the soil in. You’ll need enough to completely line the inside of your chicken wire cylinder.
* Zip Ties or Wire: For securing the chicken wire and landscape fabric together. Zip ties are super convenient, but wire is a more durable option.
* Potting Soil: A good quality potting mix is crucial for healthy sweet potato growth. Avoid using garden soil, as it can compact and hinder root development. I like to mix in some compost for added nutrients.
* Sweet Potato Slips: These are the sprouts that grow from sweet potatoes. You can buy them online or at your local garden center. You can also easily grow your own from a sweet potato you already have! (More on that later).
* Watering Can or Hose: Essential for keeping your sweet potatoes hydrated.
* Gloves: To protect your hands from the chicken wire and soil.
* Measuring Tape: To ensure accurate cuts and measurements.
* Scissors or Wire Cutters: For cutting the chicken wire, landscape fabric, and zip ties.
* Optional: Stakes or Rebar: For added stability, especially if you live in a windy area.
Growing Your Own Sweet Potato Slips (Optional but Recommended!)
If you want to save some money and enjoy the full sweet potato growing experience, starting your own slips is the way to go! It’s surprisingly easy.
1. Choose a Sweet Potato: Select a healthy, organic sweet potato. Avoid any that are bruised or have soft spots.
2. Prepare the Potato: You have two options here:
* Water Method: Suspend the sweet potato in a jar or glass of water, with the bottom half submerged. You can use toothpicks to hold it in place.
* Soil Method: Bury the sweet potato horizontally in a container filled with moist potting soil, leaving the top exposed.
3. Provide Warmth and Light: Place the jar or container in a warm, sunny location.
4. Wait Patiently: It can take several weeks for slips to emerge. Keep the water level consistent or the soil moist.
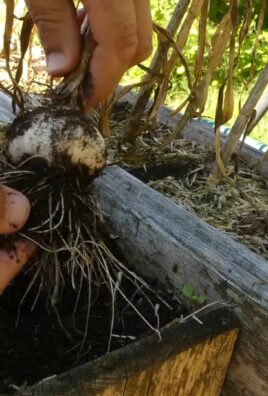
5. Harvest the Slips: Once the slips are 6-8 inches long, gently twist them off the sweet potato.
6. Root the Slips: Place the slips in a glass of water, allowing them to develop roots. This usually takes about a week.
7. Plant the Slips: Once the roots are an inch or two long, they’re ready to be planted in your vertical tower!
Building Your Vertical Sweet Potato Tower: Step-by-Step
Alright, let’s get our hands dirty and build this tower!
1. Prepare the Chicken Wire: Lay the chicken wire flat on the ground. Measure and cut a section that’s long enough to form a cylinder of your desired height and diameter. I usually aim for a diameter of around 2-3 feet. Remember to wear gloves to protect your hands from the sharp edges.
2. Line the Chicken Wire: Cut a piece of landscape fabric or burlap that’s slightly larger than the chicken wire section. This will allow for some overlap. Lay the fabric on top of the chicken wire and secure it in place using zip ties or wire. Make sure the fabric is securely attached to prevent soil from escaping. I like to overlap the fabric at the seams to create a double layer of protection.
3. Form the Cylinder: Carefully roll the chicken wire and landscape fabric into a cylinder shape. Overlap the edges of the chicken wire by a few inches and secure them together using zip ties or wire. Make sure the cylinder is sturdy and won’t collapse under the weight of the soil.
4. Secure the Base: To prevent the tower from unraveling, secure the bottom edge of the chicken wire and landscape fabric together using zip ties or wire. You can also fold the bottom edge of the landscape fabric inward to create a more secure base.
5. Position the Tower: Choose a sunny location for your sweet potato tower. Sweet potatoes need at least 6-8 hours of sunlight per day. If you live in a windy area, consider using stakes or rebar to provide extra support. Drive the stakes into the ground around the tower and attach them to the chicken wire using zip ties or wire.
6. Start Filling with Soil: Begin filling the tower with potting soil, a few inches at a time. As you add soil, gently pack it down to prevent air pockets.
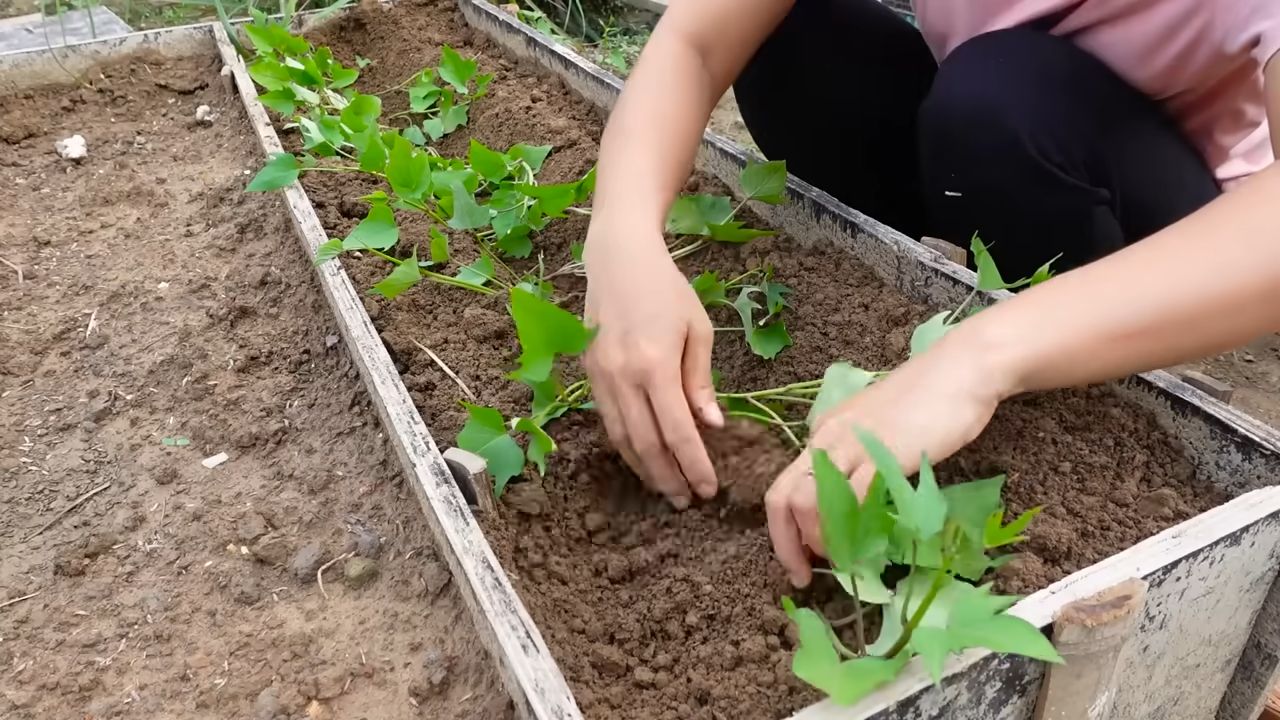
7. Plant Your Sweet Potato Slips: Once you have a few inches of soil in the tower, it’s time to plant your sweet potato slips. Make small holes in the soil, spaced about 12 inches apart. Gently insert the roots of the slips into the holes and cover them with soil.
8. Continue Filling and Planting: Continue adding soil and planting slips, working your way up the tower. You can plant slips all the way up to the top of the tower, creating a lush, green wall of sweet potato vines.
9. Water Thoroughly: After planting all the slips, water the tower thoroughly. This will help settle the soil and encourage root growth.
10. Maintain Moisture: Sweet potatoes need consistent moisture, especially during the first few weeks after planting. Water the tower regularly, especially during hot, dry weather. Check the soil moisture by sticking your finger into the soil. If it feels dry, it’s time to water.
11. Fertilize (Optional): While not essential, fertilizing your sweet potatoes can help them grow even bigger and produce a larger harvest. Use a balanced fertilizer, following the instructions on the package. I like to use a liquid fertilizer diluted in water and apply it every few weeks.
12. Monitor for Pests and Diseases: Keep an eye out for any signs of pests or diseases. Sweet potatoes are generally resistant to pests, but they can be susceptible to certain diseases, such as fungal infections. If you notice any problems, take action immediately to prevent them from spreading.
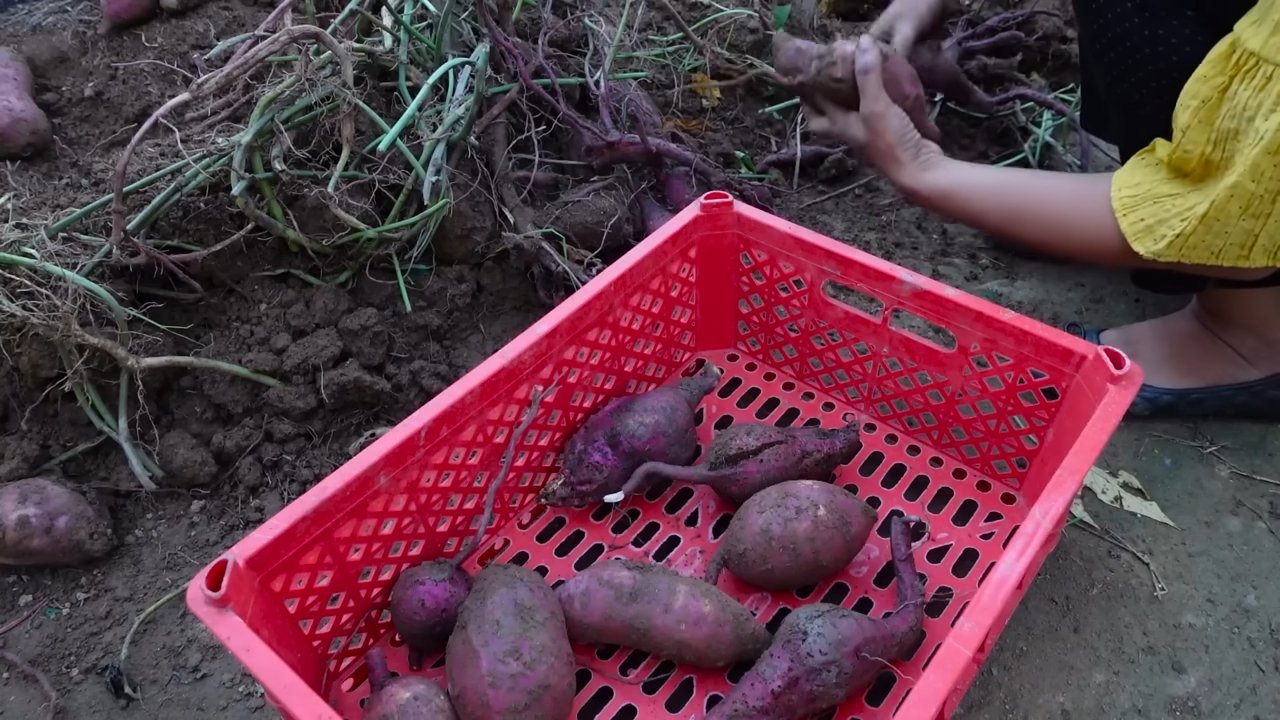
13. Harvest Time! Sweet potatoes are typically ready to harvest in the fall, about 90-120 days after planting. The leaves will start to turn yellow and the vines will begin to die back. To harvest, carefully dig around the base of the tower and gently pull out the sweet potatoes. Be careful not to damage the potatoes.
Tips for Success:
* Choose the Right Variety: Some sweet potato varieties are better suited for vertical growing than others. Look for varieties that have shorter vines and produce smaller potatoes.
* Provide Adequate Support: As the sweet potato vines grow, they can become quite heavy. Make sure your tower is sturdy enough to support the weight. You may need to add additional stakes or rebar for extra support.
* Rotate Your Crops: To prevent soil depletion, rotate your crops each year. Don’t plant sweet potatoes in the same location year after year.
* Don’t Overwater: While sweet potatoes need consistent moisture, they don’t like to be waterlogged. Overwatering can lead to root rot.
* Enjoy the Process! Growing your own sweet potatoes is a rewarding experience. Don’t be afraid to experiment and have fun!
Troubleshooting:
* Slips Not Growing: Make sure the slips are getting enough sunlight and water. Also, check the soil temperature. Sweet potatoes prefer warm soil.
* Yellowing Leaves: This could be a sign of nutrient deficiency. Try fertilizing with a balanced fertilizer.
* Pests: Inspect your plants regularly for pests. If you find any, treat them with an appropriate insecticide or organic pest control method.
* Small Potatoes: This could be due to a lack of nutrients or water. Make sure you’re fertilizing and watering regularly.
I hope this guide helps you create your own amazing vertical sweet potato tower! Happy gardening, and get ready for a delicious harvest!
Conclusion
So, there you have it! Vertical sweet potato growing isn’t just a gardening trend; it’s a game-changer for maximizing your yield, conserving space, and adding a unique aesthetic to your garden. We’ve explored the ins and outs of this innovative technique, highlighting its benefits and providing you with a step-by-step guide to get you started.
Why is this a must-try? Because it addresses several common gardening challenges. Limited space? Vertical growing solves that. Tired of battling pests and diseases that thrive in overcrowded soil? The improved air circulation in a vertical system helps minimize those issues. Want a more manageable harvest? Reaching for sweet potatoes in a tower is far easier than digging them out of the ground. Plus, let’s be honest, a sweet potato tower is a conversation starter!
But the beauty of vertical sweet potato growing lies in its adaptability. Feel free to experiment with different container types. While we’ve focused on using stacked tires or DIY towers, you could also adapt this method to large grow bags, repurposed plastic containers, or even a creatively constructed wooden frame. Consider the material’s drainage and ability to retain moisture when making your choice.
Variations abound when it comes to the soil mix. While a well-draining, nutrient-rich blend is essential, you can tailor it to your specific needs. Add more compost for extra organic matter, or incorporate perlite for enhanced drainage in wetter climates. You can also experiment with different sweet potato varieties. While Beauregard is a popular choice, explore other options like Georgia Jet or Japanese sweet potatoes to find your favorite flavor and growth habit.
Don’t be afraid to get creative with your support system. If you’re using a tower, consider adding trellises or netting to provide extra support for the vines as they grow. This will help prevent them from sprawling too much and ensure that your sweet potatoes receive adequate sunlight.
The key to success with vertical sweet potato growing is consistent monitoring and care. Regularly check the moisture levels of the soil, especially during hot weather. Water deeply whenever the top inch of soil feels dry. Fertilize every few weeks with a balanced organic fertilizer to provide your sweet potatoes with the nutrients they need to thrive. And keep an eye out for any signs of pests or diseases, addressing them promptly to prevent them from spreading.
We are confident that you’ll find vertical sweet potato growing to be a rewarding and productive experience. It’s a fantastic way to enjoy fresh, homegrown sweet potatoes, even if you have limited space. So, gather your materials, prepare your soil, and get ready to embark on this exciting gardening adventure.
We encourage you to try this DIY trick and share your experiences with us! Post photos of your sweet potato towers on social media using #VerticalSweetPotatoes and tag us so we can see your amazing creations. Let’s build a community of vertical gardeners and learn from each other’s successes and challenges. Your insights could inspire others to give this method a try and enjoy the many benefits of vertical sweet potato growing. Happy gardening!
Frequently Asked Questions (FAQ)
What are the best sweet potato varieties for vertical growing?
While many sweet potato varieties can be grown vertically, some are better suited than others. Beauregard is a popular choice due to its high yield and relatively compact growth habit. Georgia Jet is another excellent option, known for its early maturity and vibrant orange flesh. Japanese sweet potatoes, with their purple skin and white flesh, are also well-suited for vertical growing and offer a unique flavor profile. Ultimately, the best variety for you will depend on your personal preferences and local growing conditions. Consider factors such as climate, soil type, and desired flavor when making your selection.
How often should I water my vertical sweet potato tower?
Watering frequency will depend on several factors, including the weather, the type of container you’re using, and the soil mix. As a general rule, you should water deeply whenever the top inch of soil feels dry to the touch. During hot, dry weather, you may need to water daily or even twice a day. In cooler, wetter weather, you may only need to water every few days. Be sure to check the moisture levels regularly and adjust your watering schedule accordingly. Overwatering can lead to root rot, while underwatering can stunt growth and reduce yield.
What type of soil mix is best for vertical sweet potato growing?
A well-draining, nutrient-rich soil mix is essential for successful vertical sweet potato growing. A good starting point is a mix of equal parts compost, potting soil, and perlite. The compost will provide essential nutrients, the potting soil will retain moisture, and the perlite will improve drainage. You can also add other amendments, such as bone meal or rock phosphate, to provide additional phosphorus, which is important for root development. Avoid using heavy clay soils, as they can become waterlogged and inhibit root growth.
How do I fertilize my vertical sweet potato plants?
Sweet potatoes are heavy feeders and require regular fertilization to thrive. Use a balanced organic fertilizer, such as a 5-10-10 or 10-10-10 formula, every few weeks. Apply the fertilizer according to the package directions, being careful not to over-fertilize, which can burn the roots. You can also supplement with compost tea or liquid seaweed extract to provide additional nutrients and micronutrients.
How do I prevent pests and diseases in my vertical sweet potato tower?
Vertical growing can help reduce the risk of pests and diseases by improving air circulation and reducing soil contact. However, it’s still important to take preventative measures. Inspect your plants regularly for signs of pests or diseases, such as aphids, whiteflies, or fungal infections. If you spot any problems, address them promptly with organic pest control methods, such as insecticidal soap or neem oil. You can also use companion planting to deter pests and attract beneficial insects. For example, planting marigolds near your sweet potatoes can help repel nematodes.
When is the best time to harvest my vertical sweet potatoes?
Sweet potatoes are typically ready to harvest in the fall, about 90-120 days after planting. The exact timing will depend on the variety and your local growing conditions. A good indicator that your sweet potatoes are ready to harvest is when the vines start to turn yellow and die back. You can also dig up a test potato to check its size and maturity. To harvest, carefully remove the tower or container and gently dig around the base of the plants to loosen the soil. Then, carefully lift the sweet potatoes out of the soil, being careful not to damage them.
Can I grow sweet potatoes vertically in containers indoors?
Yes, you can grow sweet potatoes vertically in containers indoors, but you’ll need to provide them with adequate light and warmth. Choose a sunny location near a south-facing window, or supplement with grow lights. Use a large container with good drainage and a well-draining soil mix. Keep the soil consistently moist, but not waterlogged. Fertilize regularly with a balanced organic fertilizer. Be aware that indoor-grown sweet potatoes may not produce as large of a yield as those grown outdoors.
What do I do with the sweet potato slips after harvesting?
After harvesting your sweet potatoes, you can save the slips (the sprouts that grow from the sweet potatoes) to start new plants the following year. To do this, cut the slips from the sweet potatoes and place them in a jar of water, with the bottom end submerged. Place the jar in a sunny location and wait for roots to develop. Once the roots are a few inches long, you can transplant the slips into individual pots filled with potting soil. Keep the soil moist and warm, and fertilize regularly. Once the weather warms up in the spring, you can transplant the slips into your vertical sweet potato tower.
How can I maximize my yield when growing sweet potatoes vertically?
To maximize your yield when growing sweet potatoes vertically, focus on providing optimal growing conditions. This includes using a well-draining, nutrient-rich soil mix, watering regularly, fertilizing every few weeks, and providing adequate sunlight. You can also try pinching back the vines to encourage branching and more sweet potato production. Additionally, consider using a larger container or tower to provide more space for the roots to grow. Finally, choose a high-yielding sweet potato variety that is well-suited to your local climate.

Leave a Comment