

Vinegar and Vaseline uses might sound like ingredients for a strange science experiment, but trust me, they’re actually your secret weapons for a thriving home garden! For generations, resourceful gardeners have relied on simple, readily available items to boost their plants and tackle common problems. Think of your grandmother’s garden – chances are, she had a few tricks up her sleeve that didn’t involve expensive chemicals or fancy gadgets.
I’m excited to share some amazing DIY hacks that harness the power of these two humble ingredients. Why? Because gardening should be enjoyable and accessible to everyone! We all want lush, healthy plants, but not everyone has the time or budget for complicated solutions. These vinegar and vaseline uses are not only cost-effective, but they’re also environmentally friendly alternatives to harsh chemicals.
From keeping pests at bay to promoting faster growth, you’ll be amazed at what these everyday items can do. So, ditch the expensive garden supplies and get ready to unlock the potential of your garden with these simple, yet effective, DIY tricks!
Unleash the Power of Vinegar and Baking Soda: 10 Amazing DIY Hacks!
Hey there, fellow DIY enthusiasts! Get ready to be amazed by the incredible versatility of two common household ingredients: vinegar and baking soda. Forget expensive cleaners and specialized products – with these two powerhouses, you can tackle a surprising number of tasks around your home. I’m going to walk you through 10 of my favorite DIY hacks using vinegar and baking soda, complete with step-by-step instructions. Let’s get started!
Hack 1: Unclogging Drains Like a Pro
A clogged drain is a total nightmare, right? But before you reach for harsh chemicals, try this natural and effective solution.
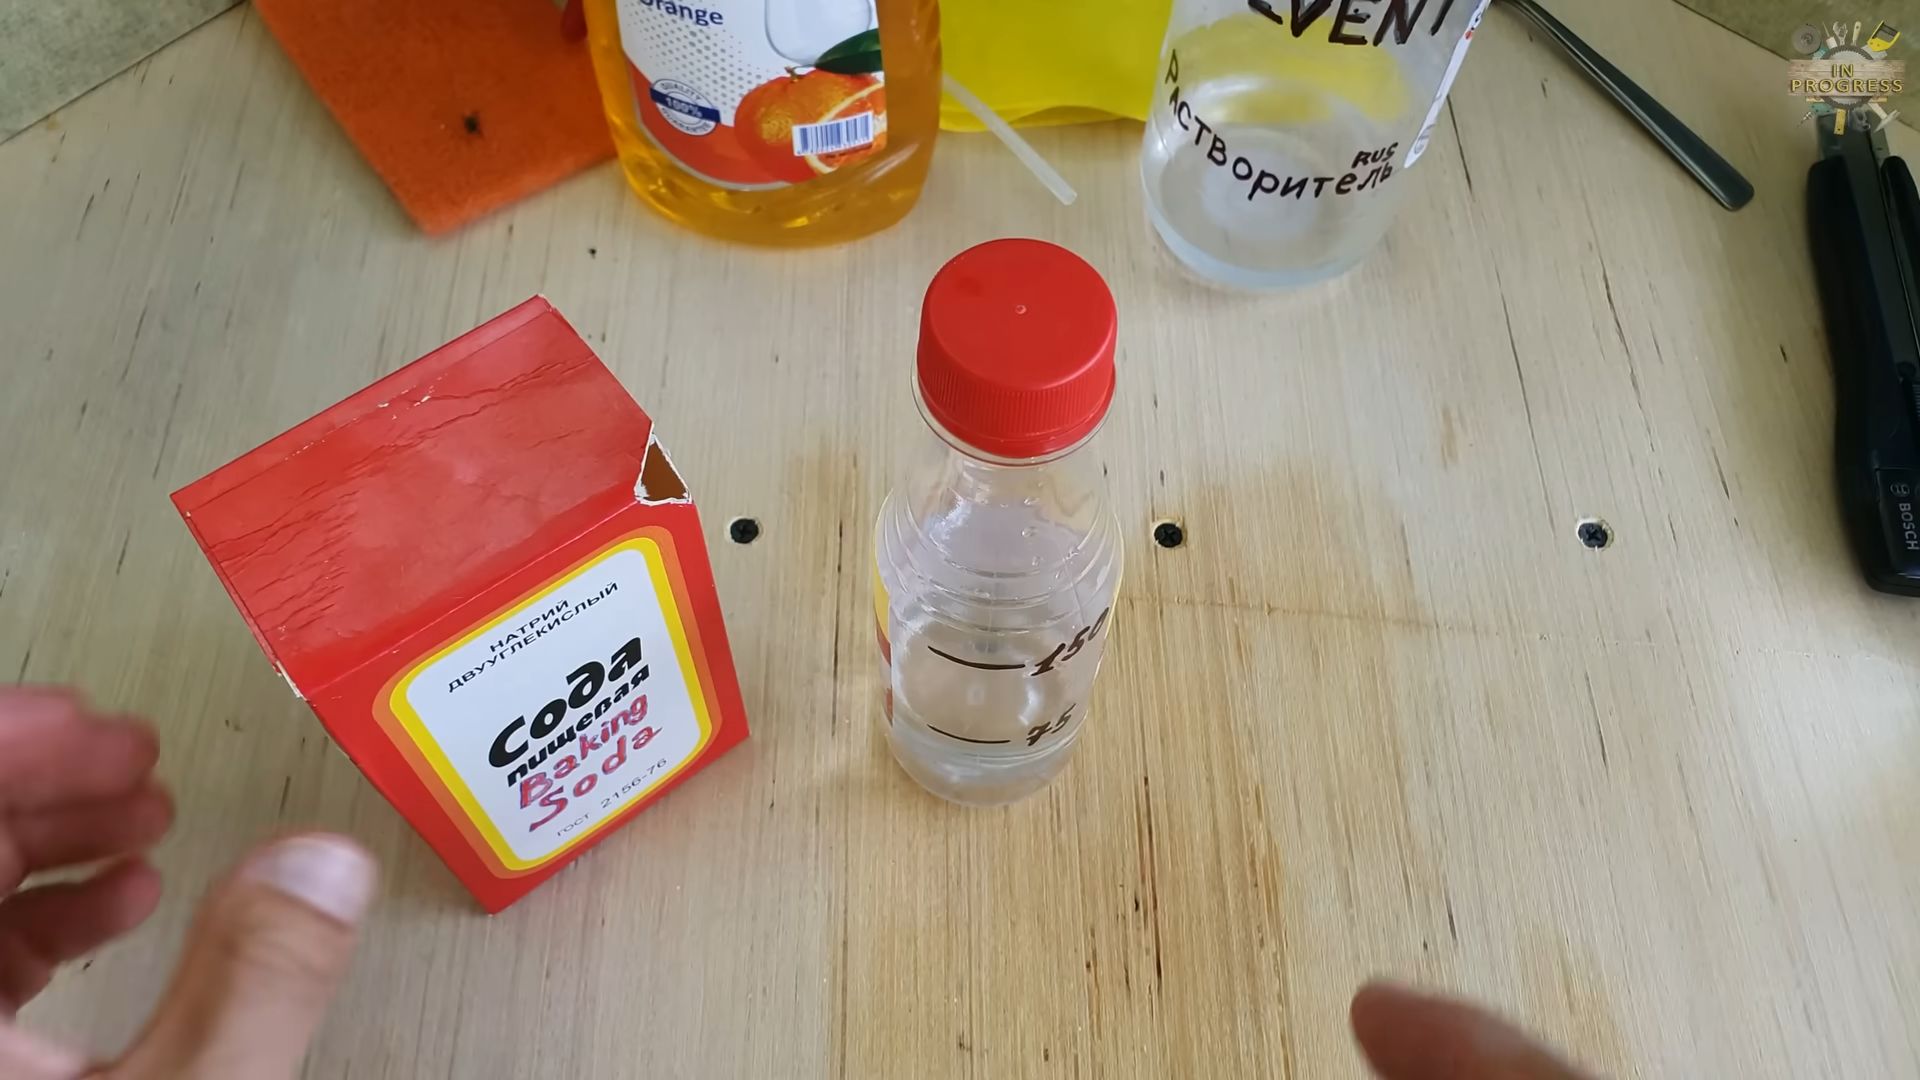
What you’ll need:
* 1 cup baking soda
* 2 cups white vinegar
* Boiling water
Step-by-step instructions:
1. Pour the baking soda down the drain. Make sure it goes directly into the drain opening.
2. Follow with the vinegar. You’ll immediately notice a fizzing reaction – that’s the magic happening!
3. Let it fizz for 30 minutes. This allows the baking soda and vinegar to break down the clog.
4. Flush with boiling water. Carefully pour a kettle of boiling water down the drain to clear away the loosened debris.
5. Repeat if necessary. For stubborn clogs, you might need to repeat the process a second time.
Hack 2: Sparkling Clean Microwave in Minutes
Microwaves can get pretty gross, pretty quickly. Splatters and spills become baked-on messes. But don’t worry, this hack makes cleaning a breeze.
What you’ll need:
* 1 cup water
* 2 tablespoons white vinegar
* Microwave-safe bowl
* Clean cloth or sponge
Step-by-step instructions:
1. Combine water and vinegar in the bowl. Mix the water and vinegar in your microwave-safe bowl.
2. Microwave for 5 minutes. Place the bowl in the microwave and heat on high for 5 minutes. The mixture will boil and create steam.
3. Let it stand for 5 minutes. Don’t open the microwave immediately! Let the steam work its magic for another 5 minutes. This will loosen the grime.
4. Wipe clean. Carefully remove the bowl (it will be hot!) and wipe down the inside of the microwave with a clean cloth or sponge. The splatters should wipe away easily.
Hack 3: Freshening Up Your Mattress
Mattresses can harbor dust mites and odors. This simple trick will leave your mattress feeling fresh and clean.
What you’ll need:
* Baking soda
* Essential oil (optional, for fragrance)
* Vacuum cleaner with upholstery attachment
Step-by-step instructions:
1. Sprinkle baking soda over the mattress. Generously sprinkle baking soda over the entire surface of your mattress.
2. Add essential oil (optional). If you want a pleasant scent, mix a few drops of your favorite essential oil with the baking soda before sprinkling. Lavender, eucalyptus, or tea tree oil are great choices.
3. Let it sit for several hours. The longer you let it sit, the better! Ideally, leave it for at least 4 hours, or even overnight. This allows the baking soda to absorb odors and moisture.
4. Vacuum thoroughly. Use the upholstery attachment on your vacuum cleaner to thoroughly vacuum up all the baking soda.
Hack 4: Removing Stubborn Coffee Stains from Mugs
Coffee stains can be tough to remove, but baking soda is up to the challenge.
What you’ll need:
* Baking soda
* Water
* Sponge or cloth
Step-by-step instructions:
1. Make a baking soda paste. Mix baking soda with a small amount of water to create a thick paste.
2. Apply the paste to the stain. Apply the paste directly to the coffee stain inside the mug.
3. Scrub gently. Use a sponge or cloth to gently scrub the stain.
4. Rinse thoroughly. Rinse the mug thoroughly with water. The stain should be gone!
Hack 5: Cleaning Grout Like a Pro
Dirty grout can make your tiles look dingy. This baking soda and vinegar solution will brighten your grout lines.
What you’ll need:
* Baking soda
* White vinegar
* Old toothbrush or grout brush
* Spray bottle
Step-by-step instructions:
1. Sprinkle baking soda on the grout. Sprinkle baking soda generously over the grout lines you want to clean.
2. Spray with vinegar. Fill a spray bottle with white vinegar and spray it onto the baking soda. It will fizz!
3. Let it sit for 15-20 minutes. Allow the mixture to sit for 15-20 minutes to loosen the grime.
4. Scrub with a brush. Use an old toothbrush or grout brush to scrub the grout lines.
5. Rinse with water. Rinse the area thoroughly with water.
Hack 6: Polishing Silverware Naturally
Tarnished silverware can look dull and unappealing. This simple hack will restore its shine.
What you’ll need:
* Aluminum foil
* 1 cup baking soda
* 1 cup salt
* Water
* Large pot or container
Step-by-step instructions:
1. Line the pot with aluminum foil. Line the bottom of a large pot or container with aluminum foil, shiny side up.
2. Add baking soda and salt. Add 1 cup of baking soda and 1 cup of salt to the pot.
3. Add boiling water. Carefully pour boiling water into the pot until the silverware is submerged.
4. Submerge the silverware. Place the tarnished silverware in the pot, making sure it touches the aluminum foil.
5. Let it soak for 5-10 minutes. Let the silverware soak for 5-10 minutes. You should see the tarnish transferring to the foil.
6. Remove and rinse. Remove the silverware from the pot and rinse it thoroughly with water.
7. Dry with a soft cloth. Dry the silverware with a soft, clean cloth.
Hack 7: Deodorizing Your Refrigerator
A smelly refrigerator is never pleasant. Baking soda is a natural odor absorber.
What you’ll need:
* Box of baking soda
Step-by-step instructions:
1. Open the box of baking soda. Simply open a fresh box of baking soda.
2. Place it in the refrigerator. Place the open box of baking soda in the back of your refrigerator.
3. Replace every 3 months. Replace the box of baking soda every 3 months to keep your refrigerator smelling fresh.
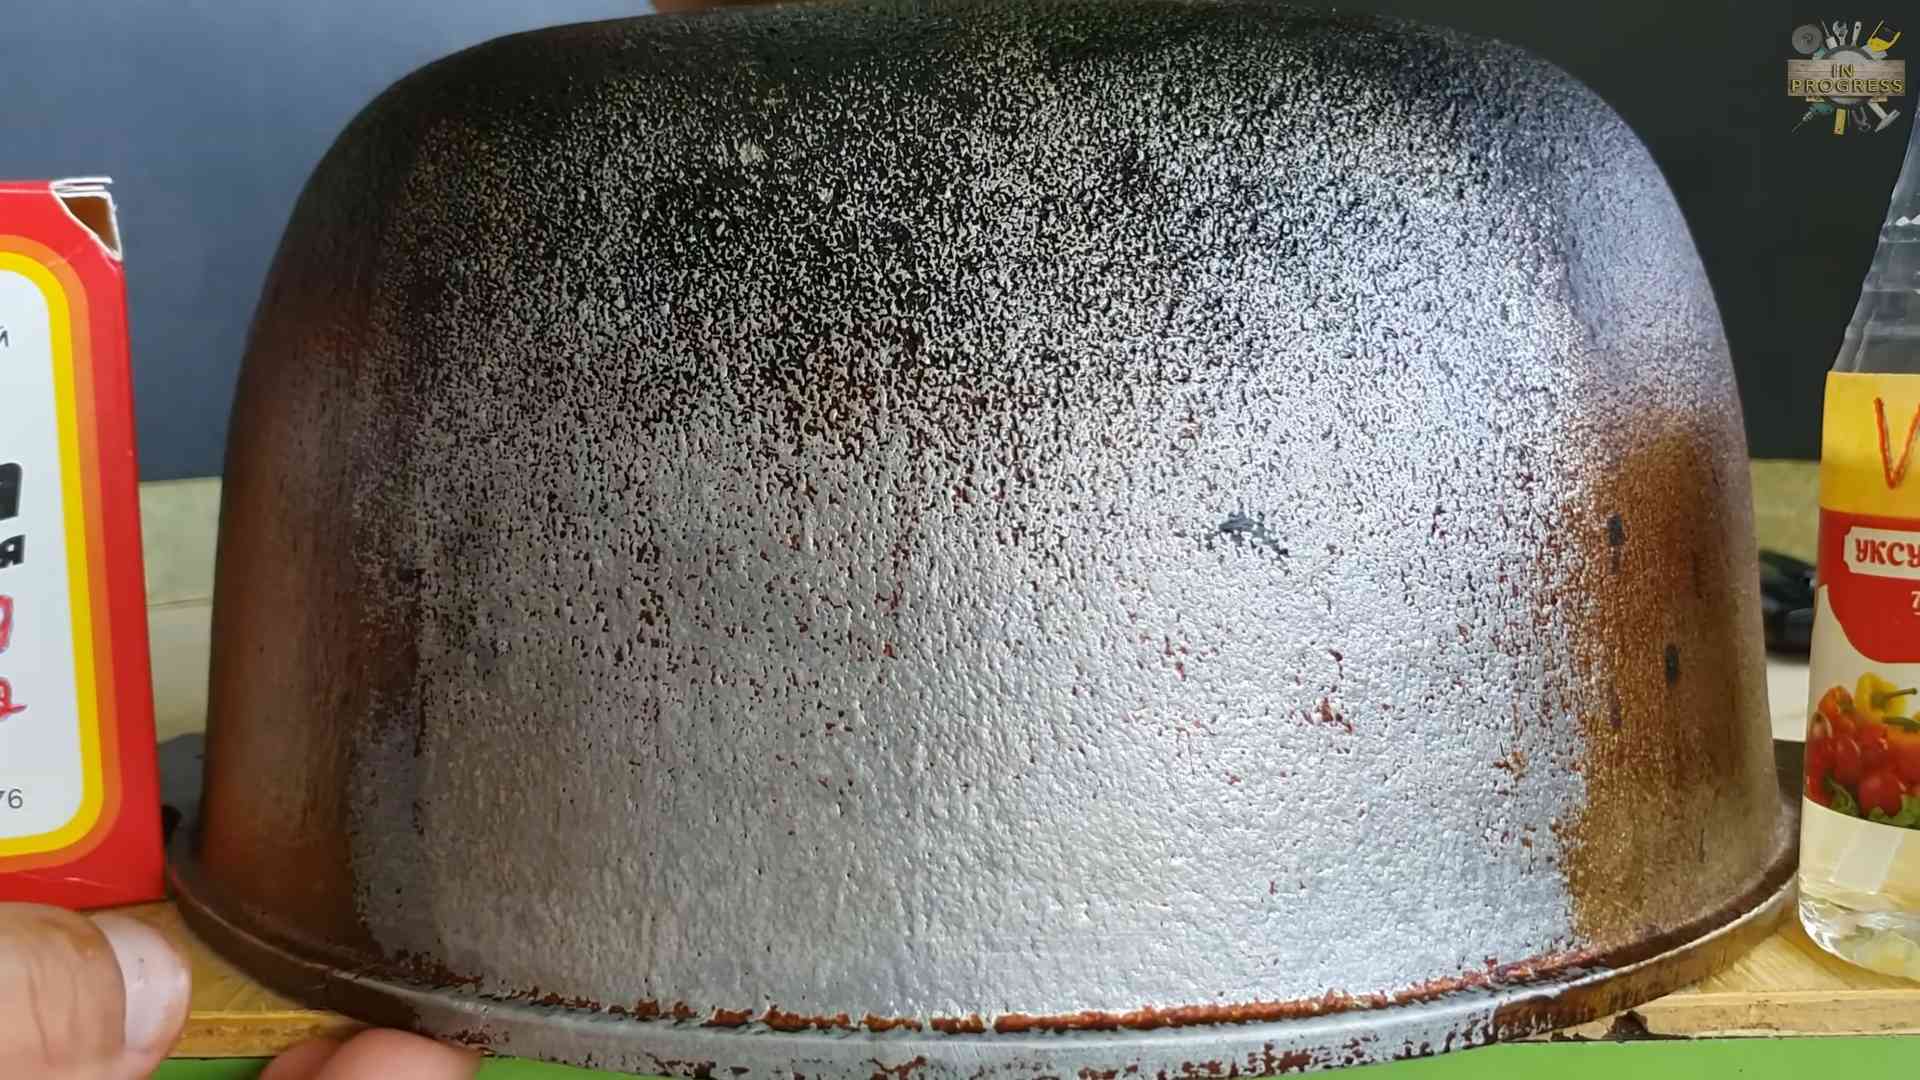
Hack 8: Cleaning Burnt Food from Pots and Pans
Burnt food stuck to the bottom of pots and pans can be a nightmare to clean. This hack makes it much easier.
What you’ll need:
* Baking soda
* Water
* Dish soap
* Sponge or scouring pad
Step-by-step instructions:
1. Cover the burnt food with baking soda. Sprinkle a generous amount of baking soda over the burnt food in the pot or pan.
2. Add water. Add enough water to cover the burnt food.
3. Bring to a boil. Bring the water to a boil on the stovetop.
4. Simmer for 15-30 minutes. Simmer the mixture for 15-30 minutes, stirring occasionally.
5. Let it cool. Let the pot or pan cool down.
6. Wash as usual. Wash the pot or pan with dish soap and a sponge or scouring pad. The burnt food should come off much more easily.
Hack 9: Making a Natural All-Purpose Cleaner
Skip the harsh chemicals and make your own all-purpose cleaner with vinegar.
What you’ll need:
* 1 part white vinegar
* 1 part water
* Spray bottle
* Essential oil (optional, for fragrance)
Step-by-step instructions:
1. Combine vinegar and water in the spray bottle. Mix equal parts white vinegar and water in a spray bottle.
2. Add essential oil (optional). If you want a pleasant scent, add a few drops of your favorite essential oil. Lemon, lavender, or tea tree oil are good choices.
3. Shake well. Shake the bottle well to combine the ingredients.
4. Use as needed. Spray the cleaner onto surfaces and
Conclusion
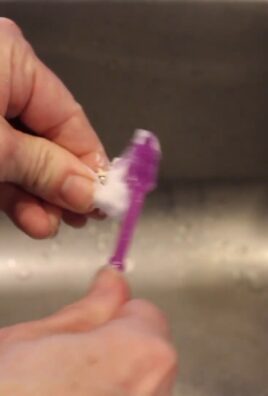
So, there you have it! This simple yet incredibly effective DIY trick using vinegar and vaseline is a game-changer for anyone looking to tackle stubborn stains, restore shine, and achieve a polished look without harsh chemicals or expensive products. We’ve explored how the acidic nature of vinegar, combined with the protective and moisturizing properties of vaseline, creates a powerful synergy that can be applied to a multitude of household tasks.
Why is this a must-try? Because it’s economical, readily accessible, and surprisingly versatile. Think about the money you’ll save on specialized cleaning solutions and the peace of mind knowing you’re using a gentler approach on your surfaces and the environment. Plus, the satisfaction of seeing those stubborn water spots disappear or that dull metal gleam again is truly rewarding.
But the beauty of this DIY trick lies in its adaptability. Feel free to experiment with variations to suit your specific needs. For instance, if you’re dealing with particularly tough stains on bathroom tiles, consider adding a small amount of baking soda to the vinegar and vaseline mixture for extra scrubbing power. Or, if you’re using it on delicate surfaces like leather, dilute the vinegar with water to prevent any potential damage. You can also infuse the vaseline with a few drops of your favorite essential oil for a pleasant scent while you work. Lavender, lemon, or tea tree oil are all excellent choices.
Don’t be afraid to get creative and tailor this DIY solution to your unique circumstances. The key is to start with small amounts and test the mixture on an inconspicuous area first to ensure compatibility.
We wholeheartedly encourage you to give this vinegar and vaseline trick a try. Whether you’re battling hard water stains in your bathroom, polishing your silverware, or restoring the luster to your leather shoes, we’re confident that you’ll be amazed by the results.
And most importantly, we want to hear about your experience! Share your before-and-after photos, your tips and tricks, and any variations you’ve discovered in the comments below. Let’s build a community of DIY enthusiasts who are passionate about finding simple, effective, and sustainable solutions for everyday challenges. Your feedback will not only help others but also inspire us to continue exploring and sharing innovative DIY ideas. So, grab your vinegar, your vaseline, and get ready to witness the magic! Let us know how this vinegar and vaseline combination works for you!
Frequently Asked Questions (FAQs)
What exactly does the vinegar do in this DIY trick?
Vinegar, particularly white vinegar, is a mild acid. This acidity helps to break down mineral deposits, grime, and other stubborn stains. It’s a natural disinfectant and deodorizer, making it a versatile cleaning agent. In this DIY trick, the vinegar acts as the primary cleaning agent, loosening the dirt and preparing the surface for the vaseline.
And what is the role of vaseline?
Vaseline, or petroleum jelly, is a mineral oil-based product that provides a protective barrier. It’s excellent for moisturizing and preventing moisture loss. In this context, vaseline serves multiple purposes. First, it helps to lift away the loosened dirt and grime that the vinegar has broken down. Second, it creates a protective layer on the surface, preventing future stains and water spots. Third, it adds a shine and polish, leaving the surface looking clean and revitalized.
Can I use any type of vinegar?
While white vinegar is generally recommended due to its clear color and lack of additives, you can use other types of vinegar, such as apple cider vinegar. However, be mindful of the color, as some vinegars might stain lighter surfaces. Always test on an inconspicuous area first. Avoid using balsamic vinegar, as its dark color can definitely stain.
Is this DIY trick safe for all surfaces?
No, it’s not. While it’s generally safe for many surfaces like glass, metal, ceramic, and some types of plastic, it’s crucial to exercise caution and test on an inconspicuous area first, especially on delicate surfaces like leather, painted surfaces, or certain types of stone. The acidity of vinegar can potentially damage or discolor these materials. Diluting the vinegar with water can help mitigate this risk.
How do I dilute the vinegar? What ratio should I use?
If you’re concerned about the strength of the vinegar, start with a 1:1 ratio of vinegar to water. For more delicate surfaces, you can even use a 1:2 ratio (one part vinegar to two parts water). Always test the diluted solution on a small, hidden area before applying it to the entire surface.
How much vaseline should I use?
A little goes a long way. Start with a small amount, about the size of a pea, and gradually add more as needed. You want to create a thin, even layer on the surface. Using too much vaseline can leave a greasy residue.
How long should I leave the vinegar and vaseline mixture on the surface?
The dwell time depends on the severity of the stain. For light cleaning and polishing, a few minutes is usually sufficient. For more stubborn stains, you can leave it on for up to 15-20 minutes. However, always monitor the surface and remove the mixture immediately if you notice any signs of discoloration or damage.
What’s the best way to remove the vinegar and vaseline mixture?
Use a clean, soft cloth to wipe away the mixture. For best results, use a microfiber cloth, as it’s gentle and absorbent. You may need to buff the surface to remove any remaining residue and achieve a polished shine.
Can I use this trick on my car’s interior or exterior?
Use extreme caution. While vinegar can be used to clean some parts of a car’s interior, it’s generally not recommended for the exterior paint, as it can damage the clear coat. Vaseline can be used sparingly on some interior surfaces like leather seats, but always test on a hidden area first. Consult your car’s owner’s manual for specific cleaning recommendations.
What are some other uses for this vinegar and vaseline combination?
Besides cleaning and polishing, this mixture can also be used to:
* Remove water spots from shower doors and faucets.
* Shine stainless steel appliances.
* Restore the luster to leather shoes and handbags.
* Loosen stuck zippers.
* Remove crayon marks from walls (test first!).
* Condition wooden furniture (test first!).
What if I don’t have vaseline? Can I use something else?
While vaseline is the preferred choice due to its protective and polishing properties, you can try using other petroleum-based products like mineral oil or even a small amount of furniture polish. However, the results may not be as effective.
Is there anything I should absolutely NOT use this trick on?
Avoid using this trick on:
* Delicate fabrics.
* Electronics.
* Surfaces that are sensitive to acids.
* Anything that could be damaged by petroleum-based products.
What if I try this trick and it doesn’t work?
If the vinegar and vaseline mixture doesn’t work, it could be due to the severity of the stain or the type of surface. Try increasing the dwell time, diluting the vinegar less, or adding a small amount of baking soda for extra scrubbing power. If all else fails, consult a professional cleaning service.
Leave a Comment